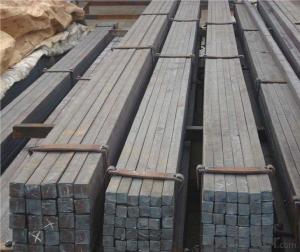


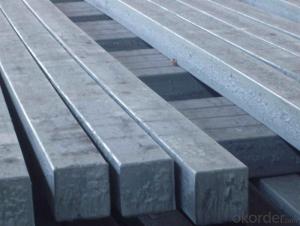
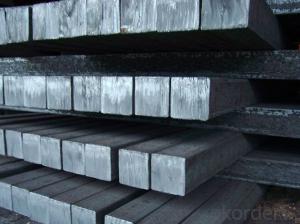
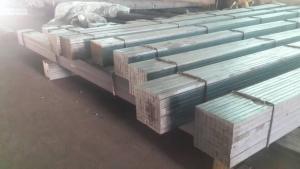
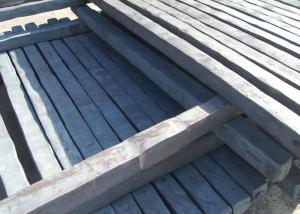
Cold drawn square steel; high quality
- Ref Price:
-

- Loading Port:
- Tianjin
- Payment Terms:
- TT OR LC
- Min Order Qty:
- 50 m.t.
- Supply Capability:
- 10000 m.t./month
OKorder Service Pledge
OKorder Financial Service
You Might Also Like


Specifications
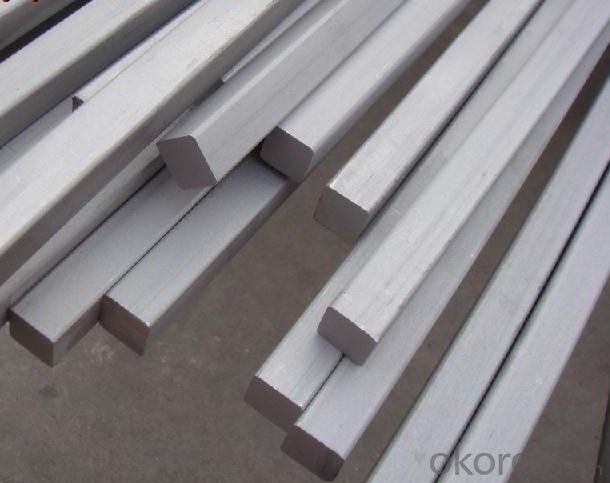
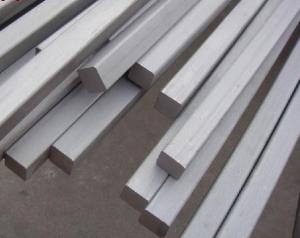
stainless steel square bar flat steel bar
Diameter:2-500mm
Length:Customized
Quality: High quality stainless steel bar
stainless steel square bar flat steel bar
Stainless Steel bar
Diameter:2-160mm
Length: Customized
Surface | bright,black |
Technique | Hot Rolled/Cold Drawn/Peeled |
1.Round bar 1Hot rolled black bar: (5~400x6000mm or according to your requirement. 2Acid round bar: (5~400)x6000mm or according to your requirement. 3Cold drawn bright bar: (1~20x6000mm or according to your requirement. 4)Polishing round bar: (5-400)x6000mm or according to your requests. | |
2. Square bar 1)Hot rolled black bar: (5*5-400*400)x6000mm or according to your requests. 2)Acid square bar: (5*5-400*400)x6000mm or according to your requests. 3)Cold drawn square bar: (1*1-20*20)x6000mm or according to your requests 4)Polishing square bar: (5*5-400*400)x6000mm or according to your requests | |
Diameter± | H9 tolerance can reach the industry standard |
Quality | Our production equipment 24 hours of continuous temperature work, to ensure the unity of the product roundness, elongation, tensile strength and yield strength. Welcome customers to our company to detect the products before shipment. For the customers who are not inconvenient, quality assurance can be laid down in the contract, we will take charge of the returning and shipping fee if there is any problems of the product quality, so it will dismiss any of your worry about our products. |
Package | Standard seaworthy packing(plastic&wooden) or according to the customer's requests |
Delivery time | 7-20days, according to the quantity |
Productivity | 10000 tons/month |
Stainless steel round bars:
Grade :200 series 300series 400series. (Standard: ASTM JIS DIN & BS)
Diameters: 4mm-300mm
Surface : white acid , annealed, black(hot rolled) , bright and following customers request.
Length: 6M(standard) or random
Packing: standard export packing or following customer’s demand.
- Q: What are the different techniques for using a steel square in welding?
- To ensure accurate measurements and angles during the welding process, various techniques can be employed using a steel square. These techniques encompass: 1. Verifying angles: Before and after welding, welders can employ a steel square to verify the accuracy of angles. By positioning the square against the joint, welders can confirm if the angles are square (90 degrees) or match the desired angle. 2. Layout and marking: Steel squares serve as exceptional tools for laying out and marking lines on the workpiece. They facilitate the creation of straight lines, marking reference points, and accurate measurement transfer. 3. Aligning corners: Prior to welding, it is crucial to ensure proper alignment and squareness of corners. By placing a steel square against the corners, welders can ascertain if they are square, allowing any necessary adjustments to be made before welding. 4. Aligning fixtures and jigs: When setting up fixtures or jigs for welding, a steel square can be utilized to ensure proper alignment. It can be applied against the fixture or jig to check for squareness or parallelism, enabling adjustments if required. 5. Measuring and transferring dimensions: Steel squares possess precise markings along their edges, enabling welders to measure and transfer dimensions accurately. This is especially beneficial when aligning or fitting pieces together before welding. 6. Detecting distortion: Following welding, a steel square can be used to detect any distortion or warping in the workpiece. By placing the square against the welded joint, any irregularities can be easily identified and rectified. In essence, a steel square is a versatile tool in welding, aiding in layout, alignment, measurement, and angle verification. By employing these techniques, welders can ensure the precision and quality of their work.
- Q: How do you use a steel square for marking and cutting angled mortise and tenon joints?
- In order to mark and cut angled mortise and tenon joints using a steel square, it is necessary to follow a series of steps: 1. Begin by determining the desired angle for the joint. This can be accomplished by utilizing a protractor or referencing a specific angle measurement. 2. Once the angle has been established, position the steel square along the edge of the wood to be cut. Ensure that the long side of the square aligns with the wood's edge. 3. Employ a pencil or marking knife to indicate the desired length of the tenon on the wood's face. This will serve as the portion that fits into the mortise. 4. Next, employ the short side of the steel square to mark the shoulder line of the tenon on both the face and edge of the wood. The shoulder line denotes the point of contact between the tenon and the mortise, creating a clean and flush joint. 5. Subsequently, using the same angle, transfer the marks onto the wood piece that will contain the mortise. Ensure that the marks align with those made on the tenon piece. 6. Utilize a chisel or mortising machine to remove the excess material within the marked shoulder lines on the wood piece with the mortise. Take care and proceed meticulously to achieve precise and clean material removal. 7. Finally, employ a saw or chisel to cut along the marked tenon lines on the tenon piece, eliminating the surplus material and shaping the tenon to fit snugly into the mortise. Always remember to measure twice and cut once to guarantee accuracy.
- Q: How do you use a steel square for measuring stairs rise and run?
- To use a steel square for measuring stairs rise and run, first, place the square against the vertical rise of the stairs, keeping one edge flush with the tread. Then, mark the rise measurement on the square's blade. Next, hold the square against the horizontal run of the stairs, aligning the blade with the tread and the tongue with the riser. Finally, mark the run measurement on the square's blade. These measurements can then be used to accurately determine the rise and run of the stairs.
- Q: Can a steel square be used for crown molding installation?
- Indeed, crown molding installation can be accomplished with the aid of a steel square. This multipurpose and precise instrument proves invaluable for a multitude of carpentry endeavors, including the installation of crown molding. By utilizing a steel square, one can expertly delineate and gauge angles, guaranteeing the utmost accuracy in cuts and a seamless fit for crown molding segments. However, it is essential to recognize that utilizing a steel square for crown molding installation necessitates supplementary calculations and adjustments due to the intricate nature of crown molding angles. It is highly recommended to seek guidance from a professional or consult a comprehensive manual for precise measurements and cutting techniques tailored to the installation of crown molding.
- Q: How do you use a steel square to find the square footage of a roof?
- To use a steel square to find the square footage of a roof, you will need to follow a few steps. First, you need to determine the pitch or slope of the roof. The pitch is usually given as a ratio, such as 4:12 or 6:12, which means for every 12 inches of horizontal run, the roof rises 4 or 6 inches vertically. Next, you will need to measure the length and width of the roof. Use the steel square as a measuring tool by placing one edge on the roof's surface and the other edge against the vertical surface, such as a wall or fascia board. This will allow you to measure the length and width accurately. Once you have these measurements, you can multiply the length and width to calculate the square footage of the roof. However, keep in mind that with a sloped roof, you need to take the pitch into account. To do this, multiply the length by the width, and then multiply the result by the pitch factor. The pitch factor is found by dividing the vertical rise by the horizontal run. For example, if the pitch is 4:12, the pitch factor is 4/12, which simplifies to 1/3. Finally, divide the total square footage by 100 to convert it to roofing squares. Roofing squares are a common unit of measurement in the roofing industry, where one square equals 100 square feet. In summary, using a steel square to find the square footage of a roof involves measuring the length and width of the roof, considering the pitch or slope, multiplying the measurements, and then converting the result to roofing squares if necessary.
- Q: What are some common mistakes to avoid when using a steel square?
- Some common mistakes to avoid when using a steel square include not properly aligning the square with the workpiece, applying excessive force while using the square, not ensuring that the square is square to the workpiece, and not securely holding the square in place while making measurements or marking lines.
- Q: Can a steel square be used for checking the squareness of a workbench top?
- Yes, a steel square can be used for checking the squareness of a workbench top.
- Q: How do you use a steel square to determine the pitch of a roof?
- To determine the pitch of a roof using a steel square, you can follow these steps: 1. Start by placing the steel square on the roof, with one leg (blade) resting on the horizontal surface (roof) and the other leg (tongue) hanging down vertically. 2. Align the tongue of the steel square with the roof surface, making sure it is perfectly vertical. 3. Take a level and place it on the tongue of the steel square, ensuring it is level horizontally. 4. Next, measure the distance between the point where the tongue of the steel square meets the roof and the level bubble. This measurement represents the rise of the roof. 5. Then, measure the distance between the point where the tongue meets the roof and the blade of the steel square. This measurement represents the run of the roof. 6. Finally, divide the rise by the run to calculate the pitch ratio or slope of the roof. By using a steel square in this manner, you can accurately determine the pitch of a roof.
- Q: Can a steel square be used for framing walls?
- Framing walls can be accomplished by utilizing a steel square. Known as a framing square or carpenter's square, this versatile tool is commonly employed in carpentry and framing endeavors. Typically crafted from steel, it possesses a 90-degree angle as well as a shorter 45-degree angle. When undertaking wall framing, a steel square proves invaluable in ensuring precise and square corners. It facilitates the measurement and marking of lumber, enables one to assess the squareness of walls, and guides the cutting and positioning of studs and other framing elements. By aligning the steel square's 90-degree angle with the wall's edges, the straightness and squareness of the framing are guaranteed. Furthermore, a steel square can be utilized for various other tasks related to wall framing, such as marking and cutting angles for roof rafters or stairs. Its durability and precision render it an indispensable tool for a multitude of framing duties, including wall construction.
- Q: How do you use a steel square to measure and mark 168.75-degree angles?
- To measure and mark a 168.75-degree angle using a steel square, the following steps should be followed: 1. Begin by placing the steel square on a flat surface or workbench, making sure it is aligned and parallel to the edge being worked with. 2. Locate the 90-degree angle on the steel square, typically found at the corner where the long and short sides meet. 3. Utilize a pencil or scribe to create a small mark near the 90-degree angle on the long side of the steel square. This mark will serve as a reference point. 4. Proceed to measure 168.75 degrees on the long side of the steel square, starting from the reference mark made in the previous step. The angle can be accurately measured using the graduations or markings on the steel square. 5. Once the correct measurement is identified, make another mark on the long side of the steel square at the measured angle. This mark will represent the desired 168.75-degree angle. 6. Now, position the steel square on the surface or material where the angle needs to be marked. Align the long side of the square with the edge being worked with, ensuring that the reference mark and the mark representing the angle are in line with the edge. 7. With the steel square securely in place, use a pencil or scribe to trace along the edge of the steel square, transferring the angle onto the surface or material. By adhering to these instructions, a 168.75-degree angle can be accurately measured and marked using a steel square. Remember to maintain measurement accuracy and a steady hand when making the marks to achieve precise results.
Send your message to us
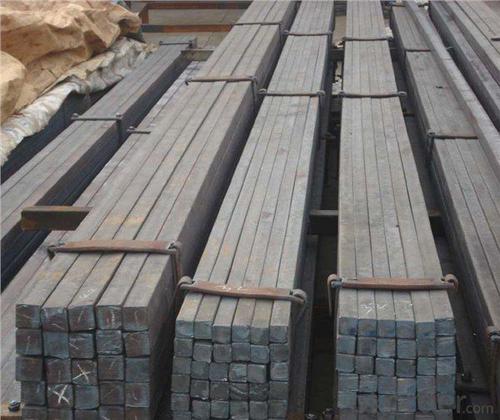
Cold drawn square steel; high quality
- Ref Price:
-
- Loading Port:
- Tianjin
- Payment Terms:
- TT OR LC
- Min Order Qty:
- 50 m.t.
- Supply Capability:
- 10000 m.t./month
OKorder Service Pledge
OKorder Financial Service
Similar products


Hot products


Hot Searches
Related keywords

