


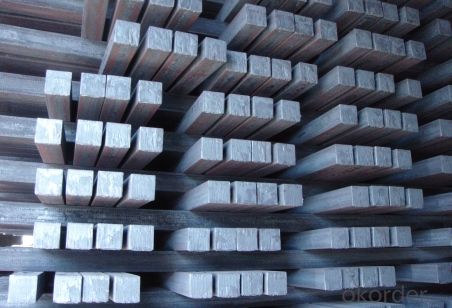


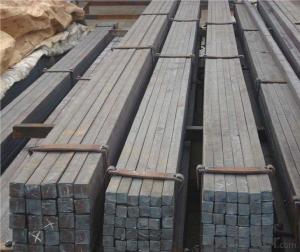
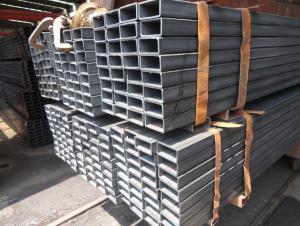
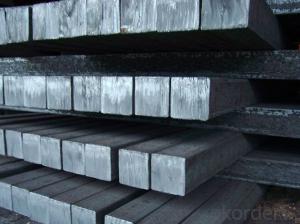
Good Quality Square Steel
- Ref Price:
-

- Loading Port:
- China Main Port
- Payment Terms:
- TT OR LC
- Min Order Qty:
- -
- Supply Capability:
- -
OKorder Service Pledge
Quality Product, Order Online Tracking, Timely Delivery
OKorder Financial Service
Credit Rating, Credit Services, Credit Purchasing
You Might Also Like


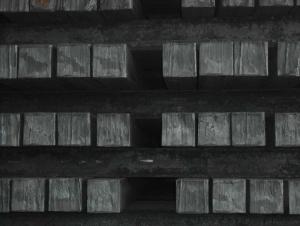


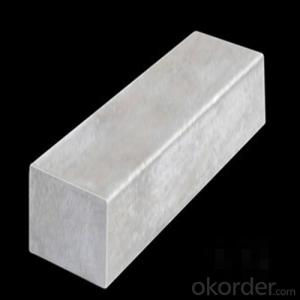
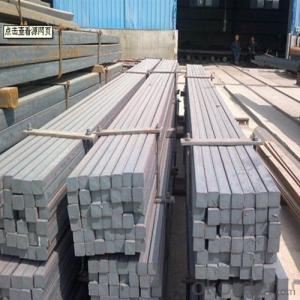
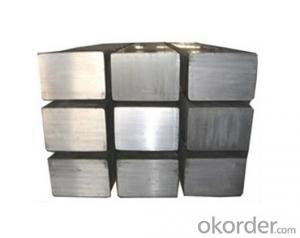
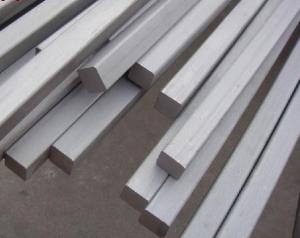
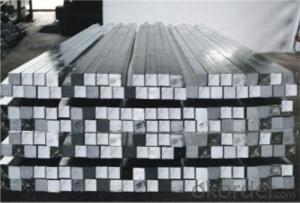
Product name | Square Bar |
SIZE | 5-80mm |
Technique | cold drawn |
Shape | Round square flat hexagonan, irregular bar. |
Material | Q235,45#,40Cr,20# 55Cr3,SAE9254,SUP12V,55CrSi,60Si2CrVA,SUP6.SUP7,SUP9 |
Quality grade | First grade |
Tolerence of OD | ±0.5mm |
Length | Acorrding customer’s requirement |
MOQ | 1MetricTon |
Deliver Time | 15-30 days after receive your deposits. |
Package | Inneer bunding with steel wires, steel stripes or steel rebars; outer packing is plastic braided bags; standard seaworthy export packing; other types of packings can be customized. |
- Q: How do you use a steel square for marking stair handrail angles?
- To use a steel square for marking stair handrail angles, you will need to follow a few steps. First, ensure that your steel square is clean and free from any debris or rust. Next, position the steel square on the handrail at the desired angle. For example, if you want to mark a 45-degree angle, align one edge of the square with the top of the handrail and the other edge with the bottom. Once the steel square is properly aligned, use a pencil or marker to mark along the edge of the square onto the handrail. This will create a clear and accurate line indicating the angle of the handrail. Repeat this process for any additional angles that you need to mark on the handrail. Remember to double-check your measurements and angles before making any cuts or adjustments to ensure accuracy. Using a steel square for marking stair handrail angles is a reliable and straightforward method that can help you achieve precise angles for your stair handrail.
- Q: How is a steel square used in carpentry?
- A framing square or carpenter's square, also known as a steel square, is extensively utilized in carpentry for various purposes. Its design consists of two arms, typically 24 inches long, which are joined at a right angle. One arm is referred to as the blade, while the other is named the tongue. In carpentry, one of the primary uses of a steel square is to determine and mark right angles. Carpenters employ this tool to guarantee that corners and joints are perfectly square. By placing the square against a board or surface, they can verify if the angles are precisely 90 degrees. If not, adjustments can be made accordingly to ensure accuracy and precision in the construction process. Aside from checking right angles, a steel square is also employed for measuring and marking cuts. The blade of the square is inscribed with different measurements, such as inches and centimeters, enabling carpenters to swiftly take precise measurements. This aids in accurately marking the length and width of boards or pieces that require cutting, ensuring proper fitment and minimizing errors. Another application of a steel square is for laying out and marking angles other than 90 degrees. The tongue of the square is engraved with degree increments, simplifying the process of measuring and marking angles of varying degrees. This proves particularly useful when working on projects that necessitate angled cuts, such as roof rafters or staircases. Moreover, a steel square can serve as a guide for making straight cuts with a circular saw or jigsaw. By aligning the blade of the saw against the blade of the square, carpenters can ensure a straight and accurate cut. All in all, a steel square is an indispensable tool in carpentry, providing carpenters with the capability to check right angles, measure and mark cuts, and lay out angles with precision. Its versatility and accuracy render it an essential tool for both professional carpenters and DIY enthusiasts.
- Q: What are some common techniques for using a steel square in stair building?
- Using a steel square in stair building is essential for ensuring accuracy and precision in the construction process. Some common techniques for using a steel square in stair building include: 1. Determining the Rise and Run: The steel square can be used to measure and mark the rise (vertical height) and run (horizontal length) of each stair. By aligning the square with the stringer or riser board, you can easily mark the correct measurements for each step. 2. Laying Out Stringers: Stringers are the main support structures of a stair. The steel square can be used to lay out the exact dimensions and angles required for cutting the stringers. By using the square to measure and mark the rise and run, you can accurately transfer these measurements onto the stringers for cutting. 3. Checking for Squareness: A steel square is also useful for checking the squareness of the stair parts. By aligning the square with the edges and corners of the steps, you can ensure that everything is perfectly square and level. This is crucial for a safe and stable staircase. 4. Determining the Angle of the Stair Treads: The steel square can be used to determine the angle at which the stair treads need to be cut. By aligning the square with the stringer and the tread, you can measure and mark the correct angle for cutting the treads to fit properly. 5. Creating Templates: In complex stair designs, the steel square can be used to create templates for curved or irregularly shaped stair parts. By tracing the shape onto a piece of plywood or cardboard using the square as a guide, you can transfer the template onto the actual material for cutting and shaping accurately. Overall, the steel square is an indispensable tool in stair building, providing accurate measurements, ensuring squareness, and facilitating precise cuts. By using these common techniques, builders can create safe and well-constructed staircases.
- Q: How do you use a steel square to measure and mark beveled angles?
- In order to measure and mark beveled angles using a steel square, it is necessary to follow a few straightforward steps. To begin, ensure that your steel square is clean and devoid of any debris or rust, as this will guarantee accurate measurements and markings. Following that, identify the specific angle you wish to measure and mark. Let's assume you desire to mark a 45-degree beveled angle. Position the long edge of the steel square against the material's edge that you wish to mark, specifically the edge where the beveled angle should commence. Subsequently, rotate the steel square until the 45-degree line aligns with the material's edge. This line can usually be found on the inside of the square, typically marked with a numerical value or a symbol. Once the 45-degree line is properly aligned, firmly hold the steel square against the material and utilize a pencil or scribe to mark the line along the opposite edge of the square. Congratulations! You have now successfully measured and marked a 45-degree beveled angle using a steel square. Keep in mind that the process may differ depending on the angle you wish to measure and mark. Some steel squares may feature additional lines or markings specifically designed to assist with certain angles. If you are uncertain about a particular angle, it is always advisable to consult the manufacturer's instructions or guides.
- Q: How do you use a steel square to find the height of a roof peak?
- To use a steel square to find the height of a roof peak, you can follow these steps: 1. Start by positioning yourself at the base of the roof where the peak is located. Make sure you have a clear view of the entire peak. 2. Hold the steel square in your hand, with one leg of the square resting on the roof surface and the other leg pointing straight up towards the peak. The long side of the square should be parallel to the ridge line of the roof. 3. Adjust the position of the square until the leg resting on the roof is level, ensuring that the square is perfectly vertical. You can use a bubble level or simply visually align it. 4. Once the square is properly positioned, hold it steady and look at the scale on the long side of the square. This scale represents the rise or height of the roof. 5. Locate the point where the other leg of the square intersects the scale. This point will indicate the height of the roof peak. Take note of the measurement or mark it on the square for reference. By using a steel square in this way, you can easily determine the height of a roof peak without the need for additional tools or complicated calculations. It provides a simple and accurate method for estimating the height of the peak, which can be helpful for planning and construction purposes.
- Q: How do you use a steel square to measure the width of a shelf?
- To measure the width of a shelf using a steel square, follow these steps: 1. Align the inside edge of the steel square with the side of the shelf and place it firmly against the edge. 2. Ensure accuracy by firmly holding the steel square against the shelf. 3. Observe the markings on the steel square, which should include imperial (inches) and metric (centimeters) measurements. 4. Locate the marking that corresponds to the desired width measurement. For instance, if you prefer inches, locate the inch marks on the square. 5. Take note of the measurement where the inside edge of the square aligns with the opposite side of the shelf. This measurement represents the width of the shelf. 6. Ensure precise measurements by repeating the process at multiple points along the shelf. This helps identify any variations in width, particularly if the shelf is not perfectly straight. 7. Determine the total width of the shelf by adding up the measurements obtained in step 5. If there are any variations, calculate the average width by dividing the total measurement by the number of measurements taken. Utilizing a steel square to measure the width of a shelf proves to be an effective method as it establishes a straight and accurate reference point for precise measurements.
- Q: How do you use a steel square to measure the height of a wall?
- In order to measure the height of a wall using a steel square, you will require a few extra tools like a measuring tape, a pencil, and a ladder if the wall is tall. Start by securely setting up the ladder near the wall so that you can easily reach its top. Afterward, position yourself on the ladder and extend one arm to hold the steel square against the wall. Make sure that the long side of the square is vertical and firmly touches the wall. Then, utilize the measuring tape to measure the length of the steel square from bottom to top. This measurement indicates the square's height. Once you have obtained the height measurement, mark it on the wall with a pencil at the square's bottom. Repeat this procedure for any additional measurements required for the wall. In the end, descend the ladder and employ the measuring tape to measure the distance from the marked point on the wall to the floor. This measurement will provide you with the wall's height. Always prioritize safety precautions while using a ladder and ensure its stability. Moreover, double-check your measurements for accuracy.
- Q: Can a steel square be used for checking the squareness of a scroll saw table?
- It is possible to use a steel square to check the squareness of a scroll saw table. The steel square, a measuring tool with a 90-degree angle, can be utilized to ascertain whether the edges of the scroll saw table are perfectly perpendicular to one another. By positioning the steel square against the table's edges, one can visually examine if they align precisely at a right angle. In the event that the edges are not square, adjustments can be carried out in order to guarantee precise cuts and measurements when utilizing the scroll saw.
- Q: How do you use a steel square for measuring and marking out rafter lengths?
- To use a steel square for measuring and marking out rafter lengths, you first need to understand the different markings and features of the square. A standard steel square typically consists of two arms – a longer one called the blade and a shorter one called the tongue. To begin, place the square on the edge of the rafter board with the tongue pointing upwards. Align the tongue with the edge of the board and ensure that the blade is perpendicular to it. Next, locate the "pivot point" on the square. This is usually marked by a series of numbers and lines along the blade and tongue. The pivot point is used as a reference for making measurements. To measure and mark out the rafter length, start by determining the desired length and angle for the rafter. Let's assume we want a 45-degree angle. First, find the 45-degree mark on the blade of the square. Align this mark with the pivot point on the rafter board. Next, slide the square along the board until the desired length is reached. The length is measured along the tongue of the square. Once you have positioned the square at the desired length, make sure the blade and tongue are still aligned with the edge of the board. Now, use a pencil or marker to mark along the edge of the square, creating a line that represents the rafter length. This line will guide you when cutting the rafter. Once the first rafter is marked and cut, you can use it as a template to mark out additional rafters. Simply align the square with the edge of the board, align the pivot point with the previous mark, and repeat the process for each rafter. It's important to note that there are other features on a steel square, such as the stair gauge and scribe bar, which can be used for more advanced measurements and layout tasks. However, the basic method described above will suffice for measuring and marking out rafter lengths.
- Q: How do you use a steel square to measure board widths at different angles and distances?
- In order to measure board widths at different angles and distances using a steel square, a few steps need to be followed. Here is a guide on how to do it: 1. First, select the appropriate steel square for the measurement task. There are different sizes of steel squares available, each with different markings. Choose one that suits your requirements. 2. Place the steel square on the edge of the board and make sure it is aligned perpendicular to the edge. The long side of the square should be in contact with the board's surface. 3. For measuring the width at a right angle, align the square's short side with the edge of the board and read the measurement on the long side. This will provide an accurate width measurement. 4. If you need to measure the width at a different angle, you will need to refer to the markings on the square. Steel squares usually have angles marked, such as 45 degrees or 30 degrees. Align the appropriate angle with the board's edge and then measure the width using the long side of the square. 5. To measure board widths at a specific distance from the edge, start by marking the desired distance on the board. Then, place the short side of the steel square against this mark and align the long side with the board's edge. Finally, read the measurement on the long side to determine the width at that particular distance. 6. Repeat these steps for any other angles or distances you need to measure on the board. Using a steel square to measure board widths at different angles and distances is an efficient and accurate method. Just make sure to have a good understanding of the square's markings and align it correctly with the board's edge to obtain precise measurements.
Send your message to us
Good Quality Square Steel
- Ref Price:
-
- Loading Port:
- China Main Port
- Payment Terms:
- TT OR LC
- Min Order Qty:
- -
- Supply Capability:
- -
OKorder Service Pledge
Quality Product, Order Online Tracking, Timely Delivery
OKorder Financial Service
Credit Rating, Credit Services, Credit Purchasing
Similar products


Hot products


Hot Searches
Related keywords

