


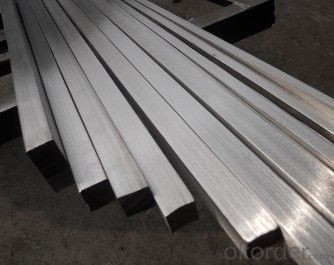
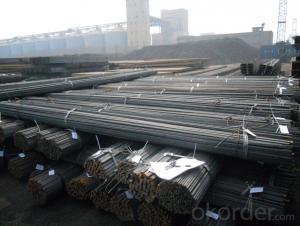
High Quality Steel Square Bar
- Ref Price:
-

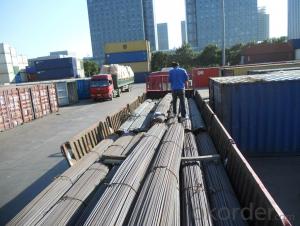
- Loading Port:
- Tianjin
- Payment Terms:
- TT OR LC
- Min Order Qty:
- 25 m.t.
- Supply Capability:
- 10000 m.t./month
OKorder Service Pledge
OKorder Financial Service
You Might Also Like


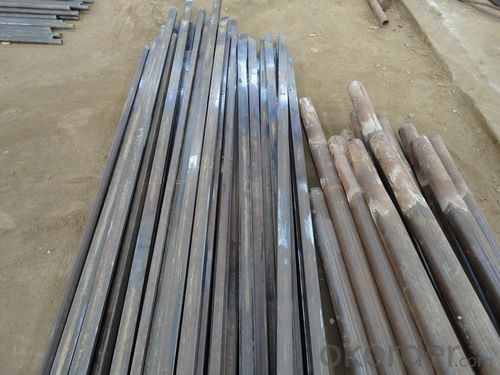
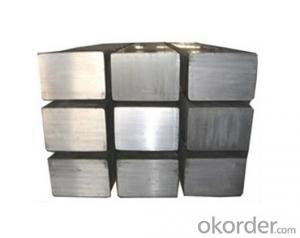
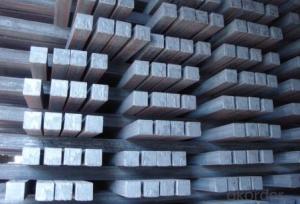
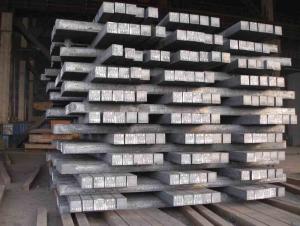
square steel billet
1.3SP, 5SP
2.terms of payment: L/C at sight
3.size: 120*120mm
4.length: 5.8~12m
square steel billet
Specifications
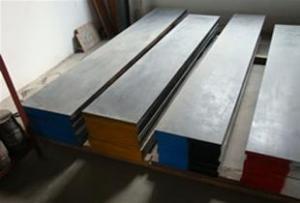
square steel billets
1)We procure world class quality steel billets which meets the specific requirements of the clients
The Billets produced by the company can be broadly divided into three main types i.e.
M.S. Billets
CRS Billets
Special Alloy Billets
M.S. Billets are used for rolling of TMT Re-Bars of Fe415 and Fe500 Grade and various other structural steel products.
CRS Billets are used fro rolling of CRS TMT Re-Bars.
Special Alloy Billets are used for rolling of any special grade TMT Re-Bars like Earthquake resistant TMT Re-Bars and for special grade structural steel products.
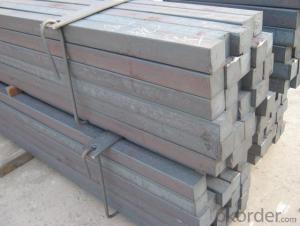
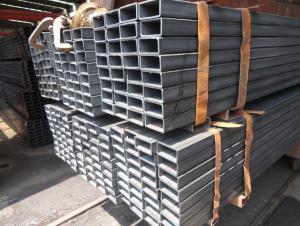
The following are the sizes of Billets available with Shyam Steel Industries Ltd.:
100 X 100
120x120
150 X 150
Physical Properties:
Description
As per IS 2830
Shyam Billets
Bend (max.) 5 mm per meter >= 5 mm per meter
Carbon (max.) 3mm per meter >= 3 mm per meter
Length 3 mt - 13 mt 3 mt - 9 mt
Chemical Properties:
Ladle Analysis:
Designation
Carbon
Manganese
C15 0.12-0.18 0.30-0.60
C18 0.15-0.21 0.30-0.60
C20 0.17-0.23 0.30-0.60
C15 MMn 0.12-0.18 0.60-1.00
C18 MMn 0.15-0.21 0.60-1.00
C20 MMn 0.17-0.23 0.60-1.00
C15 HMn 0.12-0.18 1.00-1.50
C18 HMn 0.15-0.21 1.00-1.50
C20 HMn
0.17-0.23 1.00-1.50
Billets of different designations are manufactured in three different grades namely A, B, C having sulphur, phosphorous content (on ladle analysis) and carbon equivalent as follows:
Chemical Analysis:
Grade Sulphur Phosphorous Carbon Equivalent (CE)1
Max Max Max
A 0.05 0.05 0.42
B 0.045 0.045 0.41
C 0.04 0.04 0.39
- Q: How do you choose the right size of steel square?
- There are several factors to take into consideration when selecting the appropriate size of steel square. To begin with, the purpose of your project needs to be determined. Different tasks call for different sizes of squares. For smaller projects or intricate measurements, a smaller steel square may be more suitable. Conversely, larger construction projects or the need to measure long distances would require a larger square. Moreover, the size of the materials you will be working with should be taken into account. Handling smaller pieces of wood or metal will be easier and provide more accurate measurements with a smaller square. Conversely, larger materials may necessitate a larger square to ensure precise measurements and proper alignment. Furthermore, the level of precision required for your project is an important consideration. For highly accurate measurements, a smaller steel square with finer graduations would be more appropriate. However, if your project allows for slightly less precision, a larger square with larger graduations may suffice. Lastly, your own comfort and ease of use should also be factored in. If you have larger hands or prefer a more substantial tool, a larger steel square may be more comfortable to hold and manipulate. In conclusion, selecting the right size of steel square involves evaluating the purpose of your project, the size of the materials, the level of precision needed, and your own comfort and ease of use. By taking these factors into consideration, you can choose the most suitable size of steel square to meet your needs.
- Q: How do you use a steel square to find the height of a fence post?
- In order to find the height of a fence post using a steel square, there are several steps you should follow. First, make sure that the steel square is squared off and level. Align one edge of the steel square with the side of the fence post, ensuring that it is flush with the surface of the post. Afterwards, refer to the measurements on the steel square to determine the height of the fence post. Most steel squares have measurements marked along the edges, usually in inches or centimeters. Locate the measurement that corresponds to the desired height. Once you have identified the correct measurement on the steel square, align a straight edge (such as a ruler or another piece of wood) with that measurement on the square. Ensure that the straight edge is perpendicular to the ground and extends vertically from the top edge of the square. Hold the straight edge securely in place and extend it upwards until it reaches the desired height of the fence post. At this point, you can mark the spot on the straight edge where it intersects with the top of the post. This mark represents the height of the fence post. Subsequently, you can utilize this mark as a reference point for cutting the fence post to the desired height or for ensuring that all the posts are at the same height. Remember to verify your measurements and confirm that the steel square is level and properly aligned to achieve accurate results.
- Q: How do you use a steel square to measure board diagonals at different angles?
- To use a steel square to measure board diagonals at different angles, you would first position the steel square against one corner of the board. Then, align the long side of the square with one edge of the board, ensuring it is firmly in place. Next, extend the short side of the square to the opposite corner of the board, measuring the diagonal distance. To measure the diagonal at a different angle, simply rotate the square accordingly and repeat the process.
- Q: What are the common uses of a steel square in welding?
- A steel square, also known as a framing square or carpenter's square, is a versatile tool commonly used in welding for various purposes. Here are a few common uses of a steel square in welding: 1. Measuring and Marking: A steel square is often used to measure and mark straight lines, angles, and dimensions on metal surfaces. It helps in ensuring accurate measurements and precise cuts, ensuring the welding process is executed correctly. 2. Checking for Squareness: Welding involves joining multiple metal pieces together at right angles. A steel square is used to check the squareness and ensure that the joints are properly aligned before welding. This helps in achieving strong and structurally sound welds. 3. Setting Up Right Angles: Welding often requires creating right angles between metal pieces. A steel square is used to accurately set up right angles during the fabrication process. It acts as a guide to ensure the proper alignment of the metal pieces before welding. 4. Aligning and Clamping: A steel square can be used as a guide to align and clamp metal pieces together during the welding process. It helps to hold the workpieces in the desired position, ensuring they stay in place while the welds are being made. This ensures accuracy and prevents distortion or misalignment during the welding process. 5. Checking for Flatness: Before welding, it is essential to ensure that the metal surfaces are flat and even. A steel square can be used to check for flatness by placing it against the metal surface and observing if any gaps or unevenness are present. This helps in identifying any imperfections that need to be addressed before welding. Overall, a steel square is a handy tool in welding that provides accuracy, precision, and alignment. It assists in measuring, marking, aligning, and checking for squareness and flatness, contributing to the successful execution of welding projects.
- Q: How do you use a steel square for marking hip and valley rafters?
- Before attempting to mark hip and valley rafters with a steel square, it is crucial to have a solid understanding of roof framing principles and the various types of rafters used. Carpenters, roofers, and other tradespeople utilize the versatile steel square, also known as a framing square or carpenter's square, to achieve precise measurements and markings. To effectively mark hip and valley rafters using a steel square, follow these steps: 1. Familiarize yourself with the roof framing plan: Prior to starting, it is essential to acquaint yourself with the roof framing plan or design. This will provide you with insights into the layout, angles, and dimensions of the hip and valley rafters that require marking. 2. Determine the rafter angles: Hip and valley rafters are cut at specific angles to fit the roof's slope and shape. The steel square allows for accurate determination of these angles. The steel square comprises two primary parts: the body and the tongue. The body possesses a long edge called the blade, while the tongue is shorter and positioned perpendicular to the body. 3. Position the square: Place the steel square against the edge of the rafter stock (the wood piece that will be cut). Ensure that the body's blade aligns flush with the bottom edge of the rafter stock. 4. Identify the plumb or seat cut angle: To mark the plumb or seat cut angle, slide the square along the rafter until the desired angle aligns with the top corner of the rafter stock. This angle depends on the roof's pitch and specific design. Once aligned, use a pencil or marking knife to mark the angle on the rafter stock. 5. Mark the birdsmouth cut: The birdsmouth cut refers to the area where the rafter rests on the wall's top plate. To mark this cut, maintain the square in the same position as in the previous step. Determine the desired birdsmouth depth, typically specified in the framing plan, and mark it on the rafter stock by sliding the square up or down. 6. Repeat for multiple rafters: If you have several hip or valley rafters to mark, repeat the aforementioned steps for each rafter. Ensure consistency in measurements and markings to uphold accuracy throughout the construction process. It is important to bear in mind that utilizing a steel square for marking hip and valley rafters necessitates familiarity with roof framing and the specific angles involved. If you lack experience in roof construction, it is advisable to consult a professional or refer to reliable resources for guidance.
- Q: Can a steel square be used for checking the flatness of a wall?
- No, a steel square is not suitable for checking the flatness of a wall. It is primarily used for measuring angles and ensuring right angles in carpentry and construction work. For checking the flatness of a wall, a straightedge or a level would be more appropriate.
- Q: Can a steel square be used for checking the squareness of a fence?
- To verify if a fence is square, one can employ a steel square. This multipurpose tool, commonly referred to as a framing square or carpenter's square, is frequently utilized in carpentry and woodworking to ensure precision and squareness. It comprises a 90-degree angle on one side and a 45-degree angle on the other, making it well-suited for assessing the squareness of corners and angles. By positioning the steel square against the corners or edges of the fence, one can determine if they form a perfect 90-degree angle. If the steel square fits snugly and aligns flawlessly with the fence, it signifies that the fence is square. Conversely, the presence of any gaps or misalignment indicates the necessity for adjustments to achieve squareness. Thus, a steel square serves as a dependable tool for verifying the squareness of a fence.
- Q: Can a steel square be used for woodworking joinery?
- Yes, a steel square can certainly be used for woodworking joinery. While traditional woodworking squares are typically made of wood or plastic, a steel square can offer certain advantages. Steel squares are known for their durability and accuracy, making them a reliable tool for accurate measurements and ensuring precise joinery. They have a sturdy construction that maintains its shape over time, ensuring consistent and reliable results. When using a steel square for woodworking joinery, it is important to ensure that the square is properly calibrated and aligned before making any measurements or markings. This can be done by checking it against a known accurate reference or by using a combination square to verify its accuracy. Some woodworkers prefer using a steel square for joinery work because of its resistance to warping or damage that may occur with wooden or plastic squares. The steel square can withstand the pressure and rigors of woodworking tasks, making it a long-lasting and reliable tool in the workshop. However, it is worth noting that steel squares tend to be heavier than their wooden or plastic counterparts, which may affect their ease of use for some woodworkers. Additionally, steel squares may have sharp edges, so caution should be exercised when handling them to avoid injury or damaging the wood. In conclusion, while a steel square may not be the traditional choice for woodworking joinery, it can certainly be used effectively and accurately. Its durability, accuracy, and resistance to warping make it a suitable tool for woodworkers looking for a reliable and long-lasting square.
- Q: What are the markings and graduations on a steel square used for?
- The utilization of the markings and graduations on a steel square encompasses a multitude of purposes within the realm of carpentry and its related fields. In the first place, these markings serve the function of measuring and delineating specific lengths on the material undergoing manipulation. It is customary for the square to possess both imperial and metric measurements, thereby facilitating meticulous and precise calculations in either measurement system. These markings play a pivotal role in guaranteeing that cuts and joints are executed with the utmost accuracy, ultimately culminating in a more refined and professional outcome. Furthermore, the graduations adorning a steel square find utility in the measurement of angles. Typically, the square is equipped with a protractor scale, which permits the determination of angles ranging from 0 to 180 degrees. This feature proves particularly advantageous when confronted with tasks such as the generation of angled cuts or the demarcation of specific angles for the purpose of joinery work. Moreover, the steel square frequently encompasses supplementary markings and characteristics that enhance various undertakings. For instance, it may incorporate a scale designated for locating the center of a circle, or a ruler edge designed to expedite swift measurements. Some squares even incorporate scribe lines, which can be employed for marking parallel lines or referencing points. All in all, the markings and graduations on a steel square represent indispensable tools for the attainment of precise measurements, angle demarcations, and a myriad of other duties within the realm of carpentry and its associated fields. Their presence ensures the achievement of exactitude and efficiency, ultimately yielding workmanship of superior quality.
- Q: How do you use a steel square to measure and mark parallel lines?
- To use a steel square to measure and mark parallel lines, you need to align one edge of the square with the starting point of the line. Then, hold the square firmly in place and draw a line along the other edge of the square. Repeat this process at the desired interval to create parallel lines.
Send your message to us
High Quality Steel Square Bar
- Ref Price:
-
- Loading Port:
- Tianjin
- Payment Terms:
- TT OR LC
- Min Order Qty:
- 25 m.t.
- Supply Capability:
- 10000 m.t./month
OKorder Service Pledge
OKorder Financial Service
Similar products

Hot products


Hot Searches
Related keywords

