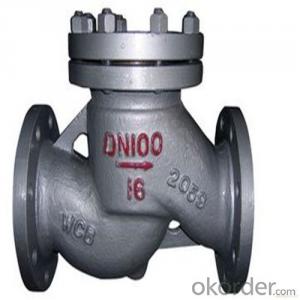
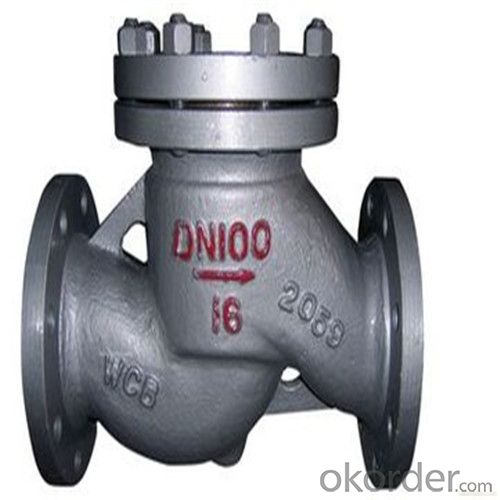
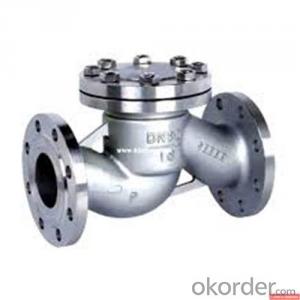
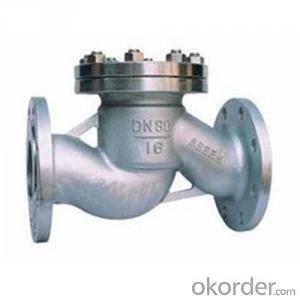
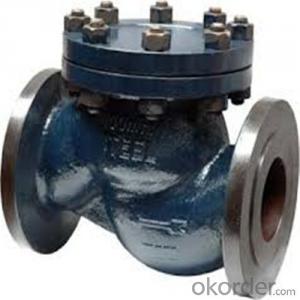
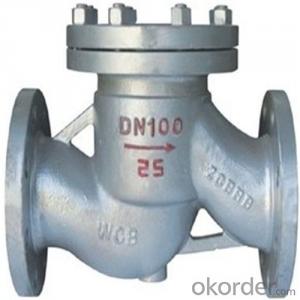
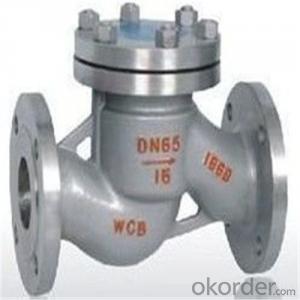
API Cast Steel Lift Check Valve Size 150 mm
- Ref Price:
-

- Loading Port:
- Shanghai
- Payment Terms:
- TT OR LC
- Min Order Qty:
- 10 pc
- Supply Capability:
- 100 pc/month
OKorder Service Pledge
OKorder Financial Service
You Might Also Like
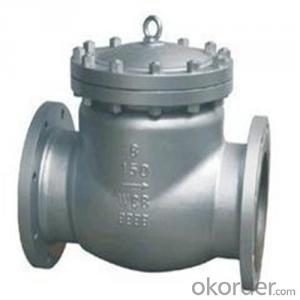
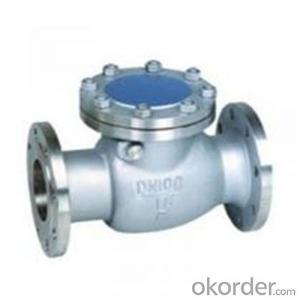


API Cast Steel Lift Check Valve 150 Class
The features of Cast Steel Lift Check Valve
Bolted Bonnet;Swing and lift disc;Metallic seating surfaces.
Body and Bonnet Connection of Cast Steel Lift Check Valve:
The body and bonnet of Class150~Class900 check valves are usually with studs and nuts.And the body and bonnet of Class1500~Class2500 check valves are usually of pressurized seal design.
Body-To-Bonnet Joint of Cast Steel Lift Check Valve:
Stainless steel + flesible graphite wounded gasket is used for Class 150 and Class 300 check valve;Stainless steel + flexible graphite wounded gasket is used for Class 600 check valve,and joint gasket is also optional for Class 600 check valve;Ring joint gasket is used for Class900 check valve;Pressurized seal design is used for Class 1500~Class 2500 check valves.
Seat of Cast Steel Lift Check Valve:
For carbon steel check valve,the seat is usually forged steel.The sealing surface of the seat is spray welded with hard alloy specified by the customer.Renewable threaded seat is used for NPS<10 check="" valves="" and="" welded="" on="" seat="" can="" be="" also="" optional="" if="" being="" requested="" by="" the="" customer.welded="" is="" used="" for="" nps="">12 crbon steel gate valves .Forstainless steel check valve,integral seat is usually adopted ,or to weld hard alloy directly integrally.Threaded or welded on seat is also optional for stainless steel check valve if being requested by the customer.
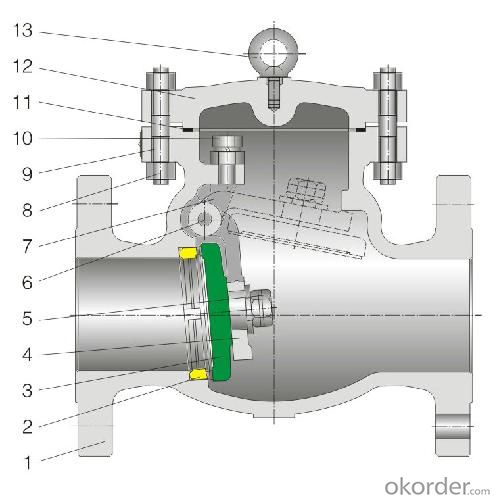
Parameter of Cast Steel Check Valve:
Standard Criteria | ASME/ANSI/API customize |
Pressure Rating | 150 Class 300 Class 600 Class 900 Class 1500 Class 2500 Class customize |
Valve Size | 50 mm 65 mm 80 mm 100 mm 125 mm 150 mm 200 mm 250 mm 300 mm 350 mm 400 mm 450 mm 500 mm 600 mm 650 mm 700 mm 750 mm |
2 inch 2.5 inch 3 inch 4 inch 5 inch 6 inch 8 inch 10 inch 12 inch 14 inch 16 inch 18 inch 20 inch 24 inch 26 inch 28 inch 30 inch customize | |
Actuator | Automatic customize |
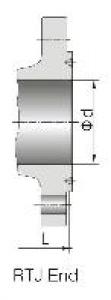
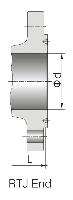
Connection | Butt Welding Flange RF Flange RTJ customize |
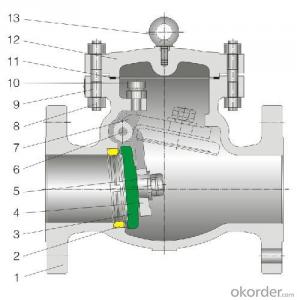
1-Body Material | A216 WCB A351-CF8 A351-CF8M customize |
2-Seat ring | A351-CF8 A351-CF8M A105+13Cr Tool Steel+A105 customize |
3-Disc | Tool Steel+A216 WCB A351-CF8M A351-CF8 A216 WCB+13Cr customize |
4-Arm | A351-CF8 A216 WCB A351-CF8M customize |
5-Nut | A194 8M A194-8 A194 2H customize |
6-Arm pin | A182-F6a A182-F316 A182-F304 customize |
7-Yoke | A351-CF8 A351-CF8M A216 WCB customize |
8-Bonnet nut | A194 8M A194-8 A194 2H customize |
9-Bonnet bolt | A193-B8 A193-B8M A193-B7 customize |
10-Bolt | A193-B7 A193-B8 A193-B8M customize |
11-Gasket | graphite+304 graphite+316 customize |
12-Bonnet | A216 WCB A351-CF8M A351-CF8 customize |
13-Eye bolt | A181 customize |
Design Standard | API 6D BS 1868 customize |
Connection Standard | API 605 ASME B 16.25-2007 ASME B 16.47A ASME B 16.47B ASME B 16.5 MSS SP-44 customize |
Test Standard | API 598 API 6D customize |
Face to Face | ASME B 16.10 customize |
Pressure-temperature ratings | ASME B 16.34-2004 customize |
Wall thickness dimension | API 600 BS 1868 |
FAQ of Cast Steel Check Valve:
Q1:I can’t find the type of steel check valve which I need. what can I do?
The chart above only lists out some common composition of steel check valve parts.We may provide other different parts material composition according to the customer's request or the actual valve working condition.
Q2:Which certification do your products pass?
Our products are in accordance with ISO 9001、ISO 14001、API 6A、API 6D、TS CE、API607/6FA/BS6755.
- Q: Since the valve drain is usually open, I am wondering if placing the cap on the drain has made my water heater dangerous.
- Easy method, change washer in valve Right method: Turn off main , attach hose to existing valve, route out side to a point as lows with respect to furnace height, open valve and drain water, remove plastic valve. Sweat on new brass valve with torch, turn main back on or just keep bucket under to collect drips and finally Pressure will not build so the thing is not going to explode or any thing - i.e. you are safe E-mail me if you don't fully understand Joe
- Q: Someone explained on chevy that valve guide clearance can limit lift.
- Valve guide clearance is distance between the valve stem and the valve stem guide. It is critical for proper engine operation.
- Q: ok im buying an aftermarket blow off valve for my car. the car itself is taken apart completely and i have no idea wht vacuum lines go where. i know tht the top nipple of the bov has to be connected to the throttle body but it has 5 lines. does it matter what line is connected to it?
- Don't do it. First of all, if you knew enough about turbo charging or supercharging, blow off valves, bypass values, hooters, etc., then you would have known we need to know the size of engine, model of turbo, piping diameter, etc. The actual control lines are not that complex. By using your tongue you can tell what each line is ported to, and then you just need to know if you blow off valve is operated by vacuum or lack of vacuum. They make both types. And your throttle body will have ports on both sides of the plate. And yes, it does very much matter. Turbo charging is not for the novice to fool around with.
- Q: hi guys..What is different between globe valve and stop check globe? Is that stop check globe=SDNR JIS std?
- I am not even sure what you are talking about. a globe valve is a type of valve that can stop the flow by turn a handel on top of the valve. A check valve on let the flow go one way and stops the flow the other way. hope this help Globe valve From Wikipedia, the free encyclopedia Jump to: navigation, search A Globe valve is a device (specifically a type of valve) for regulating flow in a pipeline, consisting of a movable disk-type element and a stationary ring seat in a generally spherical body.[1] Globe Valves are named for their spherical body shape with the two halves of the body being separated by an internal baffle. This has an opening that forms a seat onto which a movable plug[2] can be screwed in to close (or shut) the valve. The plug is also called a disc or disk.[3][4][5] In globe valves, the plug is connected to a stem which is operated by screw action in manual valves. Typically, automated valves use sliding stems. Automated globe valves have a smooth stem rather than threaded and are opened and closed by an actuator assembly. When a globe valve is manually operated, the stem is turned by a handwheel. Although globe valves in the past had the spherical bodies which gave them their name, many modern globe valves do not have much of a spherical shape. However, the term globe valve is still often used for valves that have such an internal mechanism. In plumbing, valves with such a mechanism are also often called stop valves since they don't have the global appearance, but the term stop valve may refer to valves which are used to stop flow even when they have other mechanisms or designs. Globe valves are used for applications requiring throttling and frequent operation. For example, globe valves or valves with a similar mechanism may be used as sampling valves, which are normally shut except when liquid samples are being taken. Since the baffle restricts flow, they're not recommended where full, unobstructed flow is required.
- Q: Why is the atrioventricular valve in the right ventricle called the tricupsid valve and the atrioventricular valve on the left ventricle called the bicupsid valve?
- The TRIcuspid valve has 3 pointed flaps; the BIcuspid valve has 2 pointed flaps, and a cuspid is a point (just like your bicuspid teeth have 2 points).
- Q: I need to make a ball valve that will open with no manual force but by a motor of some sort to spin it and release water. how do i make a ball valve controlled by preferably a motor or other CHEAP device. I need to do this for less that 20$
- put a slave servo on it,
- Q: My third valve won't move at all. I haven't played my trumpet in a while and I tried to oil it to get it to unstick but it still won't move at all. People say to screw it off but I can only unscrew the little cap at the bottom of the valve where you push in, not the white button at the top. Help please! Thank you so much! =]
- i got here across that Dennis Wick valve oil is a procedures more advantageous ideal to any that I easily have used. you'll locate it on Amazon. If cleansing with dish cleansing soap and heat water would not artwork, alongside with the Dennis Wick oil, I recommend that you're taking it to a restoration shop. be careful at the same time as cleansing now to not get any cork or felt moist. only dip the truly valve section into the water.
- Q: What are Atrial valves??
- I've heard the term sometimes (though rarely) used instead of atrioventricular valves, the tricuspid (right) and bicuspid valves.
- Q: Hi, this is a part 2 question to the one I posted last night. After turning the water shut off valve on my toilet back on, it didnt start to hammer till about 1 min pasted. When the hammering is happening I look in the toilet tank and see air bubbles coming out of the base of the fill valve and the water coming out of the fill tube isn't smooth and flowing its kinda step wise/ in intervals. I forgot to mention that I live in an apartment, does this affect anything?My official question is, is this an air bubble problem or is it a rubber gasket/ rubber seat problem?This is a new building only about 2 yrs old, so parts can't be that bad right?
- First check for a kinked or twisted supply connector hose. You may also have a piece of rubber gasket/washer debris stuck in the valve body (seat washer) or in the fill valve itself (from the connector compression washer). Shut off the water supply at the angle stop and disconnect the supply hose from the fill valve nipple under the toilet tank. Get a bucket and put the end of the supply connector hose/tube into the bucket and open the supply valve again. If it still hammers when unrestricted like this, the obstruction is in the anglestop valve body. The water pressure may force it out, but if it doesn't, you'll have to shut off your main water supply to clean the stop or replace it. If it doesn't hammer when unrestricted, the problem is now in the new fill valve, and is probably a deteriorated piece of the compression washer in your old supply connector hose or tube that has been pushed into the fill valve. Since it's a Fluidmaster, you can disassemble the head of the valve and remove any visible obstruction or just replace the top part.
- Q: I am a 55-year-old female going in for mitral valve replacement surgery, and I need to decide on which valve to get: bovine or mechanical. If you have any experiences or know anyone who's had either of these types of valves placed in their bodies, please elaborate on the experience. I want to know the pros and cons of each.Thank you.
- I had open heart surgery, repairs to my mitrial and tricuspid valves. On the mitrial valve, an Edwards Lifescience ring was placed to tighten valve and the tricuspid was just tightened. That was five yrs ago. Have more energy and feeling better, still. My surgeon did mention placing a porcine valve but once they got inside my heart, the DRs. choose the lifescience ring. I do take an anticoagulant but for other reasons for over 8 yrs now.
Send your message to us
API Cast Steel Lift Check Valve Size 150 mm
- Ref Price:
-
- Loading Port:
- Shanghai
- Payment Terms:
- TT OR LC
- Min Order Qty:
- 10 pc
- Supply Capability:
- 100 pc/month
OKorder Service Pledge
OKorder Financial Service
Similar products

Hot products

Hot Searches
Related keywords

