
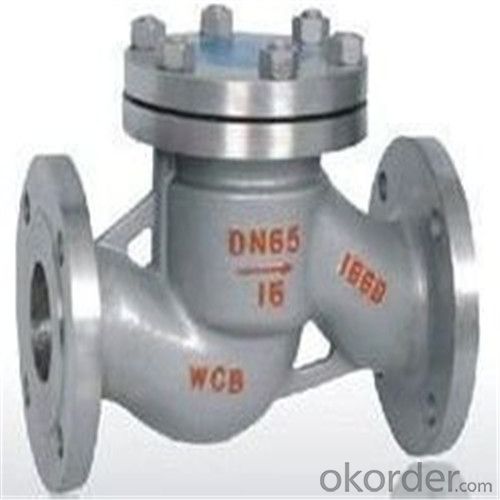
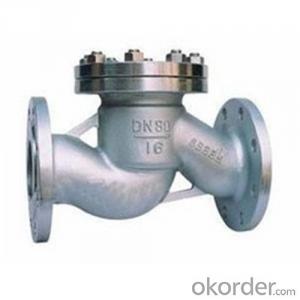
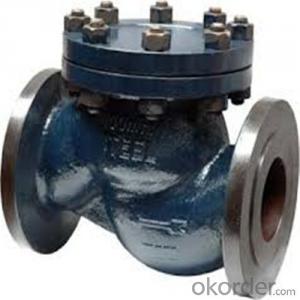
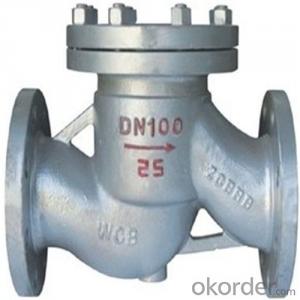
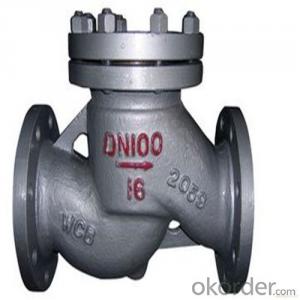
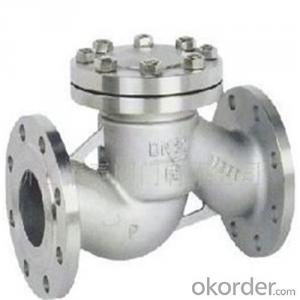
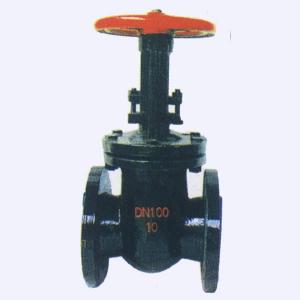
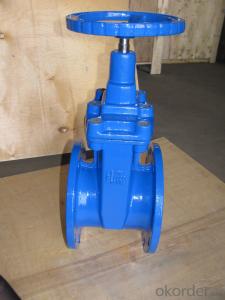
API Cast Steel Lift Check Valve Size 100 mm
- Ref Price:
-

- Loading Port:
- Shanghai
- Payment Terms:
- TT OR LC
- Min Order Qty:
- 10 pc
- Supply Capability:
- 100 pc/month
OKorder Service Pledge
OKorder Financial Service
You Might Also Like


API Cast Steel Lift Check Valve 150 Class
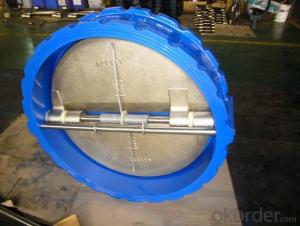
The features of Cast Steel Lift Check Valve
Bolted Bonnet;Swing and lift disc;Metallic seating surfaces.
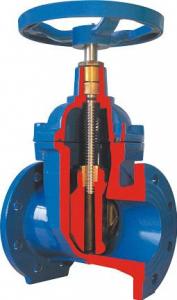
Body and Bonnet Connection of Cast Steel Lift Check Valve:
The body and bonnet of Class150~Class900 check valves are usually with studs and nuts.And the body and bonnet of Class1500~Class2500 check valves are usually of pressurized seal design.
Body-To-Bonnet Joint of Cast Steel Lift Check Valve:
Stainless steel + flesible graphite wounded gasket is used for Class 150 and Class 300 check valve;Stainless steel + flexible graphite wounded gasket is used for Class 600 check valve,and joint gasket is also optional for Class 600 check valve;Ring joint gasket is used for Class900 check valve;Pressurized seal design is used for Class 1500~Class 2500 check valves.
Seat of Cast Steel Lift Check Valve:
For carbon steel check valve,the seat is usually forged steel.The sealing surface of the seat is spray welded with hard alloy specified by the customer.Renewable threaded seat is used for NPS<10 check="" valves="" and="" welded="" on="" seat="" can="" be="" also="" optional="" if="" being="" requested="" by="" the="" customer.welded="" is="" used="" for="" nps="">12 crbon steel gate valves .Forstainless steel check valve,integral seat is usually adopted ,or to weld hard alloy directly integrally.Threaded or welded on seat is also optional for stainless steel check valve if being requested by the customer.
Parameter of Cast Steel Check Valve:
Standard Criteria | ASME/ANSI/API customize |
Pressure Rating | 150 Class 300 Class 600 Class 900 Class 1500 Class 2500 Class customize |
Valve Size | 50 mm 65 mm 80 mm 100 mm 125 mm 150 mm 200 mm 250 mm 300 mm 350 mm 400 mm 450 mm 500 mm 600 mm 650 mm 700 mm 750 mm |
2 inch 2.5 inch 3 inch 4 inch 5 inch 6 inch 8 inch 10 inch 12 inch 14 inch 16 inch 18 inch 20 inch 24 inch 26 inch 28 inch 30 inch customize | |
Actuator | Automatic customize |
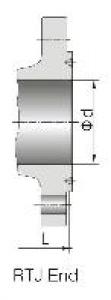
Connection | Butt Welding Flange RF Flange RTJ customize |
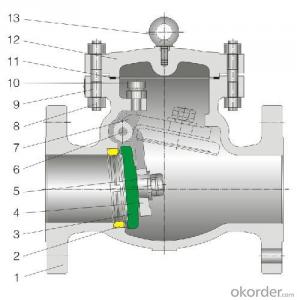
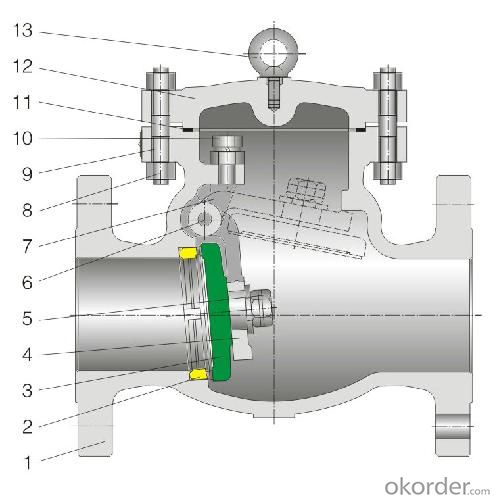
1-Body Material | A216 WCB A351-CF8 A351-CF8M customize |
2-Seat ring | A351-CF8 A351-CF8M A105+13Cr Tool Steel+A105 customize |
3-Disc | Tool Steel+A216 WCB A351-CF8M A351-CF8 A216 WCB+13Cr customize |
4-Arm | A351-CF8 A216 WCB A351-CF8M customize |
5-Nut | A194 8M A194-8 A194 2H customize |
6-Arm pin | A182-F6a A182-F316 A182-F304 customize |
7-Yoke | A351-CF8 A351-CF8M A216 WCB customize |
8-Bonnet nut | A194 8M A194-8 A194 2H customize |
9-Bonnet bolt | A193-B8 A193-B8M A193-B7 customize |
10-Bolt | A193-B7 A193-B8 A193-B8M customize |
11-Gasket | graphite+304 graphite+316 customize |
12-Bonnet | A216 WCB A351-CF8M A351-CF8 customize |
13-Eye bolt | A181 customize |
Design Standard | API 6D BS 1868 customize |
Connection Standard | API 605 ASME B 16.25-2007 ASME B 16.47A ASME B 16.47B ASME B 16.5 MSS SP-44 customize |
Test Standard | API 598 API 6D customize |
Face to Face | ASME B 16.10 customize |
Pressure-temperature ratings | ASME B 16.34-2004 customize |
Wall thickness dimension | API 600 BS 1868 |
FAQ of Cast Steel Check Valve:
Q1:I can’t find the type of steel check valve which I need. what can I do?
The chart above only lists out some common composition of steel check valve parts.We may provide other different parts material composition according to the customer's request or the actual valve working condition.
Q2:Which certification do your products pass?
Our products are in accordance with ISO 9001、ISO 14001、API 6A、API 6D、TS CE、API607/6FA/BS6755.
- Q: I was just wondering if any body got there valve replaced,and if they are still having symptoms..Such as sweating,and shortness of breath.I do not know if i should see a cardologist, or the surgeon who replaced the valve.Any answers would be appreciated.Thank you.
- Any side effects directly after or shortly after a major heart surgery or valve replacement would best be followed up by a visit to the cardiologist to make sure there are no other problems or problems with the new valve. This is a serious question and should be treated as so. Go see a doctor asap. That way, if nothing is wrong you have a piece of a mind instead of waiting and waiting.
- Q: Is there a more technically correct name for a valve that slowly opens, allowing increased pressure in a water line without blowing the end off?
- I've always known them to be simply called motorized valves, but they aren't specifically made to prevent instantaneous pressure build up. They are usually installed as a convenience type of thing and in lieu of solenoid valve which WOULD be an almost immediate full pressure situation, but any valve other than a solenoid activated one will allow for slow build up of pressure. A motorized valve just lets you do it automatically and you don't have to be right at the valve location to open it. Al
- Q: Hi,I have just bought a Northface Hammerhead and for some reason when biting on the bite valve no water is being released. Does anyone have any idea why this might be, or can tell that I am missing something obvious. Thanks very very much.
- Some valves are finicky as to where you bite them. Also, sometimes blowing a small puff of air into the bladder will help the water flow faster. If you can't stand the valve you have, you can buy a replacement valve from another brand and stick it on there. My favorites are the MSR and Nalgene/Jansport valves, but Camelbak isn't bad either.
- Q: 1992 Ford Crown Vic, 102K, burns oil, no blue smoke, no leaks. My first thought was a valve job. Any other possibilities? Suggestions? What about an approxitmate cost for the valve job? Thanks.
- there's a reserve of lubrication placed up the cylinder head; you basically desire somebody to realize up and artwork with their palms till it releases; you need to be slick and arranged very straight away. ought to that fail, they are in a place to continually swap to a crankshift piston rod; at times you basically won't be able to attain back some distance adequate with palms on my own, and you have have been given to get in there with a gadget. you will understand the roles been completed good once you experience the rigidity advance and shrink in alternating waves, and you do not have to any extent further friction subjects.
- Q: A reading from my 2002 ford explorer said insufficient flow from the EGR valve. Would it be possible to clean the valve or fix it or would I need to buy a whole new valve?
- It could be two things. The exhaust gasket coming to the valve or the vacuum coming to the valve. The egr did not need changing. Without the proper tool to check it out. I can not say which it is or how to repair. It need to go to shop where the proper test can be use to find what need to be repaired of replaced Most likely it will be a one way vacuum valve, that is not working right.
- Q: Can sum1 tell me how i can tell if my valves are in the right place?I notice there are holes in the valves, please explain how those holes are suppose to face to for each of the 3 valves?
- Put the correct valve in the valve case. (There is usually a notch that guides the placement, but it is not always accurate enough.) Blow gently into the trumpet, (you don't need to play, just blow as you do to clear the spit valves). If you feel a resistance, rotate the valve until the resistance is gone. When there is no resistance with the valve up, depress the valve and blow again. There should be no resistance there either. Repeat with each valve.
- Q: fisher control valve
- One minor point to add to Artsupremo's answer. Valves can be either air to open or air to close. With one you start with the valve closed and the other with the valve open. The procedure is the same for both types of valves, I just wanted to clarify that point.
- Q: So the plug in the bathroom since fell in, coming off the attachment to open and close it from the top. When I got under the sink, I turned the shut off valves all the way to the right and the water stoped working. I unscrewed the attachment and fixed the plug (on the drain no the water) and when I turned the vlaves back on, no water. It dribbles just a little ifi turn the sink all the way on, however I cant get full water pressure. Any help?
- In some homes the place the sink is fixed to the wall, as on your case, there may be close off valves interior the basement at as quickly as under the bathing room. If there are none there then you certainly will maximum possibly ought to close off the main water the open the tub room sink faucets to empty off extra water. stable success.
- Q: Whilst pumping up my new tubular tyre, the head of the presta valve snapped off! Because this is a tubular tyre, I spent a lot of time (and cash) gluing it on and applying it etc, so I'm reluctant to buy a new tub. Is there any way getting a new presta valve head without replacing the whole tyre?Thanks in advance.
- This Site Might Help You. RE: Presta valve snapped!? Whilst pumping up my new tubular tyre, the head of the presta valve snapped off! Because this is a tubular tyre, I spent a lot of time (and cash) gluing it on and applying it etc, so I'm reluctant to buy a new tub. Is there any way getting a new presta valve head without replacing the whole...
Send your message to us
API Cast Steel Lift Check Valve Size 100 mm
- Ref Price:
-
- Loading Port:
- Shanghai
- Payment Terms:
- TT OR LC
- Min Order Qty:
- 10 pc
- Supply Capability:
- 100 pc/month
OKorder Service Pledge
OKorder Financial Service
Similar products

Hot products
Hot Searches
Related keywords

