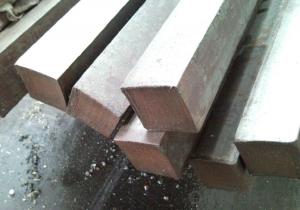


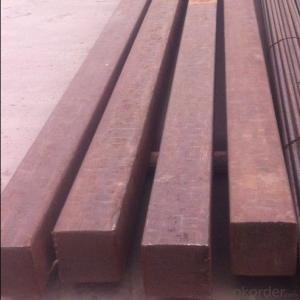
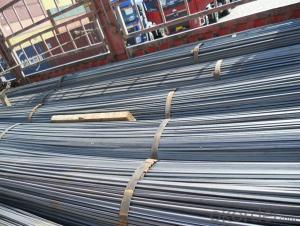
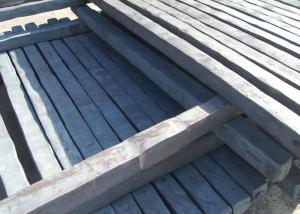
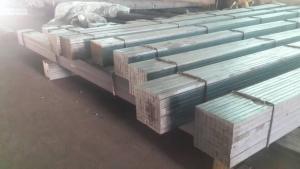
11mm*0.95kg/m square bar for construction
- Ref Price:
-

- Loading Port:
- Tianjin
- Payment Terms:
- TT OR LC
- Min Order Qty:
- 25 m.t.
- Supply Capability:
- 100000 m.t./month
OKorder Service Pledge
OKorder Financial Service
You Might Also Like


Product Description:
Specifications
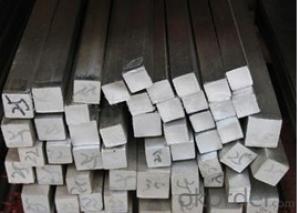
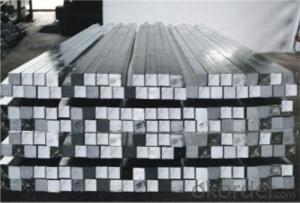
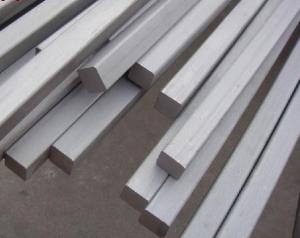
stainless steel square bar flat steel bar
Diameter:2-500mm
Length:Customized
Quality: High quality stainless steel bar
stainless steel square bar flat steel bar
Stainless Steel bar
Diameter:2-160mm
Length: Customized
Surface | bright,black |
Technique | Hot Rolled/Cold Drawn/Peeled |
1.Round bar 1Hot rolled black bar: (5~400x6000mm or according to your requirement. 2Acid round bar: (5~400)x6000mm or according to your requirement. 3Cold drawn bright bar: (1~20x6000mm or according to your requirement. 4)Polishing round bar: (5-400)x6000mm or according to your requests. | |
2. Square bar 1)Hot rolled black bar: (5*5-400*400)x6000mm or according to your requests. 2)Acid square bar: (5*5-400*400)x6000mm or according to your requests. 3)Cold drawn square bar: (1*1-20*20)x6000mm or according to your requests 4)Polishing square bar: (5*5-400*400)x6000mm or according to your requests | |
Diameter± | H9 tolerance can reach the industry standard |
Quality | Our production equipment 24 hours of continuous temperature work, to ensure the unity of the product roundness, elongation, tensile strength and yield strength. Welcome customers to our company to detect the products before shipment. For the customers who are not inconvenient, quality assurance can be laid down in the contract, we will take charge of the returning and shipping fee if there is any problems of the product quality, so it will dismiss any of your worry about our products. |
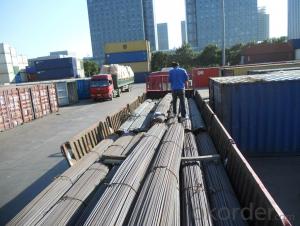
Package | Standard seaworthy packing(plastic&wooden) or according to the customer's requests |
Delivery time | 7-20days, according to the quantity |
Productivity | 10000 tons/month |
Stainless steel round bars:
Grade :200 series 300series 400series. (Standard: ASTM JIS DIN & BS)
Diameters: 4mm-300mm
Surface : white acid , annealed, black(hot rolled) , bright and following customers request.
Length: 6M(standard) or random
Packing: standard export packing or following customer’s demand.


- Q: Can a steel square be used for checking the alignment of fences?
- Yes, a steel square can be used for checking the alignment of fences. A steel square is a versatile tool that can be used for various measurements and alignments. When it comes to checking the alignment of fences, a steel square can help ensure that the fence posts are square to the ground and that the fence panels are properly aligned. By placing the steel square against the posts and panels, one can easily determine if they are straight and aligned correctly. The right angles and straight edges of the steel square make it an effective tool for this purpose.
- Q: How do you use a steel square to measure angles?
- To use a steel square for measuring angles, you can follow these steps: 1. Ensure that the steel square is clean and free from any dirt or debris that may affect the accuracy of your measurements. 2. Identify the angle that you want to measure. The steel square typically has two arms, a longer one called the blade and a shorter one called the tongue. 3. Place the steel square on a flat surface, ensuring that the blade is aligned with one side of the angle you want to measure. 4. Rotate the square until the tongue aligns with the other side of the angle. Make sure that both arms of the square are in contact with the surface and the sides of the angle. 5. Once the steel square is properly aligned, read the angle measurement from the scale engraved on the blade or tongue. The scale usually provides measurements in degrees, with markings at regular intervals. 6. Take note of the angle measurement and record it for future reference or use. It is important to handle the steel square with care to avoid any damage that might affect the accuracy of its measurements. Regularly check and calibrate your steel square if necessary to ensure precise and reliable angle measurements.
- Q: How can a steel square be used for making accurate cuts?
- A steel square can be used for making accurate cuts by aligning it with the edge of the material being cut and using its straight edge as a guide for the cutting tool. This ensures that the cuts are straight and precise, resulting in accurate measurements and angles.
- Q: What are the different angles that can be measured with a steel square?
- A versatile tool for measuring and creating various angles is a steel square, also known as a framing square or carpenter's square. Let's explore some of the angles that can be measured using this tool: 1. Right Angle: The most common angle that can be measured with a steel square is 90 degrees, representing a perfect right angle. Simply align the long edge of the square with one side of the object or surface to determine this angle easily. 2. Acute Angle: An acute angle is any angle measuring less than 90 degrees. To measure an acute angle with a steel square, align one side of the square with the object or surface and observe the gap between the other side of the square and the object. 3. Obtuse Angle: An obtuse angle is any angle measuring more than 90 degrees but less than 180 degrees. To measure an obtuse angle using a steel square, align one side of the square with the object or surface and observe the gap between the other side of the square and the object. 4. Scalene Angle: A scalene angle has three unequal sides. Align the steel square with one side of the object or surface and observe the gap between the other side of the square and the object to measure a scalene angle. 5. Isosceles Angle: An isosceles angle has two equal sides. To measure an isosceles angle with a steel square, align one side of the square with one of the equal sides of the object or surface and observe the gap between the other side of the square and the object. 6. Equilateral Angle: An equilateral angle has three equal sides. Align the steel square with one side of the object or surface and observe the gap between the other side of the square and the object to measure an equilateral angle. These examples provide a glimpse into the range of angles that can be measured with a steel square. However, it's important to note that a steel square is primarily designed for measuring right angles, and measuring other angles may require additional tools or techniques.
- Q: How do you use a steel square to determine the angle of a hip rafter cut?
- To determine the angle of a hip rafter cut using a steel square, you would first place the square against the rafter with the body of the square aligned along the edge of the rafter. Then, you would adjust the square until the 12-inch mark on the body of the square aligns with the top edge of the rafter. Next, you would look at the degree scale on the steel square to read the angle at which the blade of the square intersects the rafter. This angle can be used as a guide for making the hip rafter cut accurately.
- Q: How do you use a steel square to determine the angle of a compound miter bevel cut?
- To determine the angle of a compound miter bevel cut using a steel square, you can follow these steps: 1. Place the steel square on the edge of the material you want to cut, with one arm of the square against the surface and the other arm extending outward. 2. Adjust the angle of the steel square until the surface arm aligns with the direction of the bevel cut you want to make. 3. Once properly aligned, read the angle measurement on the scale of the steel square where the other arm intersects. 4. This angle measurement will give you the angle of the compound miter bevel cut you need to set on your saw.
- Q: What are the different ways to hold a steel square?
- There are several different ways to hold a steel square, depending on the specific task at hand and personal preference. Here are some common methods: 1. Finger grip: This is the most basic and common way to hold a steel square. Simply grasp the square firmly with your fingers and thumb, ensuring a secure grip. 2. Palm grip: For better control and stability, some people prefer to hold the steel square in their palm, with their fingers wrapped around the handle. This grip allows for more precision and accuracy when using the square. 3. Thumb grip: Another common method is to hold the steel square with your thumb on one side of the handle and your fingers on the other side. This grip provides stability and control while allowing your fingers to remain free for other tasks. 4. Hook grip: In certain situations, it may be necessary to hang the steel square on an edge or hook it onto a surface for stability. In this case, you can hold the square by placing your fingers through the holes or slots in the handle, creating a hook-like grip. 5. Clamped grip: When using a steel square for more complex tasks, such as woodworking or metalworking, it may be beneficial to secure the square in place using clamps or vices. This ensures that the square remains fixed, allowing for precise measurements and marking. Ultimately, the way you hold a steel square depends on your comfort, the task at hand, and the level of control and stability required. It's important to find a grip that allows you to work safely and effectively while using the square.
- Q: Can a steel square be used for marking out mortises?
- Yes, a steel square can be used for marking out mortises. The square's straight edges and right angles make it a useful tool for accurately measuring and marking the dimensions of a mortise on a piece of wood.
- Q: Can a steel square be used for setting up a router table?
- Yes, a steel square can be used for setting up a router table. A steel square is a useful tool for ensuring accurate measurements and angles, which are important for aligning the router table and achieving precise cuts.
- Q: Can a steel square be used for stair railing layout and installation?
- The use of a steel square is applicable in the layout and installation of stair railings. Referred to as a framing square or carpenter's square, this versatile tool is commonly employed in carpentry and construction projects. It comprises a long arm and a shorter arm, forming a right triangle when joined at a 90-degree angle. In regard to stair railing layout and installation, a steel square serves the purpose of ensuring precise and accurate measurements. It enables the marking of angles and dimensions required for cutting the various components of the railing, such as balusters and handrails. By aligning the long arm of the steel square with the stair tread or riser edge, one can accurately indicate the positions for installing the railing posts. Moreover, during the installation process, a steel square can also be utilized to assess the squareness and alignment. It can be placed against the railing posts to verify their perpendicularity to the stair treads and risers. This step is crucial in achieving a reliable and level installation. To summarize, a steel square proves to be an invaluable tool when it comes to stair railing layout and installation. Its versatility and precision make it an ideal choice for marking angles, measuring dimensions, and ensuring squareness throughout the installation process.
Send your message to us
11mm*0.95kg/m square bar for construction
- Ref Price:
-
- Loading Port:
- Tianjin
- Payment Terms:
- TT OR LC
- Min Order Qty:
- 25 m.t.
- Supply Capability:
- 100000 m.t./month
OKorder Service Pledge
OKorder Financial Service
Similar products


Hot products


Hot Searches
Related keywords

