


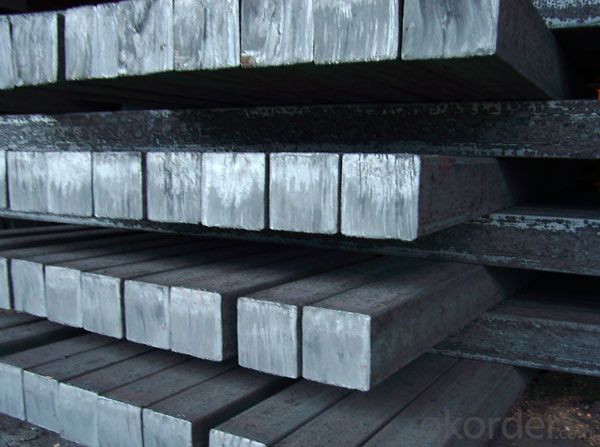


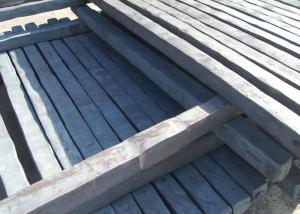
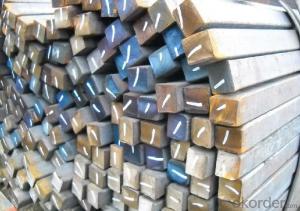
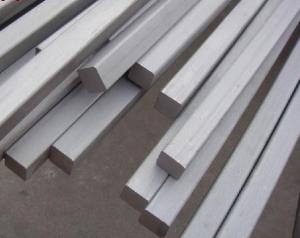
Alloyed square bar
- Ref Price:
-

- Loading Port:
- China Main Port
- Payment Terms:
- TT OR LC
- Min Order Qty:
- -
- Supply Capability:
- -
OKorder Service Pledge
OKorder Financial Service
You Might Also Like


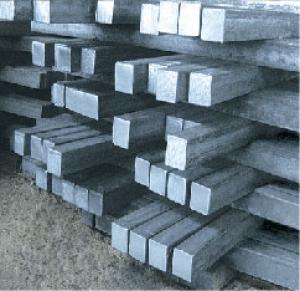
hot rolled square steel billet
1.Q195 Q235 Q345B
2.terms of payment: L/C T/T
3.size: 100~150mm length: 5.8~12m
4.certificate:GB
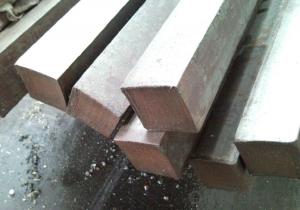
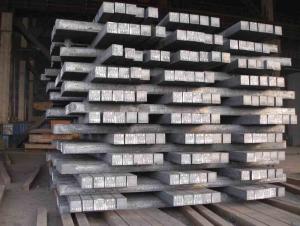
Type | Steel billet |
Standard Grade | a. 3SP/PS |
b. Q235 | |
c. 5SP d. Q275 | |
Size | 120mm x 120mm-150mm x 150mm etc. as per customers' requirement |
Length | 12m as standard |
Application | Carbon structural steel, Alloy steel, Gear steel, etc. |
Packing | standard export packing, or as per customers' requirement |
Quality | First quality |
Delivery time | Right now after the deposit. |
Others | 1. our products conform to all the standards |
2. we can offer special specification products as per our customers | |
3. we can offer the original mill test certificate and original production |
- Q: Can a steel square be used for porch post layout and installation?
- Yes, a steel square can be used for porch post layout and installation. Steel squares are versatile tools commonly used in carpentry and construction. They can be used to measure and mark angles, ensure accurate right angles, and aid in laying out and positioning posts and beams. The durability and precision of a steel square makes it suitable for various tasks, including porch post layout and installation.
- Q: How do you use a steel square to lay out a dovetail joint?
- To use a steel square to lay out a dovetail joint, begin by marking the thickness of the boards on their ends using the square. Next, place the square on the end of one board, aligning it with the edge. Use the square to mark the desired angle for the dovetail, ensuring it is consistent across the joint. Repeat this step on the other board, ensuring both angles match. Finally, connect the marks on both boards to complete the layout of the dovetail joint.
- Q: How do you use a steel square to lay out a cone shape?
- In order to lay out a cone shape using a steel square, a few steps must be followed. To begin, the desired dimensions of the cone, including the height and base diameter, need to be determined. It is important to have these measurements readily available before commencing the layout process. Afterwards, a horizontal line should be drawn on a flat surface or workbench. This line will serve as the baseline for the cone. The midpoint of the line should be marked as it will act as the apex of the cone. The steel square should now be taken, and one side of it should be placed along the baseline. The apex of the square should be aligned with the midpoint of the line. This will result in the formation of a right angle. From the apex, the desired height of the cone should be measured along the vertical arm of the steel square, and a mark should be made. A line should then be drawn from this mark to the baseline. This line will represent the slant height of the cone. To determine the base diameter of the cone, the desired diameter should be measured along the horizontal arm of the steel square. Marks should be made at this distance on both sides of the baseline. Using a curved line, the marks on the baseline should be connected to the apex. This curved line will depict the outline of the cone. Lastly, it is essential to double-check all the measurements and lines for accuracy before proceeding with any cutting or construction. By adhering to these steps and utilizing a steel square, it is possible to successfully lay out a cone shape with precision and accuracy.
- Q: Can a steel square be used for measuring roof pitches?
- Yes, a steel square can be used for measuring roof pitches. The markings and angles on a steel square make it a useful tool for determining the pitch or slope of a roof.
- Q: How do you use a steel square to lay out a hip rafter with unequal pitch?
- To lay out a hip rafter with unequal pitch, follow these steps: 1. Start by determining the pitch angles of both roofs that meet at the hip rafter. It's important to note that these angles will be different due to the roofs having unequal pitches. 2. Position the steel square on the tail of the hip rafter, aligning the shorter leg with the plumb cut of the rafter. 3. Use the longer leg of the square to mark the rise and run measurements based on the pitch angles of each roof. The rise represents the vertical height, while the run represents the horizontal distance. 4. Measure and mark the length of the hip rafter on the side with the plumb cut. Typically, this measurement is based on the overall length required for the hip rafter. 5. Connect the marks for the rise and run, extending the lines until they intersect with the mark for the overall length. This will provide you with the outline of the hip rafter. 6. Carefully cut along the outlined shape of the hip rafter using a saw. Precision is key to ensure a proper fit during installation. Always remember to double-check all measurements and angles before cutting the hip rafter. It's also advisable to consult a professional or refer to a comprehensive guide on using a steel square for more detailed instructions specific to your project.
- Q: How do you use a steel square to determine the height of an object?
- To determine the height of an object using a steel square, follow these steps: 1. Ensure the steel square is level and stable by placing it on a flat surface. 2. Position the object you want to measure next to the steel square. 3. Vertically align the long side of the steel square with the side of the object, ensuring it is flush against the object's surface. 4. Observe the measurement markings on the steel square. The point where the top edge of the object intersects with the measurement scale on the square indicates the object's height. 5. Take note of the measurement indicated on the steel square, as it represents the object's height. Please note that if the object has an irregular shape or is not flat, you may need to adjust your positioning to find a consistent reference point for measurement. Additionally, accuracy in calibration and readability of the steel square's measurements are crucial for obtaining precise results.
- Q: What are some common measurements that can be taken with a steel square?
- A steel square is a versatile and essential tool used in carpentry and woodworking. It consists of a long blade and a shorter tongue, forming a right angle. Here are some common measurements that can be taken with a steel square: 1. Right angles: The primary function of a steel square is to ensure the accuracy of right angles. It can be used to check if two surfaces are perfectly perpendicular to each other, such as when constructing frames, cabinets, or bookshelves. 2. Squaring lumber: When working with rough lumber, a steel square can be used to mark and cut it into precise right angles. By aligning the blade against one edge and the tongue against another, the square can provide a guide for making accurate cuts. 3. Determining plumb: A steel square can help determine if an object is perfectly vertical or plumb. By placing the square against a surface and checking for gaps between the blade and the object, one can ensure that it is aligned properly. 4. Measuring angles: Although primarily used for right angles, a steel square can also be used to measure other angles. By aligning the blade or tongue against the desired angle, one can transfer or replicate the angle accurately. 5. Marking parallel lines: A steel square can be used to mark parallel lines by sliding it along the edge of a board while marking the desired distance at various points. This ensures that the lines are equidistant and parallel to each other. 6. Setting bevels: A steel square can be used to set bevel angles on tools such as saws or planes. By adjusting the blade or tongue to the desired angle, it can serve as a guide for achieving consistent and accurate bevel cuts. 7. Checking for flatness: A steel square can be used to check the flatness of a surface. By placing the square against the surface and checking for gaps or irregularities, one can ensure that the surface is even and level. In summary, a steel square is a versatile tool that can be used for various measurements and alignments in carpentry and woodworking. Its primary functions include checking right angles, squaring lumber, determining plumb, measuring angles, marking parallel lines, setting bevels, and checking for flatness.
- Q: How do you use a steel square to find the height of a gable end?
- To use a steel square to find the height of a gable end, you can follow these steps: 1. Begin by standing on a level surface directly in front of the gable end you want to measure. Make sure you have a clear view of the entire gable end. 2. Hold the steel square in your hand, ensuring it is clean and free of any debris that could affect your measurements. 3. Extend your arm fully and hold the steel square horizontally, with one of its sides aligned with the base of the gable end. The base should be the bottom edge of the gable wall where it meets the ground or foundation. 4. Keeping the steel square level, slowly raise or lower it until the other side of the square aligns with the highest point of the gable end. This could be the peak of the gable roof or the highest point of the wall, depending on the specific structure you are measuring. 5. Once you have aligned the steel square with the base and the highest point of the gable end, take note of the measurement indicated on the steel square. This measurement represents the height of the gable end. It's important to remember that the steel square is a versatile tool that can be used for various measurements and calculations in carpentry and construction. However, it is always a good idea to double-check your measurements using other methods to ensure accuracy.
- Q: How do you use a steel square to measure the height of a bookshelf?
- To use a steel square to measure the height of a bookshelf, follow these steps: 1. Position the steel square vertically against the side of the bookshelf, ensuring that it is straight and aligned with the edge of the shelf. 2. Hold the steel square firmly against the side of the shelf, making sure it doesn't move or shift during the measurement process. 3. Extend the steel blade of the square upwards until it reaches the topmost point of the bookshelf. 4. Look at the measurement markings on the blade of the steel square, starting from the bottom, to determine the height of the bookshelf. The measurement should be read at the point where the top of the bookshelf aligns with the blade. 5. Take note of the measurement or record it for future reference. Using a steel square allows for precise measurements as it provides a straight edge and a reliable tool to gauge the height accurately. It is important to ensure that the square is held steady against the bookshelf to avoid any potential errors or inaccuracies.
- Q: Can a steel square be used for checking the alignment of a fence?
- A fence's alignment can indeed be checked using a steel square. This versatile tool, also referred to as a framing square or carpenter's square, serves multiple purposes in the field of carpentry and construction. It comprises a lengthy blade and a shorter tongue, creating a right angle and featuring measurement markings along both sides. In order to verify the alignment of a fence, a steel square can be utilized to guarantee that the posts and rails are appropriately perpendicular to one another. This is crucial for upholding the fence's structural integrity and stability. To begin, position the steel square against one of the fence posts, ensuring that the blade aligns with the post while the tongue extends along the rail. Verify whether the square is flush against both the post and rail. If it is not, proceed to make adjustments to align them properly. Subsequently, employ a level to determine if the square is truly vertical. If the bubble in the level is centered, it indicates that the fence post is plumb. If it is not centered, make the necessary adjustments to the post until it achieves perfect verticality. Repeat this procedure for each fence post and rail to guarantee that the entire fence maintains proper alignment. Utilizing a steel square can assist you in achieving a fence that is straight and level, thereby enhancing both its functionality and aesthetic appeal.
Send your message to us
Alloyed square bar
- Ref Price:
-
- Loading Port:
- China Main Port
- Payment Terms:
- TT OR LC
- Min Order Qty:
- -
- Supply Capability:
- -
OKorder Service Pledge
OKorder Financial Service
Similar products


Hot products


Hot Searches
Related keywords

