


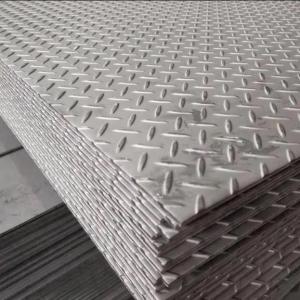
EN10025 Hot rolled steel chequer plate for construction
- Ref Price:
-

- Loading Port:
- Tianjin
- Payment Terms:
- TT or LC
- Min Order Qty:
- 25 m.t.
- Supply Capability:
- 10000 m.t./month
OKorder Service Pledge
OKorder Financial Service
You Might Also Like


Product Description:
OKorder is offering EN10025 Hot rolled steel chequer plate for construction at great prices with worldwide shipping. Our supplier is a world-class manufacturer of steel, with our products utilized the world over. OKorder annually supplies products to European, North American and Asian markets. We provide quotations within 24 hours of receiving an inquiry and guarantee competitive prices.
Product Applications:
EN10025 Hot rolled steel chequer plate for construction are ideal for structural applications and are widely used in the construction of buildings and bridges, and the manufacturing, petrochemical, and transportation industries.
Product Advantages:
OKorder's EN10025 Hot rolled steel chequer plate for construction are durable, strong, and resist corrosion.
Main Product Features:
· Premium quality
· Prompt delivery & seaworthy packing (30 days after receiving deposit)
· Corrosion resistance
· Can be recycled and reused
· Mill test certification
· Professional Service
· Competitive pricing
Product Specifications:
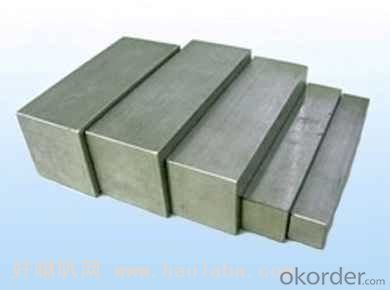
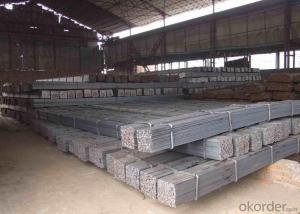
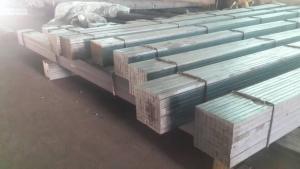
square steel billet
1.3SP, 5SP
2.terms of payment: L/C at sight
3.size: 120*120mm
4.length: 5.8~12m
square steel billet
Specifications
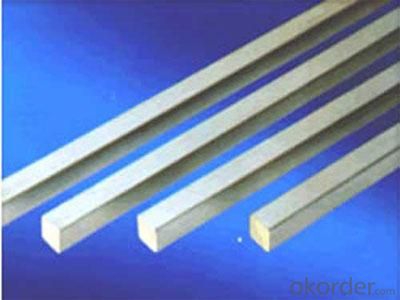
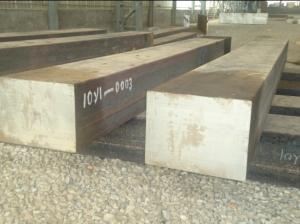
square steel billets
1)We procure world class quality steel billets which meets the specific requirements of the clients
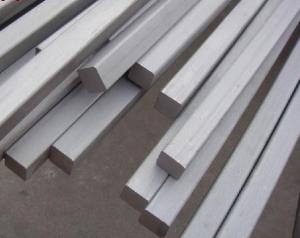
The Billets produced by the company can be broadly divided into three main types i.e.
M.S. Billets
CRS Billets
Special Alloy Billets
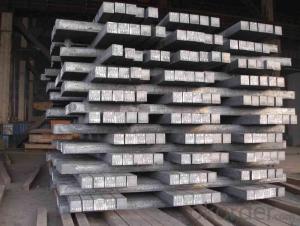
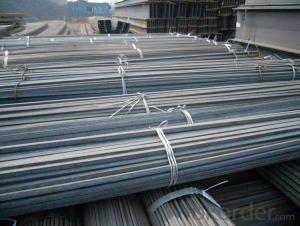
M.S. Billets are used for rolling of TMT Re-Bars of Fe415 and Fe500 Grade and various other structural steel products.
CRS Billets are used fro rolling of CRS TMT Re-Bars.
Special Alloy Billets are used for rolling of any special grade TMT Re-Bars like Earthquake resistant TMT Re-Bars and for special grade structural steel products.
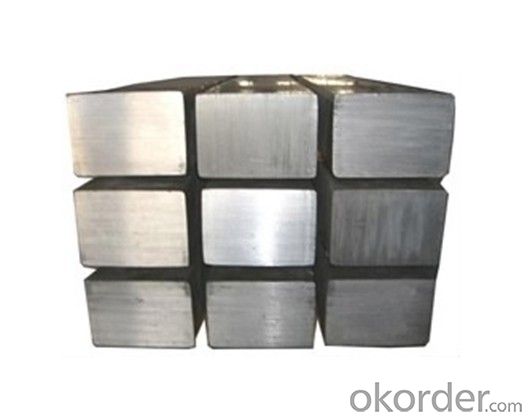
The following are the sizes of Billets available with Shyam Steel Industries Ltd.:
100 X 100
120x120
150 X 150
Physical Properties:
Description
As per IS 2830
Shyam Billets
Bend (max.) 5 mm per meter >= 5 mm per meter
Carbon (max.) 3mm per meter >= 3 mm per meter
Length 3 mt - 13 mt 3 mt - 9 mt
Chemical Properties:
Ladle Analysis:
Designation
Carbon
Manganese
C15 0.12-0.18 0.30-0.60
C18 0.15-0.21 0.30-0.60
C20 0.17-0.23 0.30-0.60
C15 MMn 0.12-0.18 0.60-1.00
C18 MMn 0.15-0.21 0.60-1.00
C20 MMn 0.17-0.23 0.60-1.00
C15 HMn 0.12-0.18 1.00-1.50
C18 HMn 0.15-0.21 1.00-1.50
C20 HMn
0.17-0.23 1.00-1.50
Billets of different designations are manufactured in three different grades namely A, B, C having sulphur, phosphorous content (on ladle analysis) and carbon equivalent as follows:
Chemical Analysis:
Grade Sulphur Phosphorous Carbon Equivalent (CE)1
Max Max Max
A 0.05 0.05 0.42
B 0.045 0.045 0.41
C 0.04 0.04 0.39
Q1: What makes stainless steel stainless?
A1: Stainless steel must contain at least 10.5 % chromium. It is this element that reacts with the oxygen in the air to form a complex chrome-oxide surface layer that is invisible but strong enough to prevent further oxygen from "staining" (rusting) the surface. Higher levels of chromium and the addition of other alloying elements such as nickel and molybdenum enhance this surface layer and improve the corrosion resistance of the stainless material.
Q2: Can stainless steel rust?
A2: Stainless does not "rust" as you think of regular steel rusting with a red oxide on the surface that flakes off. If you see red rust it is probably due to some iron particles that have contaminated the surface of the stainless steel and it is these iron particles that are rusting. Look at the source of the rusting and see if you can remove it from the surface.
Q1: How do we guarantee the quality of our products?
A1: We have established an advanced quality management system which conducts strict quality tests at every step, from raw materials to the final product. At the same time, we provide extensive follow-up service assurances as required.
Q2: What makes stainless steel stainless?
A2: Stainless steel must contain at least 10.5 % chromium. It is this element that reacts with the oxygen in the air to form a complex chrome-oxide surface layer that is invisible but strong enough to prevent further oxygen from "staining" (rusting) the surface. Higher levels of chromium and the addition of other alloying elements such as nickel and molybdenum enhance this surface layer and improve the corrosion resistance of the stainless material.


- Q: How do you use a steel square to scribe a line?
- Before scribing a line with a steel square, it is important to familiarize yourself with the markings and measurements on the square. Typically, a steel square consists of two arms joined at a right angle, with one arm longer than the other. The longer arm is referred to as the blade, while the shorter arm is known as the tongue. To start, position the steel square on the material where you want to scribe a line, making sure that the tongue runs parallel to the edge of the material. This alignment is crucial for achieving accuracy. Securely hold the square in place to prevent any shifting while scribing the line. Next, select a sharp pencil or scribe tool and align it with the desired measurement on the blade. This measurement will depend on the width or length you want the line to be. Once the pencil or scribe tool is aligned, hold it perpendicular to the material and press it against the edge of the blade. Now, carefully slide the pencil or scribe tool along the blade's edge, maintaining consistent pressure. This will create a precise line on the material, following the square's angle. Keep scribing the line until you reach the desired length or position. Remember to proceed with caution and take your time to ensure accuracy while scribing the line. It can be beneficial to practice on scrap material before attempting to scribe lines on your actual workpiece. Moreover, always double-check your measurements and ensure that the square is properly aligned before starting the scribing process.
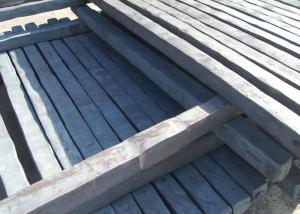
- Q: Can a steel square be used for checking the alignment of deck boards?
- Yes, a steel square can be used for checking the alignment of deck boards. A steel square, also known as a framing square or carpenter's square, is a versatile tool commonly used in woodworking and construction. It consists of a long arm and a shorter perpendicular arm, forming an "L" shape. The long arm can be used as a straightedge to ensure the deck boards are aligned properly. To check the alignment of deck boards using a steel square, place the long arm of the square against the edge of one deck board and extend it across the neighboring boards. This will allow you to visually inspect if the boards are parallel and evenly spaced. The shorter arm can also be used to measure the gap between boards to ensure consistent spacing. Furthermore, the square can be used to check the corners and angles of the deck to ensure they are square and properly aligned. This is important for structural stability and aesthetic appeal. However, it is worth mentioning that while a steel square can be a useful tool for checking alignment, it may not be the most precise option. For greater accuracy, specialized tools such as a laser level or string line may be more suitable for checking the alignment of deck boards.
- Q: How do you use a steel square to measure the height of a doorway?
- To use a steel square to measure the height of a doorway, you would simply place the square vertically against the side of the doorway, ensuring one edge of the square is flush against the floor. Then, read the measurement on the vertical side of the square to determine the height of the doorway.
- Q: What are some alternative tools to a steel square?
- Some alternative tools to a steel square include a combination square, try square, framing square, and a speed square.
- Q: How do you use a steel square to create scarf joints?
- If you want to create scarf joints using a steel square, there are a few steps you need to follow. Begin by determining the desired angle at which you want the joint to be cut. You can either measure this angle with a protractor or refer to the angles marked on the steel square itself. Once you have determined the angle, position the steel square on the edge of the wood piece you wish to cut. Ensure that the square is aligned with both the chosen angle and the edge of the wood. Next, use a pencil or marking knife to trace along the edge of the steel square, marking the desired angle onto the wood. This marking will serve as a guide for your cut. Carefully use a saw to cut along the marked line, following the chosen angle. Take your time to achieve a precise cut and maintain the angle consistently by using a steady hand. After completing the cut, you will have two wood pieces with matching scarf joints. These joints are commonly utilized in woodworking to connect two pieces of wood end to end, creating a stronger joint compared to a simple butt joint. It is important to note that achieving a seamless and robust scarf joint requires both precision and practice. Therefore, dedicate enough time to the process, ensure accurate measurements, and practice your cutting skills in order to create the best possible scarf joint using a steel square.
- Q: What are some common techniques for using a steel square in carpentry?
- Some common techniques for using a steel square in carpentry include measuring and marking 90-degree angles, checking for squareness, laying out stair stringers, marking and cutting rafters, and ensuring accurate and precise cuts for various woodworking projects.
- Q: What are some common uses for a steel square in box joint construction?
- A steel square is an essential tool in box joint construction and is used for a variety of purposes. Some common uses for a steel square in box joint construction include: 1. Layout and marking: A steel square is used to accurately mark and measure the dimensions of the box joint. It helps in setting up the appropriate size and spacing of the finger joints and ensures precision in the layout. 2. Checking for squareness: The steel square is utilized to check the squareness of the corners in box joint construction. This ensures that the joints are perfectly perpendicular and will result in a strong and sturdy box. 3. Aligning and guiding: When assembling the box joint, a steel square can be used to align and guide the pieces together. It helps to maintain the correct angle and ensures that the joints fit snugly, resulting in a tight and secure box. 4. Testing for flatness: The steel square can also be used to test the flatness of the joint surfaces. By placing the square against the surfaces, any gaps or irregularities can be detected and corrected before final assembly. 5. Cutting and sawing: A steel square can be used as a guide for cutting and sawing the box joint. It provides a straight edge for the saw or router, ensuring clean and accurate cuts along the joint lines. Overall, a steel square is an indispensable tool in box joint construction. It helps in layout, alignment, checking for squareness, and ensuring precision cuts, resulting in a well-fitted and strong box joint.
- Q: How do you use a steel square to determine angles for chair rail molding?
- To use a steel square for determining angles for chair rail molding, start by placing the square against the wall with one leg touching the bottom edge of the chair rail. Then, rotate the square until the other leg aligns with the wall. The angle formed by the square's blade and the wall will indicate the angle at which the chair rail needs to be cut. Use this measurement to accurately cut the chair rail molding for a perfect fit.
- Q: What are the advantages of using a steel square over other measuring tools?
- One advantage of using a steel square over other measuring tools is its durability. Steel squares are made from sturdy materials, making them resistant to wear and tear. Additionally, steel squares provide precise measurements due to their rigid design, allowing for accurate angles and lines. Another advantage is their versatility, as steel squares can be used for a variety of tasks such as measuring, marking, and layout work. Overall, the advantages of using a steel square include durability, accuracy, and versatility, making it a reliable and essential tool for many professionals and DIY enthusiasts.
- Q: Can a steel square be used for fence gate installation?
- Yes, a steel square can be used for fence gate installation. It can be used to ensure accurate measurements and angles during the installation process.
Send your message to us
EN10025 Hot rolled steel chequer plate for construction
- Ref Price:
-
- Loading Port:
- Tianjin
- Payment Terms:
- TT or LC
- Min Order Qty:
- 25 m.t.
- Supply Capability:
- 10000 m.t./month
OKorder Service Pledge
OKorder Financial Service
Similar products

Hot products


Hot Searches
Related keywords

