


Fiber Cement Board 100% Non-Asbestos Smart Board
- Ref Price:
-
$1.50 - 3.00
/ m²

- Loading Port:
- Shanghai
- Payment Terms:
- TT or LC
- Min Order Qty:
- 10000 m²
- Supply Capability:
- 300000 m²/month
OKorder Service Pledge
OKorder Financial Service
You Might Also Like

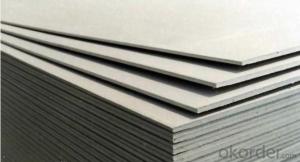

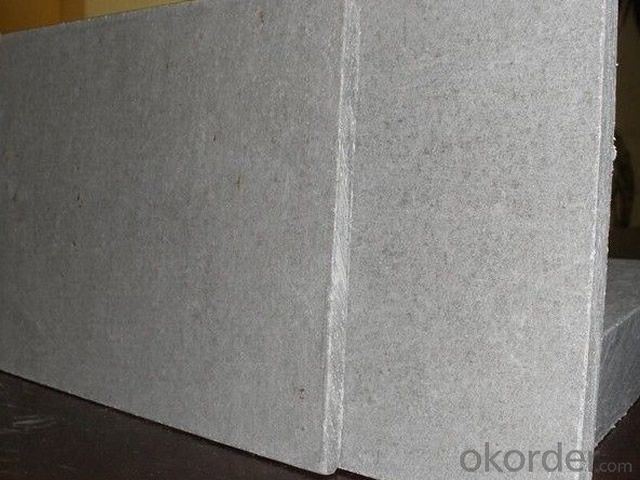
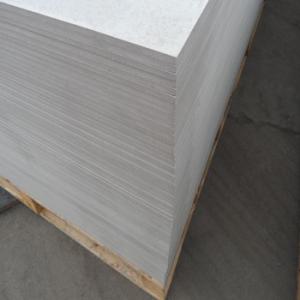
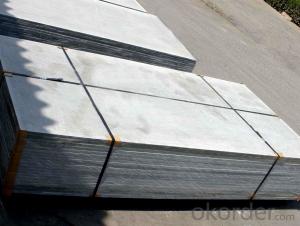
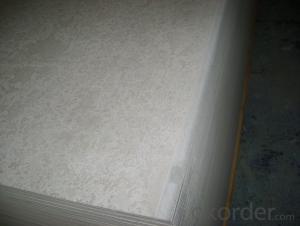
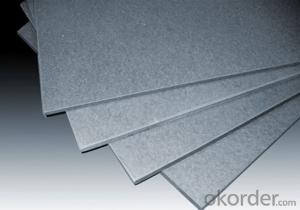
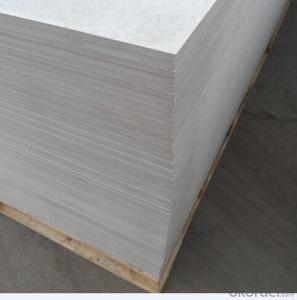
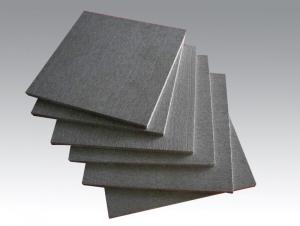
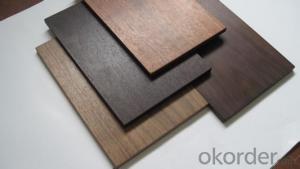
Fiber cement board, using high quality fiber and mineral substances as main content,was made with forming by advanced technique & technological process & through high temperature & high pressure maintenance & special treatment.
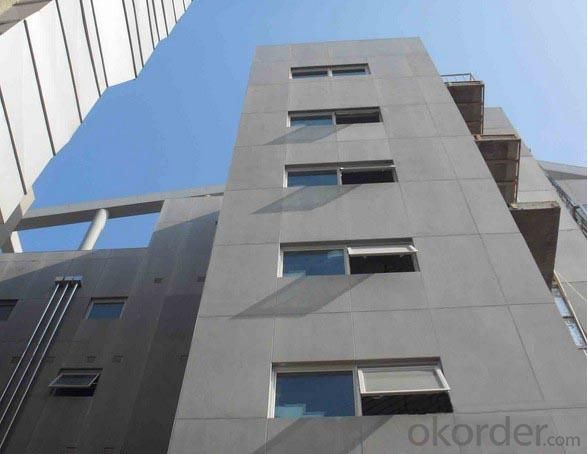
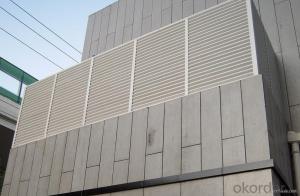
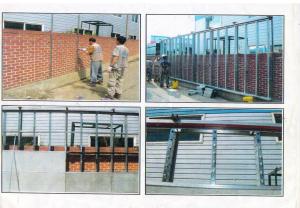
Product Applications:
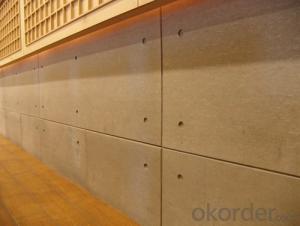
1.Indoor ceiling of industrial and resident building.
2.Partition of industrial and resident building.
3.The ceiling and partition of the bathroom and other wet condition building.
4.Indoor ceiling and partition as base board of the decoration for operation room,clean room of hospital or laboratory .
5.The fireproof board of the air passage.
6.Furniture or furniture's accessories.
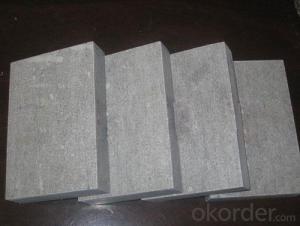
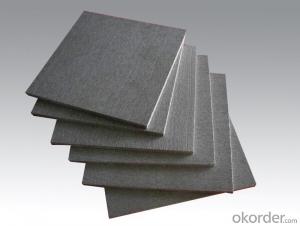
Product Advantages:
1)excellent fire-proof
2)excellent damp-proof
3)Durability and long service life
4)high strength
5)stable dimensions
6)good heat and sound insulation
7)non-asbestos
8)mould resistant
9)no deformation
Main Product Features:
It's 100% free of asbestos, formaldehyde, benzene and other harmful substances and with excellent performance like high strength, large size, light weight, fire and water proofing, green and environmental friendly, high efficient and energy-saving. Therefore, this kind of new material is vigorously developed and recommended by the country.
Product Specifications:

FAQ:
1. Which port do you choose for FOB ?
Answer: FOB Shanghai Port.
2. What's your delivery time of your products?
Answer: About 20 days after confirm the order.
3. What about the terms of payment?
Answer: 30%TT advanced payment, balance seven days before shipment.
Other terms of payments also can be negotiated.
4. What's your Minimum order quantity(MOQ) of your product?
Answer: Generally, MOQ is 1x20' container. Others can contact with me directly.
Images:


- Q: We're tiling our basement. The floor is plain concrete. Do I need to put a layer of plywood, then a layer of cement board, then the tiles, or do I just need a layer of cement board then the tiles?
- The dude, I`ve seen many different ways of doing this and the best result is using a orange plastic membrane just for this purpose. It has a diamond shape on one side an smooth on the other side. This membrane is about 1/4 inch thick at the most. This membrane is used by tile contractors on concrete and plywood floors. It`s used just like cement board but comes in a roll. It is installed in the same way as cement board- 'thinset' under it. You should be able to find this membrane at a tile store or even a Lowes or Home Depot. The only time I`ve seen tile just on the concrete floor is when the concrete had NO cracks or cut joints in it. If the floor is cracked any where that is where you will have the new tile joints to start cracking. And no one likes to go back and try to re-grout just to have it keep cracking. Hoped this point you in the right direction. No plywood is needed. May your new tile floor look Great and last forever- 'without' repair...
- Q: how do I drywall over cement in a basement? How do i attach the drywall to the walls?
- You have a couple of options, both similar. Either build a stud wall which will lose you about 3 1/2 of depth or attach firring strips to the wall. You can use 2 x 4s laid flat and attach them to the cement walls with concrete nails, concrete screws (often referred to by a popular brand name such as Tap-Con. I prefer using a powder-activated tool which uses .22 caliber cartridges to drive special nails into the cement. Very fast and you can rent one for about $35/day, nails extra. Put plastic up first, then the 2/4's and nail them flat to the wall. A great time to insulate with 1 1/2 foam board between the boards, which will reduce noise and help to moderate your basement temperature. I'd recommend using green board which is moisture resisitant. I've done this myself and it is a very satisifying improvement.
- Q: do I have to remove the vinyl floor covering or can I just put the cement board over it
- i about 95% sure you can install the cement boared right over the vinyl floor covering.go to hgtv and i am sure they will have your answer on there web sight but i am almost sure you can do it.
- Q: How many colors does cement have?
- A foreign reinforced concrete research institute invented a cheap and common shielding material - carbon cement. In order to make the cement conductive, in the cement added conductive properties of anthracite or coke powder. Building the building with this kind of cement makes the building itself a barrier and more secure and reliable than a metal barrier. When making conductive cement, pay attention to its high reflection coefficient, resulting in a high level of indoor electromagnetic energy. For the protection of staff and sensitive equipment, the Russian Institute of Concrete and Reinforced Concrete Science has also found a more ideal conductive cement, both a good absorption of electromagnetic radiation, but also has a very low reflection coefficient. The success of its development can reduce the cost of electromagnetic protection to the original 1%. Conductive cement can be used not only to build new plants but also as protective coatings. As the conductive cement will heat when there is a current through, this heat is safe and does not cause burning, so it can be used to build heat exchangers, drying rooms, non-icing airport runways, sidewalks and stairs, Wall of the house.
- Q: ok so im trying to attach the cooling fan to my cpu on my motherboard and i cant find any glue but i did find some patch cement in a road hazard kit, i was wondering if this would work or would my computer fry?
- You need thermal paste. You can get a very small tube, enough for 1-3 applications (?) at COMPUSA (or other such place) for under $5. I work on m-boards/processors all the time and know that some kind of adhesive would probably ruin your computer. I've had many heat sinks/fans that would not separate from the processor, and sometimes lift it out of the socket without loosening the arm that tightens it. The kind of damage cant be (easily/cheaply) repaired. Get thermal paste, apply very thin amount to proc, covering the entire (proc) heat sink. Same to heat sink/fan.
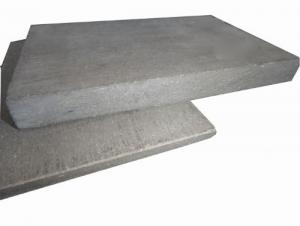
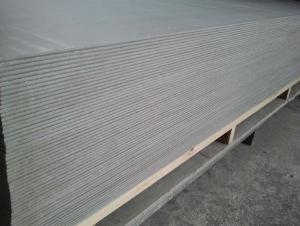
- Q: What are the fiberboard specifications? Fiber cement board thick
- Length 2.44 m width 1.22 m, which is the specification, the thickness is between 5 and 30 mm
- Q: Installing a shower in my basement, and am framing around a fiberglass 36 square shower base. should I put it flush against the frame and then attach cement board (it will overhang) or leave room to slide cement board between base and frame? Thanks!
- I saw another answer that tells you to leave it above the flange of the base, but here is the problem with that and how I do it. If you leave it short of the base, there is now a gap however high the flange is with nothing to support the tile OR a place for the grout the sit because there is a void behind the tile. What I do is measure the thickness of the base ( usually 1/4) and then I rip a filler strip the same thickness as the flange. I nail it to the studs from the flange up to where you are going to stop the backer board or to the ceiling and then attach Hardibacker or Wonderboard to the furred out studs. Now the substrate can be installed 1/4 inch off the bottom of the base unit to avoid water wicking up and the tile has a full backing to within 1/4 of the base as well as the grout goes all the way in instead of sitting only BETWEEN the tiles as it would if you left it 1 1/2 up off the bottom sitting on the top of the flange. The only adjustment you will need to do is set the shower valve out whatever the thickness of the furring strips you add so it finishes on the tile surface to the manufacturers specs.
- Q: im using a cement backer board why do i need a scratch coat and mesh?
- More info is needed, but if on the wall glued and screwed to the studs you will not need anything else. (backer-on screws ) help because they countersink themselves. On A floor application the minium substrate suggested is 1 1/4 inches total, but I NEVER use less than 1 1/2 inches combined. Plywood only I do not use OSB board for tile at all. If using Marble tile or large 12x12 or larger tile, there can not be flex in the floor because grout will pop, and crack and the tile or Marble will not hold up. Thicker is certainly better. I also install cement board with thin-set over plywood nailed and screwed to secure. I have never used a scratch coat with cement board, I would just use the true mud base if needed. I hope this helps you, but please give more info next time. SO normal tile installations with cement type adhesive ( thin-set )
- Q: do i need mortar under the cement board?
- no you just screw it to the wall or studs. then after its up you tape and mortar the joints with special mortar and tape. then you tile or put you tub surround up over it
- Q: Our (rented) townhouse has a very bleak cement block basement. Right now the blocks are painted white and cream (and not in a pretty pattern) and the floor is painted dark gray. We want to use the basement as a fitness room and a crafting area for scrapbooking. The lighting is also terrible. What are some ways we can brighten up the space and make it more hospitable without doing any permanent construction (remember we are renting) or spending a lot of money?
- Craig's List will have inexpensive items (albeit used) for decorating. As for light construction work: The most important issue is waterproofing. Use Super ThoroCoat to seal and color the walls. For the floor, use oops paint from home depot. A 5 gallon bucket of an off color should do the trick, and it is normally marked down from $125 to $15. Yes, that is $110 off the normal price. Our local store ALWAYS has one or two garage or concrete floor 5 gallon buckets in the oops area that someone didn't pick up or didn't particularly like the color of. (Remember the most important rules in painting a concrete floor: Clean the floor first, make sure it is dry, apply paint and WAIT 48 hours before walking on it and three more days before putting furniture down on it.) Then, area rugs are cheap enough on Craig's list as well as Ikea furniture. They are BOTH available in good condition on Craig's list with little time wasted looking and great prices. Your landlord will appreciate your use of ThoroCoat or ThoroSeal on the walls and concrete paint on the floor. You will have done the right thing and have made it moisture resistant and waterproof too. FYI, our townhouse basement is done with these sealants. It worked well at keeping dust sealed in as well as taking away the dampness associated with normal basements.
Send your message to us
Fiber Cement Board 100% Non-Asbestos Smart Board
- Ref Price:
-
$1.50 - 3.00
/ m²
- Loading Port:
- Shanghai
- Payment Terms:
- TT or LC
- Min Order Qty:
- 10000 m²
- Supply Capability:
- 300000 m²/month
OKorder Service Pledge
OKorder Financial Service
Similar products
Hot products

Hot Searches
Related keywords

