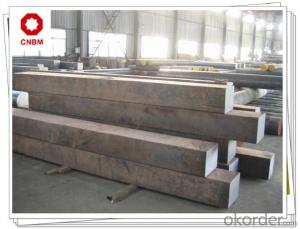


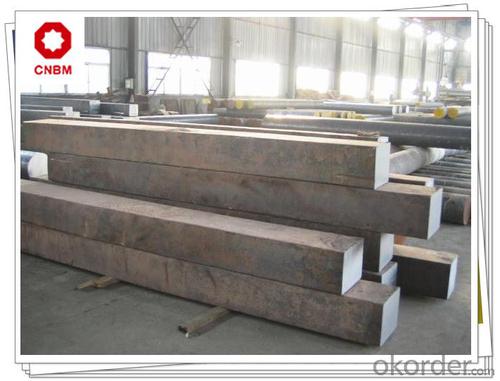
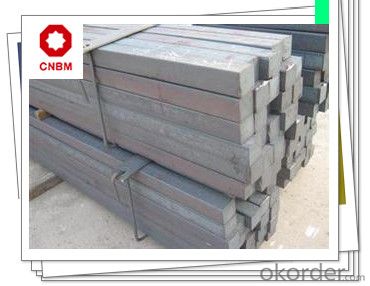


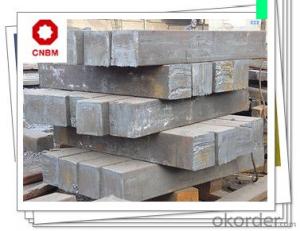
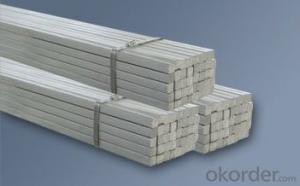
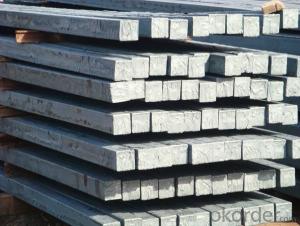
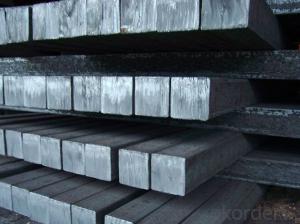
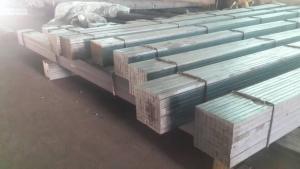
Carbon Structural Steel Square Bars S20C
- Ref Price:
-

- Loading Port:
- Shanghai
- Payment Terms:
- TT OR LC
- Min Order Qty:
- 400 m.t
- Supply Capability:
- 80000 m.t/month
OKorder Service Pledge
OKorder Financial Service
You Might Also Like


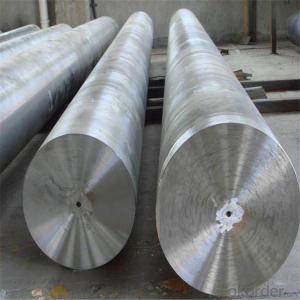
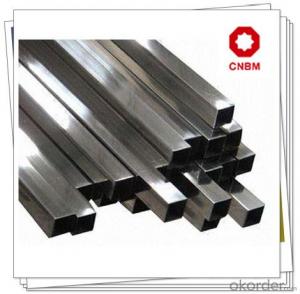
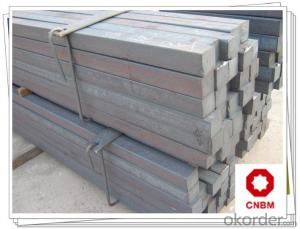
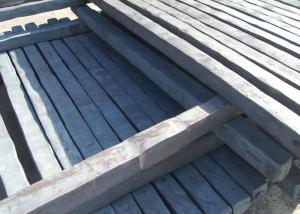
Carbon Structural Steel Square Bars S20C Specification 1, Size: 120*120mm; 130*130mm; 150*150mm; 160*160mm; 200*200mm 2, Length: Max 12m 3, Heat Treatment: Normalizing, Annealing, Tempering, Quenching 4, Surface Treatment: Black, Polished, Galvanized Application 1, Used in the manufacturing mechanical parts with high toughness but can not suffer great stress 2, Used in manufacturing carburizing and carbonitriding parts with high surface hardness. Chemical Composition % Products Show C Si Mn P S Cr Ni Cu 0.08-0.23 0.15-0.35 0.30-0.60 ≤0.030 ≤0.035 ≤0.20 ≤0.25 ≤0.25


Work Shop

About Us


- Q: Can a steel square be used for checking the levelness of a surface?
- Typically, a steel square is not employed to verify the levelness of a surface. Commonly known as a carpenter's square or a try square, a steel square is mainly utilized in woodworking and construction to measure and mark right angles. It is not specifically engineered or adjusted to determine levelness. To assess the levelness of a surface, it is more suitable to use a level tool like a spirit level or a laser level. These tools are specifically designed to indicate if a surface is perfectly horizontal or vertical, using a bubble or laser line respectively.
- Q: Can a steel square be used for checking the alignment of fences?
- Indeed, the alignment of fences can be assessed using a steel square. This multipurpose tool lends itself to diverse measurements and alignments. In terms of fence alignment, a steel square assists in guaranteeing that the fence posts are perpendicular to the ground and that the fence panels are appropriately aligned. By positioning the steel square adjacent to the posts and panels, it becomes effortless to ascertain their straightness and proper alignment. The steel square's precise right angles and straight edges render it an efficient instrument for this specific task.
- Q: How do you use a steel square to determine the length of a miter cut?
- Here are the steps for accurately determining the length of a miter cut using a steel square: 1. Align one arm of the steel square with the edge of the material that needs to be cut, placing it at a 45-degree angle. 2. Mark the material along the other arm of the square using a pencil or a scribe. This mark represents the angle of the miter cut. 3. Measure the length of the marked line using a tape measure or a ruler. This measurement indicates the length of the miter cut. 4. Transfer the measured length to the material that requires cutting. Use the pencil or scribe to mark the length on the material. 5. Verify the alignment of the steel square and the marked line to ensure accuracy. Make any necessary adjustments before proceeding with the cut. 6. Cut along the marked line using a suitable saw for the material, creating the miter cut. By employing a steel square in this manner, you can precisely determine the length of a miter cut and guarantee that your material is cut at the desired angle.
- Q: Can a steel square be used for checking the alignment of a planer table?
- Checking the alignment of a planer table is possible with the use of a steel square. A versatile tool, the steel square finds common application in woodworking and construction, serving to measure angles, verify squareness, and establish alignment. To assess the alignment of a planer table, simply position the steel square against the table's edge and ensure it seamlessly aligns with the surface. Through a visual examination of the square in relation to the table, you can determine if the table requires adjustment or if it is properly aligned. Moreover, the steel square proves beneficial in examining the alignment of the fence and other planer components, guaranteeing accuracy and precision in your woodworking endeavors.
- Q: How do you use a steel square to determine the length of a stringer?
- To use a steel square to determine the length of a stringer, you would measure the rise and run of the staircase. Then, using the rise and run measurements, you can calculate the length of the stringer by utilizing the Pythagorean theorem.
- Q: Are there any limitations to using a steel square?
- The use of a steel square does have its limitations. To begin with, the size and weight of a steel square can pose challenges when handling it, particularly for those with limited strength or dexterity. This can make it tough to use the square for extended periods or for intricate projects that require precise measurements. Additionally, steel squares are primarily designed for right angles and straight measurements, which means they may not be suitable for projects involving angles other than 90 degrees. In such cases, achieving accurate angles may require the use of additional tools or techniques. Furthermore, if not properly maintained, steel squares can be susceptible to rust and corrosion. This can affect their accuracy over time, necessitating regular cleaning and maintenance to ensure reliable measurements. Lastly, steel squares may not be appropriate for certain materials or surfaces. For instance, utilizing a steel square on delicate or easily scratched materials like polished wood or glass could potentially cause damage. In such instances, alternative measuring tools or protective measures may need to be employed. Despite these limitations, steel squares continue to be widely used and valued for their strength, durability, and accuracy in numerous woodworking, metalworking, and construction projects. However, it is crucial to be aware of their limitations and adapt accordingly when necessary.
- Q: How do you use a steel square to determine the angle of a bevel cut?
- To use a steel square to determine the angle of a bevel cut, you can follow these steps: 1. Begin by placing the steel square on the edge of the material that you want to cut. Make sure that one arm of the square is aligned with the edge of the material, and the other arm is perpendicular to it. 2. Next, adjust the square so that the perpendicular arm is parallel to the surface you are working on. This will ensure accuracy in measuring the angle of the bevel cut. 3. Once the square is positioned correctly, take a protractor or a bevel gauge and place it against the angled edge of the square. Align the gauge with the perpendicular arm to measure the angle. 4. Read the measurement from the protractor or bevel gauge. This will give you the precise angle of the bevel cut. 5. Finally, transfer the measured angle to your saw or cutting tool by adjusting its bevel or miter gauge accordingly. This will ensure that your cut matches the desired angle. Using a steel square to determine the angle of a bevel cut is a simple and effective method, especially when precision is key. By following these steps, you can accurately measure and replicate the desired angle for your bevel cuts.
- Q: What are some common uses for a steel square in roofing?
- A steel square is commonly used in roofing for tasks such as measuring and marking angles, cutting straight lines, checking for squareness, and laying out roof rafters and trusses accurately.
- Q: How do you use a steel square for making accurate miter cuts?
- Achieving accurate miter cuts with a steel square involves several steps: 1. Ensure that your steel square is clean and free of dirt or debris. This is important for obtaining precise measurements. 2. Position the steel square flat against the material's edge where the miter cut will be made. Make sure it is aligned correctly and that the desired cutting angle is perpendicular to the square. 3. Securely hold the square against the material to prevent any movement or shifting. If necessary, use clamps or a vise to keep the square in place. 4. Use a pencil or marking knife to mark the line where the miter cut will be made. Align the square with the desired angle and trace along its edge to create an accurate guideline. 5. Verify the square's alignment before proceeding. It is crucial to confirm that the square has not moved while marking the line. 6. Carefully follow the marked line using a miter saw or handsaw to make the miter cut. Take your time and make precise cuts to achieve the desired angle. 7. After making the cut, check the accuracy of the miter by fitting the two cut pieces together. They should fit snugly and form a perfect angle. If adjustments are necessary, use sandpaper or a file to refine the cut until the desired fit is achieved. Remember, practice and patience are essential when using a steel square for accurate miter cuts. Over time, you will improve and achieve precise, clean cuts for your woodworking projects.
- Q: What are some common uses for a steel square in picture framing?
- The steel square, also referred to as a framing square or carpenter's square, serves as a versatile tool in the realm of picture framing. Its applications encompass a range of functions, including: 1. Measurement and marking: With precise measurements etched onto its surface, the steel square enables framers to accurately measure and mark the dimensions of picture frames. This proves particularly beneficial in guaranteeing the squareness of the frame and the alignment of its corners. 2. Angle verification: Boasting a 90-degree angle, the steel square proves instrumental in assessing the squareness of corners and ensuring proper frame alignment. Framers can position the square against the frame's corners to verify if they possess perfect squareness or necessitate adjustments. 3. Miter cutting: When crafting mitered corners for picture frames, the steel square can be employed to delineate and guide the cuts. By placing the square against the frame's edge, framers can draw a straight cutting line at the desired angle, thereby ensuring precise and accurate mitered corners. 4. Center determination: Frequently, framers must pinpoint the center point of a frame to ensure optimal placement of artwork or mounting hardware. The steel square can facilitate this process by marking the center through diagonal alignment of the square's edges across the frame, resulting in an intersection at the center point. 5. Mat board alignment: Mat boards serve as a common component in picture framing, enhancing the aesthetic and safeguarding the artwork. The steel square can assist in aligning the mat boards by positioning the square against the edges, guaranteeing their perpendicularity to one another. 6. Hardware alignment: The installation of various hardware components, such as D-rings, wire, or hooks, often proves necessary for hanging picture frames. The steel square can ensure the proper alignment and even spacing of these hardware pieces, culminating in a balanced and well-hung frame. All in all, the steel square constitutes an invaluable tool for picture framers, facilitating precise measurements, square corners, accurate cuts, and proper alignment of frames and mat boards.
Send your message to us
Carbon Structural Steel Square Bars S20C
- Ref Price:
-
- Loading Port:
- Shanghai
- Payment Terms:
- TT OR LC
- Min Order Qty:
- 400 m.t
- Supply Capability:
- 80000 m.t/month
OKorder Service Pledge
OKorder Financial Service
Similar products

Hot products

Hot Searches
Related keywords

