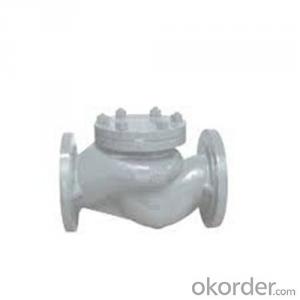

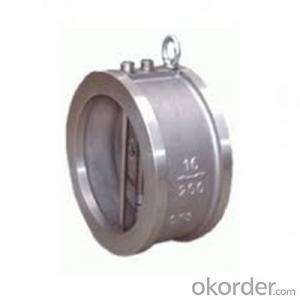
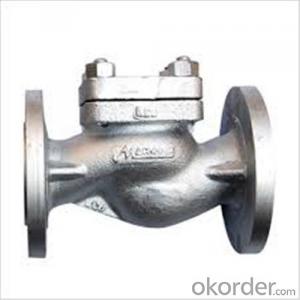
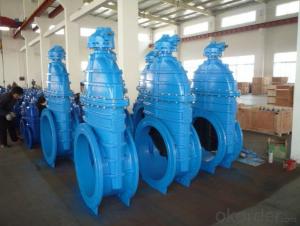
API Cast Steel Lift Check Valve 1500 Class
- Ref Price:
-

- Loading Port:
- Shanghai
- Payment Terms:
- TT OR LC
- Min Order Qty:
- 10 pc
- Supply Capability:
- 100 pc/month
OKorder Service Pledge
OKorder Financial Service
You Might Also Like

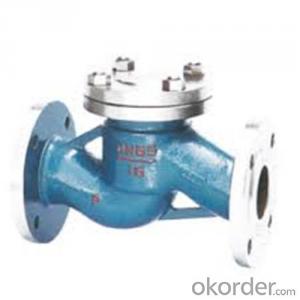


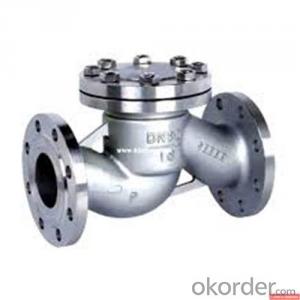
API Cast Steel Lift Check Valve 150 Class
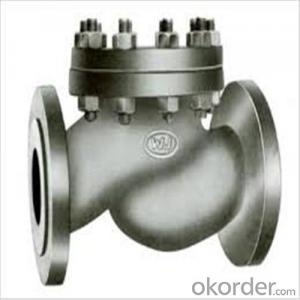
The features of Cast Steel Lift Check Valve
Bolted Bonnet;Swing and lift disc;Metallic seating surfaces.
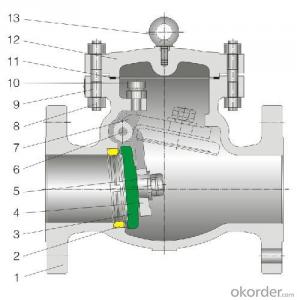
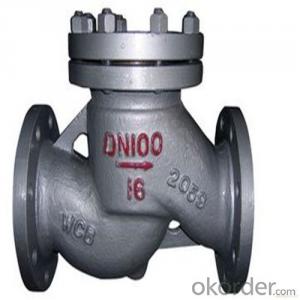
Body and Bonnet Connection of Cast Steel Lift Check Valve:
The body and bonnet of Class150~Class900 check valves are usually with studs and nuts.And the body and bonnet of Class1500~Class2500 check valves are usually of pressurized seal design.
Body-To-Bonnet Joint of Cast Steel Lift Check Valve:
Stainless steel + flesible graphite wounded gasket is used for Class 150 and Class 300 check valve;Stainless steel + flexible graphite wounded gasket is used for Class 600 check valve,and joint gasket is also optional for Class 600 check valve;Ring joint gasket is used for Class900 check valve;Pressurized seal design is used for Class 1500~Class 2500 check valves.
Seat of Cast Steel Lift Check Valve:
For carbon steel check valve,the seat is usually forged steel.The sealing surface of the seat is spray welded with hard alloy specified by the customer.Renewable threaded seat is used for NPS<10 check="" valves="" and="" welded="" on="" seat="" can="" be="" also="" optional="" if="" being="" requested="" by="" the="" customer.welded="" is="" used="" for="" nps="">12 crbon steel gate valves .Forstainless steel check valve,integral seat is usually adopted ,or to weld hard alloy directly integrally.Threaded or welded on seat is also optional for stainless steel check valve if being requested by the customer.
Parameter of Cast Steel Check Valve:
Standard Criteria | ASME/ANSI/API customize |
Pressure Rating | 150 Class 300 Class 600 Class 900 Class 1500 Class 2500 Class customize |
Valve Size | 50 mm 65 mm 80 mm 100 mm 125 mm 150 mm 200 mm 250 mm 300 mm 350 mm 400 mm 450 mm 500 mm 600 mm 650 mm 700 mm 750 mm |
2 inch 2.5 inch 3 inch 4 inch 5 inch 6 inch 8 inch 10 inch 12 inch 14 inch 16 inch 18 inch 20 inch 24 inch 26 inch 28 inch 30 inch customize | |
Actuator | Automatic customize |
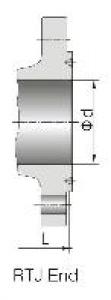
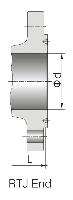
Connection | Butt Welding Flange RF Flange RTJ customize |
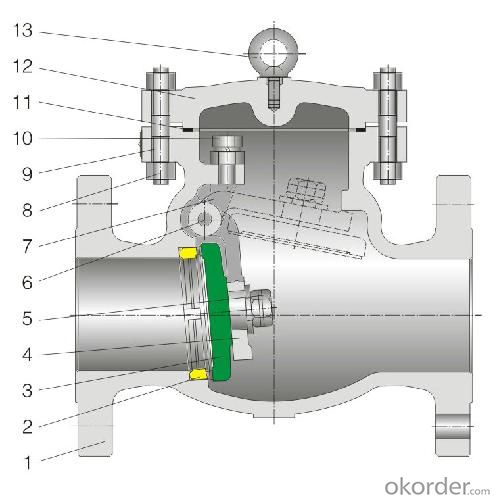
1-Body Material | A216 WCB A351-CF8 A351-CF8M customize |
2-Seat ring | A351-CF8 A351-CF8M A105+13Cr Tool Steel+A105 customize |
3-Disc | Tool Steel+A216 WCB A351-CF8M A351-CF8 A216 WCB+13Cr customize |
4-Arm | A351-CF8 A216 WCB A351-CF8M customize |
5-Nut | A194 8M A194-8 A194 2H customize |
6-Arm pin | A182-F6a A182-F316 A182-F304 customize |
7-Yoke | A351-CF8 A351-CF8M A216 WCB customize |
8-Bonnet nut | A194 8M A194-8 A194 2H customize |
9-Bonnet bolt | A193-B8 A193-B8M A193-B7 customize |
10-Bolt | A193-B7 A193-B8 A193-B8M customize |
11-Gasket | graphite+304 graphite+316 customize |
12-Bonnet | A216 WCB A351-CF8M A351-CF8 customize |
13-Eye bolt | A181 customize |
Design Standard | API 6D BS 1868 customize |
Connection Standard | API 605 ASME B 16.25-2007 ASME B 16.47A ASME B 16.47B ASME B 16.5 MSS SP-44 customize |
Test Standard | API 598 API 6D customize |
Face to Face | ASME B 16.10 customize |
Pressure-temperature ratings | ASME B 16.34-2004 customize |
Wall thickness dimension | API 600 BS 1868 |
FAQ of Cast Steel Check Valve:
Q1:I can’t find the type of steel check valve which I need. what can I do?
The chart above only lists out some common composition of steel check valve parts.We may provide other different parts material composition according to the customer's request or the actual valve working condition.
Q2:Which certification do your products pass?
Our products are in accordance with ISO 9001、ISO 14001、API 6A、API 6D、TS CE、API607/6FA/BS6755.
- Q: Among butterfly,ball,needle and gate valves which is used mostly in pneumatic system?
- It depends on what sort of system you are operating. Most butterfly valves leak, a few don't. Ball valves are instant operation, and don't normally leak. Needle valves are used for fine control of the flow rate. Gate valves are quick to operate, and don't normally leak. On aircraft pneumatic systems, butterfly valves are common, where a leak is permissable. Where no leak is permissable, slide valves are used, which have rubber seals.
- Q: Can someone please help me on this anatomy question:Describe the physical similarities and differences in the structure of the AV valves and the semilunar valves.Thanks
- The two atrioventricular (AV) valves ensure blood flows from the atria to the ventricles, and not the other way. These are large, multicusped valves that prevent backflow from the ventricles into the atria during systole. They are anchored to the wall of the ventricle by chordae tendinae, that prevent the valve from inverting. The two semilunar (SL) valves are present in the arteries leaving the heart, and they prevent blood flowing back from the arteries into the ventricles. These are positioned on the pulmonary artery and the aorta. These valves do not have chordae tendinae, but are more similar to valves in veins.
- Q: My chevy s-10 pickup automatic is shifting rough from 1st to 2nd, gives the truck a bump when shifts. Tech says I likely need a valve body replacement. He also indicated I could drive this for a while if I wanted. What more can happen if I prolong replacement? Truck is still at a fair blue book value and I'm wondering if I should sell it now. I have been very lucky in not having to sink any $ aside from normal wear and tear into it, so for me to have it replaced is the first $ investment. I have 103k miles for 2000. Anyone else in a sim sitch, or having multiple problems at this mileage as well? I'm wondering if this is the begininng of the end?
- How much do you think you'll sell a truck with a failing transmission for? Or, are you going to hide the problem from the buyer? Flush it again, and spring for synthetic this time.
- Q: Is it supposed to go on or only in cases when the power goes out??? I bought this pump and the directions are horrible!!! There isn't room for both the air stone and the check valve!! How does this stupid thing work???
- Check valve designated that it lets air go in one direction and stops water from going in reverse direction. For example if your airline gets disconnected from airpump by accident and drops on floor water won't gets syphoned out frmo tank to floor. You'd be surprised how much water can end up on floor in this scenario ;-) In order to install check valve you have to cut airline somewhat in halfs and put your checkvalve between pump and airstone. Arrow shows direction in which it passes air.
- Q: OK, I would like to run my shorty headers open on my Camaro, but I have two questions.1. I heard valve damage may occur because cold air gets in there. Why isn't this the case with straight pipe exhaust, doesn't the cold air travel to the valves in that case anyway?2. Right now with my headers to off road y pipe I have 2 o2 sensors to throw the check engine light off, and it has worked. If I run open headers, will they still work?
- The valve damage from open headers sounds more like a theory than reality. I, and numerous other drag racers, have run open headers for decades without valve damage. More often than not, it's either the lower end or other parts of the valve train that crap out long before the valves. The O2 sensors will work if they stay hot enough, otherwise you may need to put heated sensors in.
- Q: I have 06 Suzuki gsx-r 750 and i was wondering what are the signs or how do i know that my valves need to be adjusted?
- Actually, your valves will not clatter, they will get very quiet. Valve clearances ordinarily tend to tighten up over time. A tappy valve is a happy valve. Measure the clearances with a feeler gauge to tell if they need adjustment. Some early warning signs of tight valve clearances include an unstable idle, stalling on the overrun, and stumbling off idle. You should also keep a record of your clearances before adjustment, shim sizes as found, clearance after adjustment, shim sizes after adjustment, and mileage. That information will help you anticipate adjustments, give you an idea of what shim sizes to have on hand, and give you an indication of any unusual wear patterns. Keep this information in mind when chasing carb and ignition problems, too. Driveability issues attributed to carburetion are often caused by tight valve clearances instead. If it has been a while since your last valve adjustment, set them first, before chasing carb issues.
- Q: I was wondering if anyone knew how important tire valve stem caps were in maintaining inflation pressure in auto tires? I noticed one of my tires losing air slowly (from 30 psi to 21 psi in about a week) and this tire (unlike the other three) also had a missing tire valve stem cap. I've just replaced it, and was wondering if a missing valve stem cap caused faster loss of tire pressure.
- Tire Caps
- Q: okay so i recently brought a trumpet and the valve keys were getting stuck. i used the valve oil and it worked. but then when i put the valve key back in and tried blowing through no sound came out. i think it's because i didnt put it back in right. now my question is how do i put it in right? i tried everything but it's still not making a sound. thanks,
- The first thing you should check is the order of the valves. take them all out and look on the sides of them for a number. One should have a 1 on it, another will have a 3 and the other one will probably be unmarked but that's obviously the one in the middle. On the outside of your trumpet there will be a 1 and a 3. The valve with the 1 on it goes in the slot that has a 1 on the outside, etc. Make sure you put these in right. if it's still not playing after you put the valves in and they're secured, twist the tops of the valves where the pearls are clockwise until they don't turn anymore. This should fix your problem.
- Q: How do you remove a richdel sprinkler valve, when I turn the body of it, it doesn't unscrew, it just turns in place.
- if the valve itself has gone bad, then you can actually replace it without haveing to remove it. richdells are now called irritrol valves. they are not that hard to replace the guts and top part of the valve. if you can find the same valve off the internet or a landscape store, just take apart the old one and replace the insides with the parts from the new valve, and replace the top piece with solenoid as well. if you cant find the same kind of valve, just dig up a nice hole and cut the pipes and replumb it. thats pretty easy too. the more room you have on the pipe to cut, the easier it will go. but richdells are now irritrols. the parts will be the same, just have a different label. ive seen the richdells last over 20 years though good luck and hope this helps
- Q: On a Chevrolet truck with a V8...One valve cover has a PVC valve and the other a push-in breather. Would it hurt to put a second PVC valve in so I have one on each side and run 3/8 hose to a T fitting then to the carburator? Good/Bad/Wouldn't hurt?
- I own a shop, and understand the system. You must have a filter on one side that allows air to flow into the crankcase, while a metered (PVC) amount is pulled through the engine for a complete evacuation of the crankcase. If you tie both ends together, you would have no air flow through the engine. What it would do is; build up pressure inside the engine, and force the oil out every seal, and crack in the engine. In othe words, it would use oil in a bad kind of way. Air must enter the engine, travel through the engine, and go back through the combustion side of the engine, and exit out the exhaust system. The vacuum inside the crankcase is a different system than the combustion side. If an engine does not create the correct amount of vacuum inside the crankcase, the piston rings will not seal as they should, and allow combustion to enter the crankcase building pressure. The PVC valve is a metering check ball that allows air to flow one way, but not the other, thus hooking a hose between the two sides will not allow the engine to ingest fresh air from any where. The vent cap for one side is a filter, and allows the fresh air to enter the engines crankcase. The air travels through the engine and evacuates the blow by gases from the piston rings. Equal amounts of pressure on both sides of the rings is what keeps the gases from just blowing past the rings. A pressure is actually built up between the top, and the bottom rings that make the rings expand and seal off even better. Upset this pressure on either side of the rings, and you have an engine that uses oil. It will either burn the oil, and/or throw the oil out of the engine. Its not really complicated how the system works, but disrupt the flow, or not have an equal amount of pressure on both sides of the piston rings, and you will have an unhappy engine. This applies to stock engines that come from the factory with a PVC system. Glad to help out, Good Luck!!!
Send your message to us
API Cast Steel Lift Check Valve 1500 Class
- Ref Price:
-
- Loading Port:
- Shanghai
- Payment Terms:
- TT OR LC
- Min Order Qty:
- 10 pc
- Supply Capability:
- 100 pc/month
OKorder Service Pledge
OKorder Financial Service
Similar products

Hot products

Hot Searches
Related keywords

