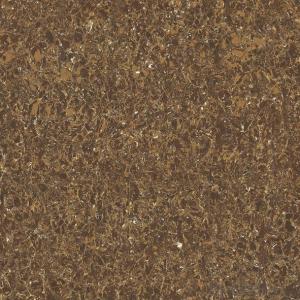

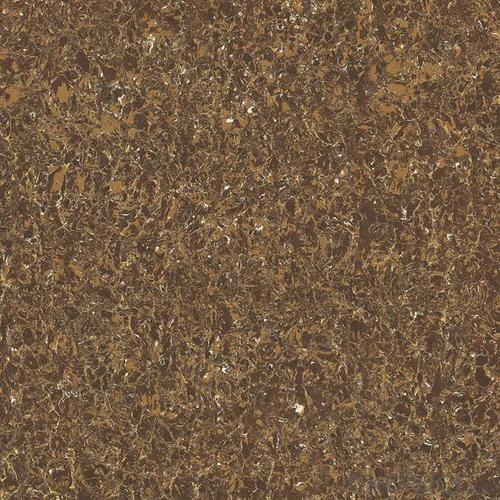
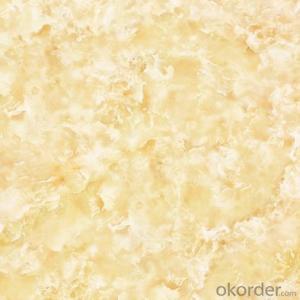
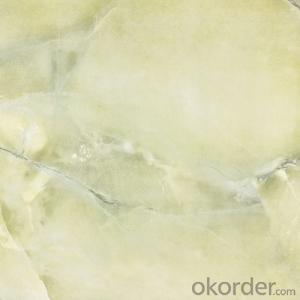
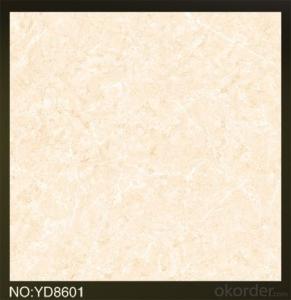
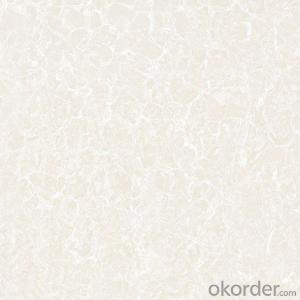
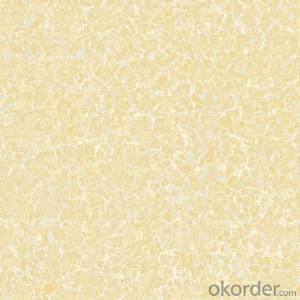
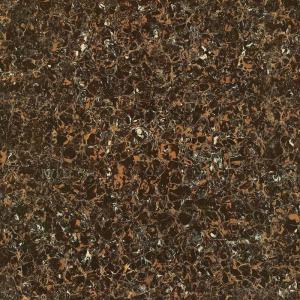
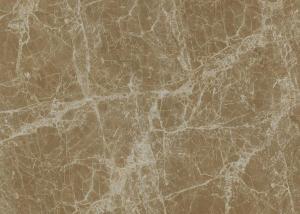
Polished Porcelain Tile Pilate Stone Serie Brown Color CMAX23606
- Ref Price:
-
$4.50 - 4.60
/ m²

- Loading Port:
- Guangzhou
- Payment Terms:
- TT OR LC
- Min Order Qty:
- 700 m²
- Supply Capability:
- 1000000 m²/month
OKorder Service Pledge
OKorder Financial Service
You Might Also Like


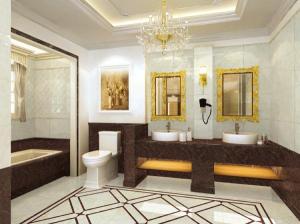
Product Brief Introduction
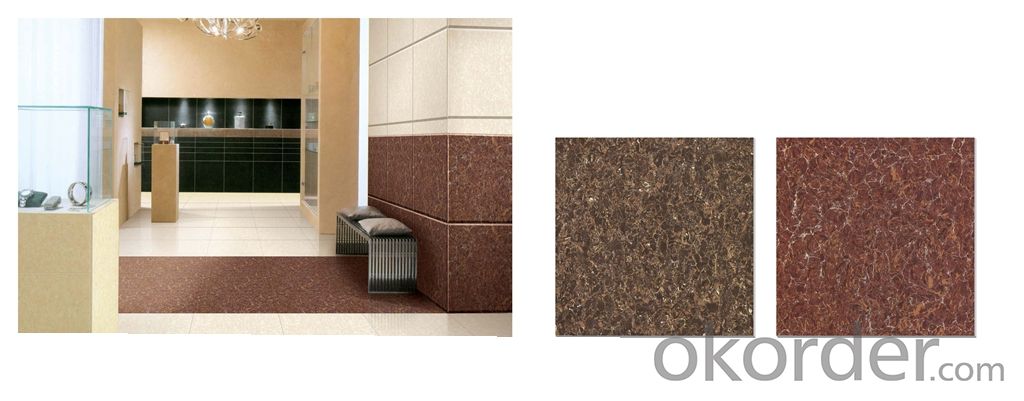
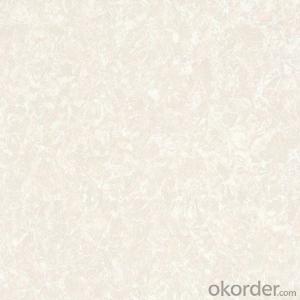
Polished Porcelain Tile Pilate Stone Serie Brown Color CMAX26606 is one of the most popular color of Pilate Stone Serie, which is one popular serie of Polished Porcelain Tile in the present market. Just like other series, it could be used for interior floor for apartment, villa, super market as well as other public areas, due to its being high glossy and clean, homogeneous color shade as well as the reasonable price compared with natural stones.
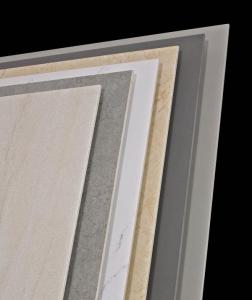
Product Features
Polished Porcelain Tile, Double Loading
Only Grade AAA available
Strict control on color shade, deformation, anti-pollution, surface glossy degree as well as packing
Competitive price
Standard export packing: Pater Carton+ Wooden Pallet
Fast delivery
OEM service could be offered
Marketing support on samples, catalogues as well as carton designing
Professional sales team for product, document and schedule of importing and exporting.
Product Specification
Tile Type: Polished Porcelain Tile
Quality standard: GB/T4100-2006, ISO13006, ISO9001
Water Absorption Rate: 《0.5%
Breaking Strength: 》 1800 N
Rupture Modulus: 》40 MPa
Length and Width Tolerance: ±0.1%
Surface Smoothness: ±0.15%
Edge Straightness: ±0.15%
Wearing Strength: 《1600 mm3
Glossiness: 》 85 Degree
Resistance to Chemical: Class UA
Resistance to Staining: Class 3.
Packing Information (For 27.5 Tons heavy 20’Fcl)
For 600x600mm, 4pcs/Ctn, 40 Ctns/Pallet, 960 Ctns/20’Fcl, 1382.4m2/20’Fcl
For 800x800mm, 3pcs/Ctn, 28 Ctns/Pallet, 616 Ctns/20’Fcl, 1182.72m2/20’Fcl
Production Line&Packing


FAQ
1. For Polished Porcelain Tile, is the 30*60 available?
—— Yes, 30*60 is available. Due to the basic size is 60*60, we need to cut 60*60 tile into 30*60. 6 pcs are packed into one carton.
2. What is the MOQ for this tile?
—— Normally the MOQ is 1382.4 m2 for one 20’ container. To support our clients, we could go with 3 models to fill one container at most.
3. Can we use the carton with our own design and brand name?
—— Yes. Normally we go with Neutral Carton or our Carton with our CMAX brand name. But for carton of client’s own design, the MOQ for one size is 5 containers, due to the carton factory can’t arrange production if quantity is below 5000 pcs.
- Q: My house is in the top floor, the water pipe in the bathroom, and then all the water pipes in the bathroom are clear, the new house, the ground with a tile, surrounded by walls and tiles, no shower or something, the bathroom put a Taiwan washing machine, a Faucet, the ground water is generally the washing machine drain row to the ground and then flow through the water hole. Now the situation is not posted on the side of the tile watermark, the walls of the white putty from the package off. After inspection found the gap between the tile is white, because the tile is white. Suspected to be caused by seepage between the cracks. Do not want to tear tiles to re-engage. Is there a good way to solve it? Buy a private room, certainly not done waterproof
- ust stay in the new house, cement paste the tile produced a hollowing, a long time caused the tiles off; no gaps in the gap of the tile paving, experienced a temperature difference on the corner of the burst ... ... real life, we often encounter The above situation: spent several months, spent tens of thousands, hundreds of thousands, or even millions of houses decorated, not from the fresh freshness came out, in the kitchen, health and other space encountered a pile of trouble. Of course, some consumers because there is no choice of the right brand and high-quality products caused by some consumer distress.
- Q: ok, i tiled my kitchen with the sticky tiles (not expensive ceramic ones or anything like that) then sealed it with a clear tube of sealant. it is about 3 or 4 days later, and the floor looks like crap. the sealer left behind a nasty tar trail or something. While the tile looks glossy and beautiful the places i sealed are dull and def noticable. How do I get rid of the excess???? I've tried scraping, it just don't work. help me!!!!
- i dont know about anything chemical, but what about a paint scraper? it would be a lot of hard word, but it would prob get rid of the nasty extras. Just trying to be helpful. good luck ;)
- Q: I just cant figure it out i must have wasted 10 pieces of tile trying the tile that is currently laid on the floor..it hasnt been cut at all to get it to fit..and its not two pieces..its one piece of tile that has 2 circles cut into it that fit perfectly that looks like the radiator was picked up and the legs placed into the holeshow do i do this? i know you are SUPPOSED to cut the tile in half and them put it back together..but..im just curious if there is a way im not thinking about??
- You have to buy a pair of tile nippers. And to be quite frank, the holes were probably drilled their first but, you have to score your tile in half and nip half circles in either one to replace it. In this case, you have to score your tile in thirds and mark where the holes should be and gently nip your half circles. A little at a time. Try this, get a piece of tile and mark where the holes should be and using a hole saw( a round saw that fits on a drill, a little larger than the existing pipe)then drill your holes While squirting water on it at the same time to prevent friction and when this is done, score your tile from the center of each hole. This should do the trick.
- Q: My bathroom in my new house has the ugliest green tile halfway up the wall and then a different shade of green tile on the floor. My husband I have a little experierience with fixing stuff up, but this one has us puzzled. We want to tear the tile down and put up drywall. Then we‘d like to carpet the floor. We haven‘t got the nerve yet cause we don‘t know what to expect behind those tiles on the wall. Got ANY suggestions in my little dilemma???
- If the tiles go all the way around the room, measure up 4' at each corner. Use a chalk line or level to make a horizontal line around the room. All hardware below this line should be removed. Towel bars, heat register covers, cabinets, toilet, door trim, etc. If the wall is drywall, you could cut along this line with a drywall hand saw. If you have access to a sawzall (reciprocating saw), the process will go quick. (If you're handy, you should have this tool). To avoid cutting wires, pipes, pay close attention when cutting. Lay tool against wall in line with chalk line. Start blade, slowly, then lower blade to line. Now tilt blade inward. CAUTION. Go only as deep as needed to penetrate wall. If you go deeper, you risk cutting wires or plumbing. Now pull saw along line around perimiter of room. Safety glasses are recommended during cuttiing and removal. Use hammer to make hole in wall just below cut line. Using Gloves, pull sections of drywall and tile by hand as much as possible. If screws remain in the studs hit with a hammer at a 45% angle. they should break off. If it's nails, you should pull them. Floor tiles will come up with a flat pry bar and a hammer. Just pick a spot along an edge. Use a couple sharp blows with hammer to start, then use flat bar and hammer to peel out floor tile and grout. Hope this motivates you to go for it.
- Q: i‘m having an investigatory project and its all about making tiles out of broken glass and rice hull. help me pls.
- i do not know what kind of tiles u want to make.is it glass tiles.and how many tiles u want to make.from where u would collect the glass.what would be the thickness of each broken glass. but all the best
- Q: I have a small round accent table with formica top. I‘d like to try my hand at mosaic tiling on the top. Is it possible to do this over the formica, or do I have to remove it. If so, what do I use to prep the formica before tiling. p.s. I‘ve never tiled anything before. Using this as a learning project.Thanks for any suggestions, tips.
- Lightly sand the formica and then prime it with kilz it. Let it dry and go to town with your mosaic. I did this to a kitchen island 7 years ago and it's still holding up.
- Q: I‘m installing new tile in my bathroom and had a few questions.1. I understand that I‘m supposed to remove the toilet prior to laying the tile. So I remove the toilet, lay new tile, and then put the toilet on top of the tile? Does this mean that the toilet will sit on the tile? If so, won‘t there be a very little gap where the tile and toilet meet? Are you supposed to seal this gap? Or, do you cut the tile around the shape of the bottom of the toilet and tile around it?2. Same question with the vanity. I‘m replacing my old vanity. Do I have to remove the old vanity, lay tile in the whole area where the old vanity was, and then install the new vanity on top of the tile? Again, what about the small gap? Does it need to be sealed? What do you seal it with?3. How do you remove the old vanity? Do you simply disconnect the plumbing, remove the screws holding it to the wall, and pry it from the wall?Any comments, suggestions, or advice are appreciated.
- True enough, you can tile around your vanity and not under it. However, if you ever want to replace the vanity, or change to a pedestal sink, you will find yourself with a problem. I recommend that you do a complete floor tiling job instead of trying to keep a stack of extra tiles in your garage in case this remodel situation occurs. I removed my old vanity by taking out the contents, removing any doors or drawers to gain access to the area under the sink. You can turn off the water supply valves, disconnect the water from the sink, undo the plumbing drain. If it is a popup sink stopper, you can unscrew the arm at the bottom also. If you are replacing the vanity, I estimate you will also replace the sink faucet set, which is what we are doing, so I was not too concerned about saving all the parts. BUT, put all of them in a bag so you can at least donate a used complete faucet set to Habitat's RESTORE. With the sink out of the way, now disengage the vanity from the wall. There is usually a couple of heavy lag bolts/screws which will require a wrench and not a screw driver to remove. once they are removed, you are almost there. Now take loose the shoe molding which covers the seam where vanity sits on the floor. If there is a backsplash , try to just slide the vanity away from it so it will not be broken. Sometimes all that secures the backsplash to the vanity is some silicone, and it can be cut with a razor knife inserted between the vanity top and the backsplash. I am no way a plumber, but I do very well at demolition of different home features. Take your time, and don't give up. You want to leave the wall intact, and the plumbing connections reusable. I ended up stuffing an old sock in the drain after I removed the P-trap, wrapping the end around the pipe stub. That keeps any stray odors out of the house.
- Q: We have a two sink bathroom set up would like to replace the counter-top with a homemade tile counter-top - we are pretty handy but have not dealt with tile before - and before I ask my dad for help I thought why not check out yahoo answers. Thanks! :)
- Depending on what the counter top is now you will need to sand it down and score it (make long scratches in the surface to hold the grout). Next you want to start with the edges and then work your way in. Lay the grout and set the tile. Make sure you get small bumpers to put in between the tiles to keep the spacing even. Make sure you have a way of cutting the tiles also to fit the uneven spaces.
- Q: in the process of shopping i am coming across made in china flooring tiles, are these products durable, are they reliable, will there be a quaility issue with long term use? can anyone recommend a tile that is manufactered in the U.S.? there are so many different tiles on the market it is hard to choose, should we even be using a porcelean tile, what about vinyl sheet goods? this is a bathroom application..5‘ wide 7‘ deep
- Several types of tile are made in the US. Some include Florida Tile, American Olean some Laufen tile are made here. You don t necessarily need a 12x12 , you may want to consider a smaller tile in that space. Even some of the makers listed above import the tile from Turkey, China, Italy etc. Over the years I haven t done much China made tile so I can t honestly comment on that. Almost any tile made ( almost) will be fine in a residential bathroom setting. Porcelain tiles are fine but normal ceramics will also work well. Vinyl sheet goods will also work fine in a bathroom. They come in 6 and 12 ft goods, so a 6x7 foot pc will work excellent for you since you won t scrap out much and you ll be seamless. Any questions you can e mail me through my avatar and check my qualifications there. GL
Send your message to us
Polished Porcelain Tile Pilate Stone Serie Brown Color CMAX23606
- Ref Price:
-
$4.50 - 4.60
/ m²
- Loading Port:
- Guangzhou
- Payment Terms:
- TT OR LC
- Min Order Qty:
- 700 m²
- Supply Capability:
- 1000000 m²/month
OKorder Service Pledge
OKorder Financial Service
Similar products


Hot products

Hot Searches
Related keywords

