


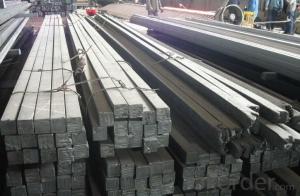
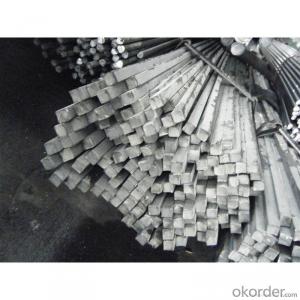
High Quality GB Standard Steel Square Bar 21mm-25mm
- Ref Price:
-

- Loading Port:
- Tianjin
- Payment Terms:
- TT OR LC
- Min Order Qty:
- 25 m.t
- Supply Capability:
- 10000 m.t/month
OKorder Service Pledge
OKorder Financial Service
You Might Also Like


Product Description:
-Standard: GB,
-Grade: Q195 or equivalent.
-Chemical Composition:
Standard | Grade | Element (%) | ||||
GB | Q195 | C | Mn | S | P | Si |
0.06~0.12 | 0.25~0.50 | ≤0.050 | ≤0.045 | ≤0.30 | ||
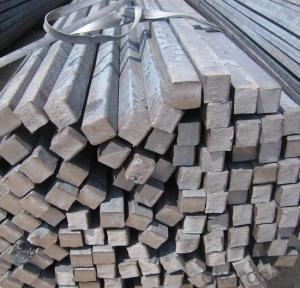
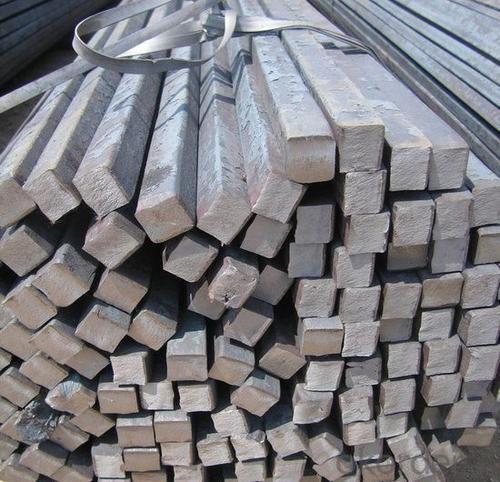
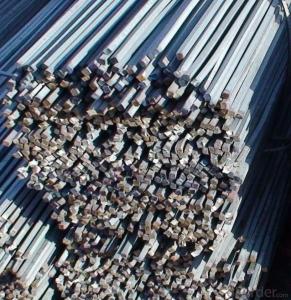
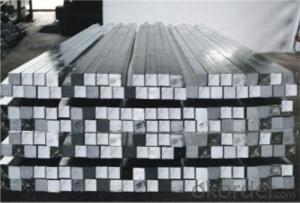
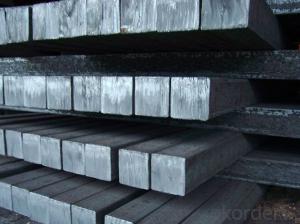
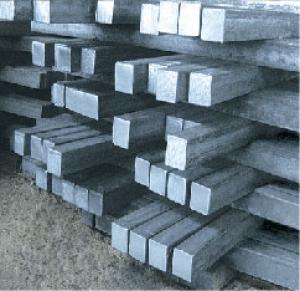
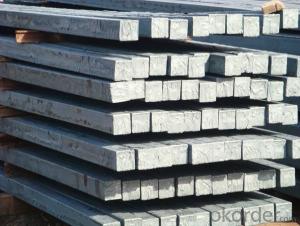
Measures of HR Square Bar (small measures):

(Section of HR Square Bar)
-Length of a side and Theoretical weight of Square Bar.
Length of a side(mm) | Theoretical weight(kg/m) | Length of a side(mm) | Theoretical weight(kg/m) |
7 | 0.385 | 22 | 3.80 |
8 | 0.502 | 24 | 4.52 |
9 | 0.636 | 25 | 4.91 |
10 | 0.785 | 26 | 5.30 |
11 | 0.950 | 28 | 6.15 |
12 | 1.13 | 30 | 7.06 |
13 | 1.33 | 32 | 8.04 |
14 | 1.54 | 34 | 9.07 |
15 | 1.77 | 36 | 10.17 |
16 | 2.01 | 38 | 11.24 |
17 | 2.27 | 40 | 12.56 |
18 | 2.54 | 42 | 13.85 |
19 | 2.82 | 45 | 15.90 |
20 | 3.14 | 48 | 18.09 |
21 | 3.46 | 50 | 19.63 |
Notes:
1, The theoretical weights in the list, base on the density of 7.85 g/cm3.
2, Formula for theoretical weight of Square bar: (length of a side)2 * 0.00785
3, The numbers with *mean that they are not regular or we don’t offer them.
-Regular length of Square Bar:
Steel | Length of a side (mm) | Length of steel (m) |
Normal steel | < 25 | 4~10 |
> 25 | 3~9 | |
Steel of high quality | All measure | 2~6 |
Tool steel >75 | 1~6 |
Usage/Applications of HR Square Bar:
-The Square Bar is normally used as structure steel.
-Row material for other structure steel like steel angles, channels, I-beams, H-beams, etc…
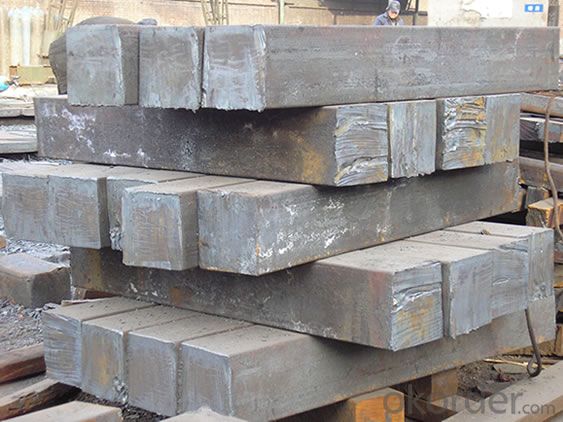
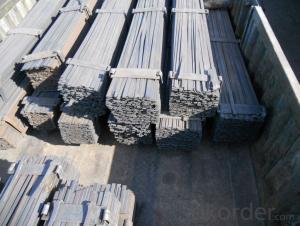
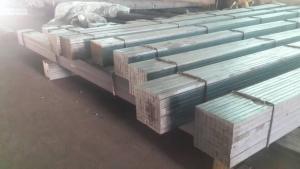
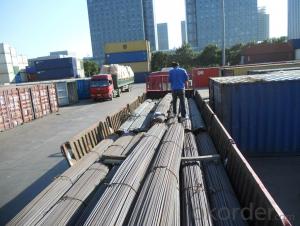
Packaging & Delivery of HR Square Bar:
-Packing Detail: The products can be packed in bundles by steel wires.
-Marks: We make tag marks and color marks. The tag marks with white background and red company logo will be tied up to each bundle of the products. The information is usually including basic information of products and company and other information requested by customers. As for color marks, we will paint both ends of bundles to make sure that it will be more convenient for customers to distinguish them from other products.
-Delivery Detail: 30~45 working days after receive buyer’s T.T. or L/C.
Transportation:
-The products can be delivered by bulk vessel or by container. As for container, products with the length of 6m will be loaded in 20’ container, with 9m or 12m, in 40’ container.
-The maximum quantity of loading of container is 25 tons.
-The products are usually transported to the nearest port from the production place.
- Q: How do you choose the right size of steel square for a project?
- When it comes to selecting the appropriate size of a steel square for your project, there are several factors to take into account. To begin with, it is crucial to evaluate the scale and scope of your project. The load that the steel square will bear and the level of structural integrity it must provide should determine the size and weight requirements. These considerations will vary depending on the specific application, whether it is construction, fabrication, or general DIY work. Furthermore, the dimensions of the components or materials that will interact with the steel square should be considered. It should be of sufficient size to accommodate these elements, ensuring a proper fit and functionality. For instance, if the steel square is to be used as a support beam, it must be wide and thick enough to offer adequate strength. In addition, the physical space in which the project will take place should be taken into account. If there are limited clearance or tight quarters, opting for a smaller-sized steel square may be more suitable. Consulting structural engineering tables and industry standards can also prove to be helpful when determining the appropriate size of a steel square for your project. These resources provide guidelines on load-bearing capacities and recommended sizes for various applications. Lastly, seeking advice from professionals or individuals with experience in the field is always a prudent decision. They can provide insights based on their expertise, assisting you in selecting the ideal size of a steel square that meets your specific project requirements.
- Q: Can a steel square be used for crown molding installation?
- Yes, a steel square can be used for crown molding installation. A steel square is a versatile and accurate tool that can be used for various carpentry tasks, including crown molding installation. It can be used to mark and measure angles, ensuring precise cuts and a proper fit for crown molding pieces. However, it is important to note that using a steel square for crown molding installation may require some additional calculations and adjustments due to the complex nature of crown molding angles. It is advisable to consult a professional or refer to a comprehensive guide for accurate measurements and cutting techniques specific to crown molding installation.
- Q: How do you use a steel square for creating accurate half-lap joints?
- To use a steel square for creating accurate half-lap joints, follow these steps: 1. Measure and mark the desired size of the half-lap joint on the pieces of wood you will be joining together. Make sure the marks are accurate and aligned properly. 2. Position the steel square on the edge of one of the wood pieces, aligning one of its edges with the edge of the wood. Ensure that the square is held firmly in place. 3. Use a pencil or a marking knife to trace along the inside edge of the square onto the wood. This will transfer the square's 90-degree angle onto the wood, which will be crucial for creating a precise half-lap joint. 4. Repeat the process of tracing the square's edge onto the other piece of wood that will be part of the half-lap joint. Make sure the marks are aligned with the first piece of wood. 5. Now, using a saw, carefully cut along the marked lines on both pieces of wood. It is important to stay as close to the marked lines as possible to ensure a tight and accurate fit for the half-lap joint. 6. Once the cuts are made, test-fit the two pieces of wood together. They should fit snugly and create a seamless joint. If necessary, make slight adjustments with a chisel or sandpaper to achieve a perfect fit. By using a steel square, you can ensure that the half-lap joints are accurately marked and cut, resulting in strong and precise connections between the pieces of wood.
- Q: How do you use a steel square to measure the height of a workbench?
- To measure the height of a workbench using a steel square, you can place one side of the square against the bottom of the workbench and extend the other side vertically until it reaches the top surface. Then, read the measurement on the vertical side of the square to determine the height of the workbench.
- Q: How do you use a steel square to determine the length of a roof ridge?
- To determine the length of a roof ridge using a steel square, you would first mark a point on one end of the ridge. Then, place the steel square with one leg against the marked point and align the other leg with the ridge. Keeping the square firmly against the ridge, walk along the length of the ridge while constantly checking that the square is aligned. Once you reach the other end of the ridge, mark the point where the square aligns with the ridge. The distance between the two marked points will give you the length of the roof ridge.
- Q: What are some common uses for a steel square in cabinetry?
- A steel square, also referred to as a framing square or carpenter's square, holds great importance in cabinetry due to its versatility. It serves various purposes, some of which include: 1. Layout and marking tasks: In cabinetry, precise marking of straight lines, right angles, and exact measurements is crucial. A steel square aids in these tasks, ensuring accurate markings for different cuts and joints. 2. Checking for squareness: To guarantee proper alignment and fit in cabinetry, precise squareness is necessary. A steel square is employed to check the squareness of panels, corners, and joints, ensuring correct alignment of all components. 3. Marking and cutting angles: For many cabinetry projects, angled cuts are required, such as mitered corners or beveled edges. A steel square acts as a guide for marking and cutting precise angles, ensuring accurate achievement of desired angles. 4. Measurement and transferring measurements: Due to its straight edges and measurement scales, a steel square proves useful for measuring and transferring measurements in cabinetry. It enables precise measurements of lengths, widths, and depths, ensuring accuracy throughout the construction process. 5. Checking and marking for level and plumb: In order to ensure stability and proper functionality, cabinetry needs to be level and plumb. A steel square aids in checking and marking level and plumb lines, ensuring correct installation of cabinets. 6. Creating and checking right angles: Right angles play a fundamental role in cabinetry construction. A steel square facilitates the creation of right angles by aligning its edges with the workpiece, ensuring proper alignment and squareness of corners and joints. All in all, a steel square is an essential tool for any cabinetmaker or carpenter, offering accuracy in layout, measurement, and alignment. Its precision and versatility make it indispensable in the field of cabinetry.
- Q: How do you use a steel square to measure a roof pitch?
- In order to measure the pitch of a roof using a steel square, the following steps should be followed: 1. Begin by selecting a steel square that consists of a body and a tongue. Typically, the body is 24 inches long, while the tongue measures 16 inches. 2. Position the body of the steel square along the lower edge of the roof rafter or truss, ensuring that the square is oriented in such a way that the tongue extends vertically towards the highest point of the roof. 3. Adjust the square until the edge of the tongue aligns with the lower edge of the rafter or truss. 4. Once the square is accurately positioned, read the measurement on the body of the square where it intersects with the upper edge of the rafter or truss. This measurement represents the vertical rise of the roof. 5. Proceed to measure the horizontal distance along the body of the square from the lower edge of the rafter or truss to the point where the tongue intersects with the body. This measurement indicates the horizontal run of the roof. 6. To determine the roof pitch, divide the measurement of the vertical rise by the measurement of the horizontal run. This calculation will yield a ratio, such as 4:12 or 6:12, which indicates the pitch of the roof. It is important to keep in mind that the pitch of a roof is measured as the vertical rise for every 12 inches of horizontal run. For instance, a 4:12 pitch signifies that for every 12 inches of run, the roof rises 4 inches vertically. Using a steel square to measure the pitch of a roof can prove to be an accurate and convenient approach, particularly when working with conventional gable roofs. However, it is crucial to ensure that the steel square is properly aligned and that the measurements are taken with precision to obtain accurate results.
- Q: What are some common measurements that can be taken with a steel square in framing?
- A versatile tool used in carpentry and framing is the steel square, also referred to as a framing square or carpenter's square. Its purpose is to guarantee accuracy and precision when cutting and assembling different materials. The steel square has various applications in framing, as outlined below: 1. Checking Right Angles: One of the steel square's most common uses is to verify and indicate right angles when constructing walls, floors, and roofs. This ensures that corners are properly aligned and square. 2. Rafters and Roof Pitch: Carpenters can determine the length and angles required to cut rafters for a roof by utilizing the rafter tables on the steel square. Additionally, the square aids in determining the slope or steepness of the roof, known as the roof pitch. 3. Measuring Angles: The steel square allows for measuring and marking angles other than 90 degrees. By positioning the square on the material, such as a board or sheet of plywood, precise angles can be marked before cutting. 4. Board Layout: When preparing boards for cutting or joining, the steel square is useful for marking measurements and creating straight lines. It enables the scribing of lines to cut boards to the desired length and marking notches and other precise measurements. 5. Level and Plumb Determination: The steel square serves as a level or plumb line, aiding in determining if a surface or object is perfectly level or plumb. This is particularly valuable when installing windows, doors, or other elements that require exact alignment. 6. Measurement and Transfer: The steel square includes a ruler, or tongue, along one edge, facilitating accurate distance measurement. These measurements can then be transferred to the material being worked on, ensuring precise cuts and placements. In conclusion, the steel square is an indispensable tool in framing, allowing carpenters to accurately measure and mark various angles, lengths, and alignments. By utilizing this tool correctly, it guarantees the structural integrity and aesthetic appeal of the framing work.
- Q: How do you use a steel square for marking parallel lines?
- To use a steel square for marking parallel lines, first ensure that the square is positioned firmly against the edge of the material you want to mark. Then, draw a line along one edge of the square using a pencil or a marking tool. Next, without moving the square, align the edge of the square with the line you just drew and mark another line parallel to the first one. Repeat this process as needed to create multiple parallel lines.
- Q: What are the different techniques for using a steel square in woodworking joinery?
- There are several techniques for using a steel square in woodworking joinery. One common technique is using it as a measurement tool to ensure accurate and precise cuts and angles. The square can be used to mark and measure straight lines, check for squareness, and mark angles for various joints such as mitered or dovetailed joints. Additionally, the steel square can be used as a guide for making straight cuts by aligning the square's edge with the material being cut. Overall, the steel square is a versatile and essential tool in woodworking joinery for achieving precise and well-fitted joints.
Send your message to us
High Quality GB Standard Steel Square Bar 21mm-25mm
- Ref Price:
-
- Loading Port:
- Tianjin
- Payment Terms:
- TT OR LC
- Min Order Qty:
- 25 m.t
- Supply Capability:
- 10000 m.t/month
OKorder Service Pledge
OKorder Financial Service
Similar products


Hot products
Hot Searches
Related keywords

