

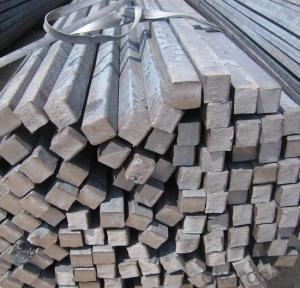


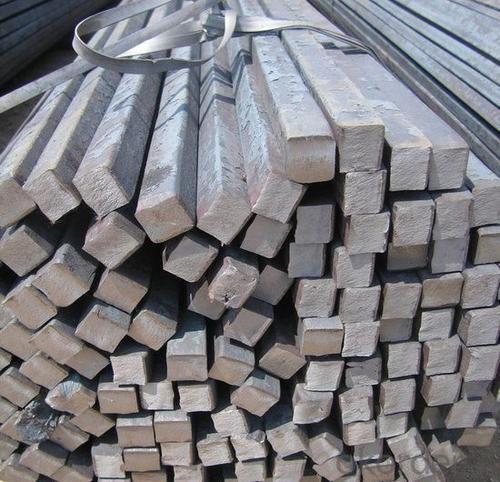
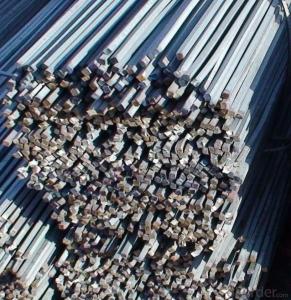
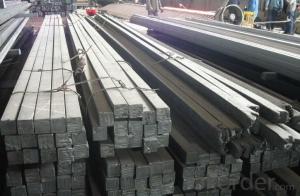
High Quality GB Standard Steel Square Bar 16mm-20mm
- Ref Price:
-

- Loading Port:
- Tianjin
- Payment Terms:
- TT OR LC
- Min Order Qty:
- 25 m.t
- Supply Capability:
- 10000 m.t/month
OKorder Service Pledge
OKorder Financial Service
You Might Also Like


Product Description:
-Standard: GB,
-Grade: Q195 or equivalent.
-Chemical Composition:
Standard | Grade | Element (%) | ||||
GB | Q195 | C | Mn | S | P | Si |
0.06~0.12 | 0.25~0.50 | ≤0.050 | ≤0.045 | ≤0.30 | ||
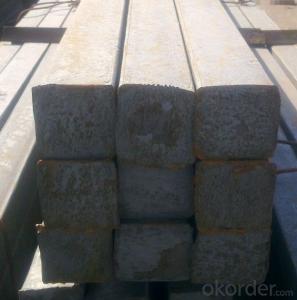
Measures of HR Square Bar (small measures):

(Section of HR Square Bar)
-Length of a side and Theoretical weight of Square Bar.
Length of a side(mm) | Theoretical weight(kg/m) | Length of a side(mm) | Theoretical weight(kg/m) |
7 | 0.385 | 22 | 3.80 |
8 | 0.502 | 24 | 4.52 |
9 | 0.636 | 25 | 4.91 |
10 | 0.785 | 26 | 5.30 |
11 | 0.950 | 28 | 6.15 |
12 | 1.13 | 30 | 7.06 |
13 | 1.33 | 32 | 8.04 |
14 | 1.54 | 34 | 9.07 |
15 | 1.77 | 36 | 10.17 |
16 | 2.01 | 38 | 11.24 |
17 | 2.27 | 40 | 12.56 |
18 | 2.54 | 42 | 13.85 |
19 | 2.82 | 45 | 15.90 |
20 | 3.14 | 48 | 18.09 |
21 | 3.46 | 50 | 19.63 |
Notes:
1, The theoretical weights in the list, base on the density of 7.85 g/cm3.
2, Formula for theoretical weight of Square bar: (length of a side)2 * 0.00785
3, The numbers with *mean that they are not regular or we don’t offer them.
-Regular length of Square Bar:
Steel | Length of a side (mm) | Length of steel (m) |
Normal steel | < 25 | 4~10 |
> 25 | 3~9 | |
Steel of high quality | All measure | 2~6 |
Tool steel >75 | 1~6 |
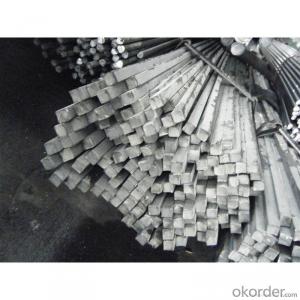
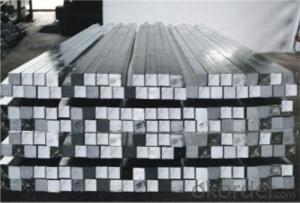
Usage/Applications of HR Square Bar:
-The Square Bar is normally used as structure steel.
-Row material for other structure steel like steel angles, channels, I-beams, H-beams, etc…
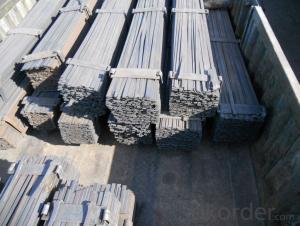
Packaging & Delivery of HR Square Bar:
-Packing Detail: The products can be packed in bundles by steel wires.
-Marks: We make tag marks and color marks. The tag marks with white background and red company logo will be tied up to each bundle of the products. The information is usually including basic information of products and company and other information requested by customers. As for color marks, we will paint both ends of bundles to make sure that it will be more convenient for customers to distinguish them from other products.
-Delivery Detail: 30~45 working days after receive buyer’s T.T. or L/C.
Transportation:
-The products can be delivered by bulk vessel or by container. As for container, products with the length of 6m will be loaded in 20’ container, with 9m or 12m, in 40’ container.
-The maximum quantity of loading of container is 25 tons.
-The products are usually transported to the nearest port from the production place.
- Q: Is there a specific method for using a steel square correctly?
- Using a steel square correctly requires a specific method. A steel square, which is also known as a framing square or carpenter's square, is a versatile tool used in woodworking and carpentry for measuring, marking, and guiding straight, square, and angled lines. To ensure proper usage of a steel square, follow these steps: 1. Get acquainted with the different parts: A steel square consists of two arms, a body, and a tongue. The arms typically measure 24 inches in length, while the body and tongue form a right angle. The body is the longer side, while the tongue is the shorter one. 2. Verify accuracy: Prior to using the steel square, it is essential to check if it is correctly calibrated and accurate. Inspect the edges for any damage or wear that may affect its precision. 3. Make straight markings: To mark a straight line, position the body of the square against the material's edge that you are working with. Align the edge of the material with the desired measurement mark on the square's body. Securely hold the square in place and draw a line along the tongue. 4. Make square markings: For marking a square or a 90-degree angle, align the body of the square against one edge of the material. Steadily hold the square in place and draw a line along the tongue. Next, rotate the square 90 degrees and align the body against the adjacent edge. Draw a line along the tongue intersecting the previous line. The point of intersection indicates a perfect square. 5. Measure and mark angles: Steel squares often have degree markings on the body and tongue, enabling you to measure and mark specific angles. Align the square accordingly, using the degree markings as a guide, and mark the desired angle on your material. 6. Check for squareness: A steel square can also be utilized to ascertain if a corner or joint is square. Position the body of the square against one edge of the corner and the tongue against the other. If the square fits perfectly, the corner is square. If there is a gap, the corner is not square and may require adjustment. Remember to use a pencil or a marking tool with a fine point to ensure accurate markings. Additionally, take your time, apply firm but gentle pressure, and double-check your measurements to ensure precision. Practicing and gaining experience will enhance your proficiency in correctly using a steel square.
- Q: How do you use a steel square to measure and mark beveled angles?
- To use a steel square to measure and mark beveled angles, you need to follow a few simple steps. First, make sure your steel square is clean and free of any debris or rust. This will ensure accurate measurements and markings. Next, identify the angle you want to measure and mark. Let's say you want to mark a 45-degree beveled angle. Place the long edge of the steel square against the edge of the material you want to mark. In this case, it would be the edge where you want the beveled angle to start. Now, rotate the steel square until the 45-degree line aligns with the edge of the material. You can find the 45-degree line on the inside of the square, usually marked with a number or a symbol. Once the 45-degree line is aligned, hold the steel square firmly against the material and use a pencil or a scribe to mark the line along the other edge of the square. You have now successfully measured and marked a 45-degree beveled angle using a steel square. Remember, the process may vary depending on the angle you want to measure and mark. Some steel squares may have additional lines or markings to help you with specific angles. It's always a good idea to refer to the manufacturer's instructions or guides if you're unsure about a particular angle.
- Q: How do you use a steel square to determine the angle of a drum sanding cut?
- To use a steel square to determine the angle of a drum sanding cut, you will need to follow these steps: 1. Start by setting up the steel square on a flat surface, ensuring that it is perpendicular to the edge of the table or workbench. 2. Place the drum sander on the table, aligning it with the edge of the steel square. 3. Adjust the angle of the drum sander by rotating it until it is parallel to one of the edges of the steel square. 4. Once the drum sander is aligned parallel to the edge of the steel square, measure the angle between the steel square and the drum sander using a protractor or an angle measuring tool. 5. Take note of the angle measurement, as this will be the angle at which you need to set your drum sander for the desired cut. 6. Use the angle measurement to adjust the drum sander accordingly, either by adjusting the table tilt or by using any angle adjustment features available on your specific drum sander model. 7. Double-check the angle by placing the steel square back on the table and aligning it with the drum sander. Ensure that the drum sander is parallel to the edge of the steel square. 8. Once you are confident that the drum sander is set at the desired angle, you can proceed with making your drum sanding cut. It is important to note that using a steel square to determine the angle of a drum sanding cut provides a rough estimate and may not be as accurate as using specialized angle measuring tools. However, it can still be a useful technique for achieving reasonably accurate results in many woodworking tasks.
- Q: What are the different angles that can be measured with a steel square?
- A steel square can be used to measure various angles, including right angles (90 degrees), acute angles (less than 90 degrees), obtuse angles (greater than 90 degrees but less than 180 degrees), and straight angles (180 degrees).
- Q: Can a steel square be used for measuring the pitch of a roof?
- Yes, a steel square can be used for measuring the pitch of a roof. A steel square, also known as a framing square or carpenter's square, is a versatile tool used by carpenters and roofers for various measurements and calculations. To measure the pitch of a roof, you can use the square's graduated scales and angles to determine the angle and slope of the roof. By placing the square on the roof's surface and aligning it with the rafters or trusses, you can easily determine the pitch by reading the scale or using the square's built-in formulas. However, it is important to note that using a steel square may not provide the most accurate measurements for complex or irregular roof shapes, and specialized roofing tools or instruments may be more suitable in those cases.
- Q: Can a steel square be used as a guide for circular saw cuts?
- Yes, a steel square can be used as a guide for circular saw cuts. A steel square, also known as a carpenter's square or framing square, is a versatile tool that can be used for a variety of purposes in woodworking. While it may not be the most ideal tool for guiding circular saw cuts due to its straight edges, it can still serve as a reliable guide for straight cuts. By aligning the square with the desired cut line and using it as a reference point, you can ensure accurate and straight cuts with your circular saw. However, for more precise and consistent circular cuts, it is recommended to use a dedicated circular saw guide or a circular saw jig specifically designed for this purpose. These specialized tools provide better control and guidance for circular saw cuts, resulting in more accurate and professional-looking results.
- Q: Can a steel square be used for checking the alignment of a door frame?
- Yes, a steel square can be used for checking the alignment of a door frame. It can be used to ensure that the corners of the door frame are square and that the sides are perpendicular.
- Q: Can a steel square be used for measuring and marking compound miter and bevel cuts?
- Indeed, the utilization of a steel square is viable in the measurement and marking of compound miter and bevel cuts. Although its conventional purpose is to measure and mark right angles, it can also serve the purpose of measuring and marking angles for compound miter and bevel cuts. By relying on the measurements and angles obtained from the steel square, it becomes possible to accurately mark the cuts on the material prior to execution. Nevertheless, it should be acknowledged that for intricate and precise compound miter and bevel cuts, the employment of specialized tools such as a miter saw or a bevel gauge might be indispensable.
- Q: Can a steel square be used for measuring the width of a wall opening?
- Measuring the width of a wall opening is possible with a steel square. Referred to as a framing square or carpenter's square, this versatile tool is widely utilized in construction and woodworking. With a multitude of measurements and angles marked on its face, it proves suitable for diverse tasks. To accurately measure the width of a wall opening, one can align the steel square against the opening's edge, ensuring its straightness. The square's edges then serve as a means to precisely measure the width. By utilizing the square's markings, one can ascertain the width of the wall opening with utmost precision. Nevertheless, it is vital to acknowledge that a steel square is not the sole tool available for this purpose. Tools like a tape measure or a ruler can also supply accurate measurements. The choice of tool depends on personal preference and the specific requirements of the task at hand.
- Q: Can a steel square be used for checking the squareness of stair railings?
- Stair railings can be checked for squareness using a steel square. Carpenters and builders often rely on this versatile tool for measuring and marking tasks. To determine if the corners and angles of a railing are at 90 degrees, simply position the steel square against it. By aligning the square along the edges, one can easily assess if adjustments are necessary for proper squareness. As a result, the use of a steel square is valuable in guaranteeing the precision and accuracy of stair railings.
Send your message to us
High Quality GB Standard Steel Square Bar 16mm-20mm
- Ref Price:
-
- Loading Port:
- Tianjin
- Payment Terms:
- TT OR LC
- Min Order Qty:
- 25 m.t
- Supply Capability:
- 10000 m.t/month
OKorder Service Pledge
OKorder Financial Service
Similar products
Hot products


Hot Searches
Related keywords

