


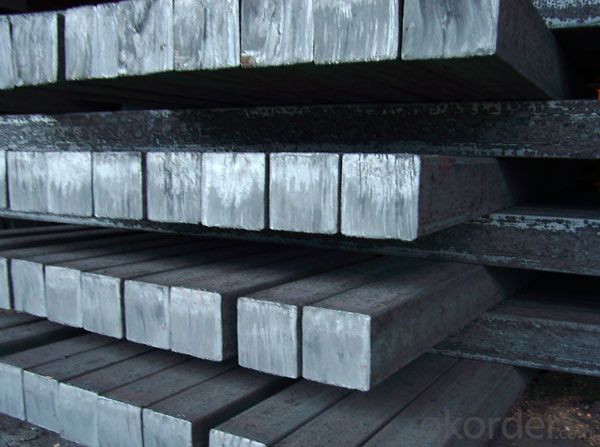


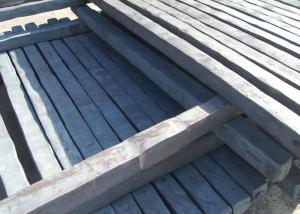
Alloyed square bar-Steel
- Ref Price:
-

- Loading Port:
- China Main Port
- Payment Terms:
- TT OR LC
- Min Order Qty:
- -
- Supply Capability:
- -
OKorder Service Pledge
OKorder Financial Service
You Might Also Like


hot rolled square steel billet
1.Q195 Q235 Q345B
2.terms of payment: L/C T/T
3.size: 100~150mm length: 5.8~12m
4.certificate:GB
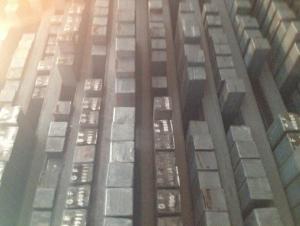
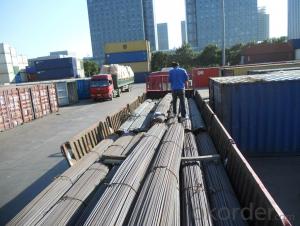
Type | Steel billet |
Standard Grade | a. 3SP/PS |
b. Q235 | |
c. 5SP d. Q275 | |
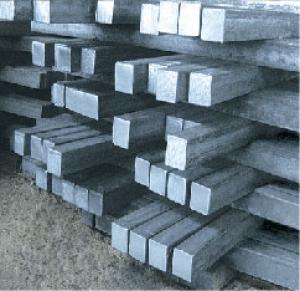
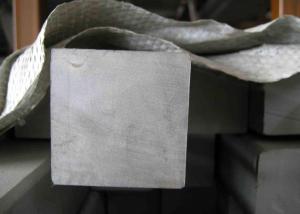
Size | 120mm x 120mm-150mm x 150mm etc. as per customers' requirement |
Length | 12m as standard |
Application | Carbon structural steel, Alloy steel, Gear steel, etc. |
Packing | standard export packing, or as per customers' requirement |
Quality | First quality |
Delivery time | Right now after the deposit. |
Others | 1. our products conform to all the standards |
2. we can offer special specification products as per our customers | |
3. we can offer the original mill test certificate and original production |
- Q: Can a steel square be used for marking and cutting wood?
- Absolutely! When it comes to marking and cutting wood, a steel square is the way to go. This versatile tool is a common sight in woodworking, as it serves multiple purposes such as measuring, marking, and ensuring the accuracy of right angles. Crafted from top-notch steel, it boasts a lengthy blade and a shorter tongue that converge at a perfect 90-degree angle. The lengthy blade comes in handy for marking straight lines on wood, while the shorter tongue excels at marking perpendicular lines. Moreover, the edges of this steel square can double as a helpful guide when making precise cuts with a saw. All in all, if you're a woodworker, this tool is an absolute must-have for marking and cutting wood efficiently.
- Q: Can a steel square be used for checking the alignment of tiles?
- No, a steel square is not typically used for checking the alignment of tiles. A tile spacer or a laser level is commonly used for this purpose to ensure accurate and level tile placement.
- Q: As for steel structure steel, how appropriate
- The size of the material is strongly related to the load on your floor, and the roof material and column size are also related to your span and the local Blizzard loads. You can choose the size of the material according to the local conditions.
- Q: What are some common techniques for using a steel square in cabinetry?
- A steel square, also known as a framing square or carpenter's square, is a versatile tool commonly used in cabinetry for measuring and marking angles, ensuring accurate cuts and joinery. Here are some common techniques for using a steel square in cabinetry: 1. Checking for squareness: One of the primary uses of a steel square is to check if a corner is perfectly square. Place the square against the inside corner, and if the edge aligns with the adjacent edge, the corner is square. This helps in ensuring all corners of the cabinets are at right angles. 2. Marking 45-degree cuts: The steel square has a 45-degree angle marked on its body. By aligning the square with the edge of the material, you can mark a precise 45-degree angle for mitered cuts, such as for trim or decorative elements on cabinet doors and panels. 3. Marking parallel lines: The long edge of a steel square is used for marking parallel lines. Simply align the square with the edge of the material and draw a line along the other edge of the square. This technique is helpful for marking shelf and cabinet bottom locations or ensuring parallel cuts. 4. Laying out cuts: The steel square is excellent for marking accurate lines for cuts. By aligning the square with the edge of the material, you can draw a line perpendicular or parallel to the edge. This helps in marking cuts for cabinet components like shelves, drawer dividers, and door frames. 5. Determining pitch and slope: A steel square can be used to determine the pitch or slope of a roof or any inclined surface. By placing the square on the surface, you can read the pitch or slope degree based on the markings on the square. 6. Measuring and transferring dimensions: The steel square can also be used as a ruler for measuring and transferring dimensions. The body of the square usually has a scale on one or both edges, allowing you to measure and mark precise lengths or distances. Overall, a steel square is an indispensable tool in cabinetry, offering accuracy and versatility in measuring, marking, and verifying angles. Whether you're building cabinets from scratch or making precise modifications, incorporating these common techniques will help ensure your cabinetry projects are precise and well-crafted.
- Q: What are some common mistakes to avoid when using a steel square for layout work?
- When using a steel square for layout work, there are a few common mistakes that you should avoid to ensure accurate and precise measurements: 1. Not checking for accuracy: One of the most important steps is to check the squareness and accuracy of your steel square. Before starting any layout work, make sure that the edges are straight and the angles are exactly 90 degrees. Using an inaccurate square will lead to incorrect measurements and flawed layouts. 2. Ignoring proper placement: Proper placement of the steel square is crucial for accurate measurements. Ensure that the square is flush against the material you are working on and that it is held firmly in place. Any gaps or movement can result in skewed measurements and misaligned layouts. 3. Failing to account for the thickness of the square: Steel squares have a certain thickness, which should be taken into consideration when using them for layout work. Neglecting to account for this thickness can lead to inaccurate measurements, especially when you need to mark or cut along a specific line. 4. Overlooking the importance of cleanliness: Keeping your steel square clean is essential for accurate measurements. Dirt, dust, or debris on the edges or surfaces of the square can affect its accuracy. Regularly clean your square and ensure it is free from any substances that may interfere with its precision. 5. Not using the correct marking techniques: When using a steel square for layout work, it is important to use the correct marking techniques to ensure accuracy. Use a sharp pencil or marking knife to make clear and precise marks. Avoid using thick markers or pens that may create wider lines, leading to errors in measurements. 6. Rushing through the process: Accuracy and precision require patience and attention to detail. Rushing through layout work with a steel square can result in mistakes. Take your time to ensure that each measurement and mark is done correctly, double-checking when necessary. By avoiding these common mistakes, you can maximize the accuracy and precision of your layout work when using a steel square.
- Q: Can a steel square be used for barn construction?
- Yes, a steel square can be used for barn construction. Steel squares are versatile tools commonly used in carpentry and construction, including the framing and layout of barn structures. They provide accurate measurements, angles, and straight edges, making them suitable for various tasks involved in barn construction.
- Q: Can a steel square be used for checking the squareness of a planer fence?
- Yes, a steel square can be used for checking the squareness of a planer fence. The straight edges of the steel square can be placed against the planer fence to determine if it is perfectly perpendicular to the table surface.
- Q: What are some common features of steel squares?
- Some common features of steel squares include: 1. Material: Steel squares are made from high-quality steel, which gives them durability and strength. 2. Shape: Steel squares are typically shaped like a right-angled triangle, with one long side and two shorter sides forming a 90-degree angle. 3. Accuracy: Steel squares are designed to provide accurate measurements and angles. The edges and corners are precisely machined to ensure precise and consistent results. 4. Markings: Steel squares often have markings along the edges, allowing users to measure and mark specific lengths or angles. 5. Graduations: Steel squares may have graduations or scales engraved or printed on the surfaces, enabling users to measure angles or distances more easily. 6. Versatility: Steel squares can be used for a variety of purposes, including measuring, marking, and checking right angles, as well as for determining and transferring angles. 7. Size and weight: Steel squares come in various sizes, typically ranging from small pocket-sized squares to larger squares used for more heavy-duty applications. The weight of a steel square depends on its size and thickness. 8. Corrosion resistance: Steel squares are often treated or coated to enhance their resistance to rust and corrosion, ensuring a longer lifespan. 9. Stability: Steel squares are designed to be stable and rigid, providing a reliable reference for accurate measurements and layout work. 10. Multi-functionality: Some steel squares may feature additional features, such as built-in spirit levels, scribing tools, or adjustable components, making them more versatile and convenient for specific applications.
- Q: What are some safety precautions to follow when using a steel square?
- When using a steel square, it is important to take the following safety precautions: 1. Wear protective gear: Always wear safety goggles and work gloves to protect your eyes and hands from any potential hazards. 2. Check for damage: Before using a steel square, inspect it for any signs of damage or wear. A damaged square may not provide accurate measurements and can pose a safety risk. 3. Use on stable surfaces: Ensure that you are working on a stable and level surface to prevent any slips or accidents. 4. Secure the workpiece: When using a steel square to mark or cut materials, make sure the workpiece is securely clamped or held in place to prevent it from moving or shifting during the process. 5. Use proper technique: Familiarize yourself with the correct technique of using a steel square. This includes holding it firmly and ensuring it is aligned properly to obtain accurate measurements. 6. Avoid misuse: Do not use a steel square for tasks it is not designed for, as it may compromise safety and accuracy. Always use the square as intended. 7. Store safely: After use, store the steel square in a designated area, away from other tools or equipment, to prevent any potential accidents or damage. By following these safety precautions, you can ensure a safer and more efficient experience when using a steel square.
- Q: Can a steel square be used for tile installation?
- Tile installation can indeed make use of a steel square. Known also as a framing square or carpenter's square, this versatile tool is commonly employed in construction and carpentry. Although not specifically designed for tile installation, it can still prove quite beneficial in this regard. A primary function of the steel square is to guarantee precise measurements and angles. This is particularly crucial when it comes to installing tiles, as they require perfect alignment for a professional outcome. The steel square can be employed to measure and mark straight lines, right angles, and the various angles necessary for tile cuts. Additionally, the steel square can serve as a straightedge or guide during tile cutting. By positioning the square against the tile, it can help ensure a straight and even cut. This proves especially useful when executing diagonal or angled cuts. However, it is important to note that the steel square is not specifically tailored for tile installation and may lack certain features required for the task. For instance, it may lack the notches or guides typically present in tile-specific tools. Therefore, while the steel square can be utilized and is often found in the toolkits of many professionals, it may not be the most ideal or specialized tool for tile installation. To conclude, while a steel square can be employed in tile installation and provide valuable assistance in measurement, marking, and cutting, it is advisable to also possess specialized tile tools to ensure optimal results.
Send your message to us
Alloyed square bar-Steel
- Ref Price:
-
- Loading Port:
- China Main Port
- Payment Terms:
- TT OR LC
- Min Order Qty:
- -
- Supply Capability:
- -
OKorder Service Pledge
OKorder Financial Service
Similar products

Hot products


Hot Searches
Related keywords

