


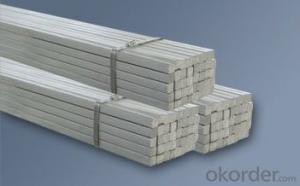
Alloyed steel square bar
- Ref Price:
-

- Loading Port:
- China Main Port
- Payment Terms:
- TT OR LC
- Min Order Qty:
- -
- Supply Capability:
- -
OKorder Service Pledge
OKorder Financial Service
You Might Also Like


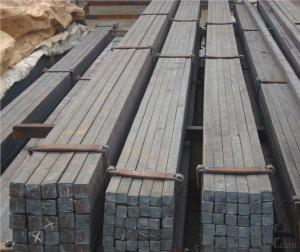


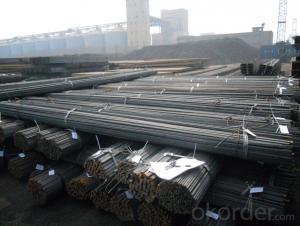
hot rolled square steel billet
1.Q195 Q235 Q345B
2.terms of payment: L/C T/T
3.size: 100~150mm length: 5.8~12m
4.certificate:GB
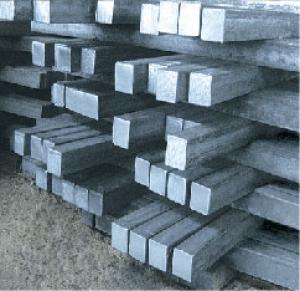
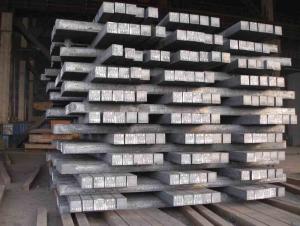
Type | Steel billet |
Standard Grade | a. 3SP/PS |
b. Q235 | |
c. 5SP d. Q275 | |
Size | 120mm x 120mm-150mm x 150mm etc. as per customers' requirement |
Length | 12m as standard |
Application | Carbon structural steel, Alloy steel, Gear steel, etc. |
Packing | standard export packing, or as per customers' requirement |
Quality | First quality |
Delivery time | Right now after the deposit. |
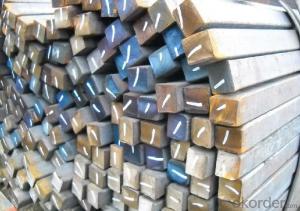
Others | 1. our products conform to all the standards |
2. we can offer special specification products as per our customers | |
3. we can offer the original mill test certificate and original production |
- Q: Can a steel square be used for automotive repairs?
- Yes, a steel square can be used for automotive repairs. It is a versatile tool that can be utilized for measuring and checking angles, ensuring accuracy in repairs and alignments.
- Q: Can a steel square be used for checking the squareness of furniture joints?
- Yes, a steel square can be used for checking the squareness of furniture joints. A steel square, also known as a carpenter's square or a framing square, is a versatile tool commonly used in woodworking and construction. It has a right angle shape, with one long side and one short side forming a 90-degree angle. To check the squareness of furniture joints, you can place the steel square against the joint and observe if it fits perfectly into the corner, indicating that the joint is at a perfect right angle. If there is any gap or misalignment between the square and the joint, it would indicate that the joint is not perfectly square. Using a steel square to check the squareness of furniture joints is a simple and effective method, especially when working on projects that require accurate angles and precise measurements. It helps ensure that the furniture has properly aligned joints, which enhances stability, durability, and overall quality.
- Q: What are the different ways to hold a steel square when making measurements?
- There are several ways to hold a steel square when making measurements. The most common method is to hold it by the handle, keeping it perpendicular to the surface being measured. Another way is to grip the square by the body, placing one edge along the surface and aligning the other edge with the desired measurement. Additionally, the square can be held by the handle and used as a guide against another surface, ensuring accurate measurements. Ultimately, the method of holding the steel square depends on the specific measurement being taken and the preference of the user.
- Q: What are the different ways to read angles on a steel square?
- There are typically three different ways to read angles on a steel square: 1. Degree scale: Steel squares often have a degree scale on one of the arms, allowing you to directly read the angle in degrees. This scale is useful for precise measurements and accurate angle readings. 2. Protractor scale: Some steel squares feature a protractor scale, which allows you to measure angles more precisely. By aligning the square's edge with the angle you want to measure, you can read the angle directly from the protractor scale. 3. Vernier scale: Certain steel squares may also have a vernier scale, which provides a more detailed measurement of angles. By aligning the square's edge with the angle you want to measure, you can read the angle from the vernier scale and get a more precise reading than with a regular degree scale.
- Q: How do you use a steel square to lay out stair stringers?
- To use a steel square for laying out stair stringers, you will need to follow a few steps. First, gather all the necessary tools and materials, including a steel square, a tape measure, a pencil, a framing square, and the dimensions or measurements for your stair design. Next, determine the rise and run of your stairs. The rise is the vertical height between each step, while the run is the horizontal depth of each step. Measure and mark these dimensions accurately. Once you have the rise and run measurements, you can start laying out the stringers. Place the steel square on the edge of the stringer board, aligning the 90-degree corner of the square with the top edge. This corner represents the top of the stringer. Use the rise measurement to mark a point on the stringer, starting from the top edge and moving down. This will indicate the location of the top of the first step. Then, use the run measurement to mark another point on the stringer, starting from the same top edge but moving horizontally. This will indicate the location of the front of the first step. Continue this process for the remaining steps, using the same rise measurement for each step but adjusting the run measurement accordingly. Make sure to mark both the top and front of each step accurately. After marking the stringer for all the steps, use the framing square to connect the marks and create the outline of the stringer. Place the square's wider arm against the top edge of the stringer and align the narrower arm with the front edge. Draw a line along the edge of the square to connect the marks and create the profile of the stringer. Finally, repeat these steps for the opposite side of the stringer if you are building a double stringer staircase. This will ensure that you have two identical stringers for your stairs. Using a steel square to lay out stair stringers is an effective method that helps ensure accurate and symmetrical construction. However, it is crucial to double-check your measurements and marks before cutting the stringers to avoid any mistakes or inaccuracies.
- Q: Can a steel square be used for baseboard installation?
- Yes, a steel square can be used for baseboard installation.
- Q: What are some common applications for a steel square in woodworking?
- A steel square is a versatile tool that is commonly used in woodworking for various applications such as measuring and marking right angles, checking the squareness of joints, laying out and marking precise measurements, and determining the accuracy of cuts and angles. It can also be used as a guide for cutting or sawing straight lines and as a support or fence for ensuring straight and square cuts.
- Q: Can a steel square be used for measuring roofing angles?
- Yes, a steel square can be used for measuring roofing angles. A steel square, also known as a framing square or carpenter's square, is a versatile tool that can be used for a variety of measurements in construction, including roofing angles. Its long body and right angle shape make it ideal for measuring and marking angles accurately. With the help of the steel square, roofers can determine the pitch or slope of a roof, ensuring precise measurements for proper installation and alignment of roofing materials.
- Q: Can a steel square be used for tile layout?
- Tile layout can definitely benefit from the use of a steel square. This tool, also referred to as a framing square or a carpenter's square, is incredibly versatile and has many applications in layout tasks. One of its main uses is for marking right angles and checking for squareness. When it comes to tile layout specifically, a steel square is great for ensuring that tiles are laid out in straight lines and at perfect right angles. It can also be used to measure and mark the starting point for tile installation, as well as to verify if the tiles are properly aligned and square throughout the installation process. However, it's important to remember that while a steel square is useful, it should be utilized alongside other tile layout tools like a chalk line or a laser level. This combination guarantees accurate and precise tile installation.
- Q: Can a steel square be used for checking the alignment of a fence?
- Yes, a steel square can be used for checking the alignment of a fence. A steel square, also known as a framing square or carpenter's square, is a versatile tool that can be used for various tasks in carpentry and construction. It consists of a long blade and a shorter tongue, forming a right angle, with measurement markings along both edges. To check the alignment of a fence, you can use a steel square to ensure that the posts and rails are properly perpendicular to each other. This is important for maintaining the structural integrity and stability of the fence. First, place the steel square against one of the fence posts, ensuring that the blade aligns with the post and the tongue extends along the rail. Check if the square is flush against the post and rail, and if not, adjust the alignment until it is. Next, use a level to check if the square is perfectly vertical. If the bubble in the level is centered, it means that the fence post is plumb. If it is not, make adjustments to the post until it is perfectly vertical. Repeat this process for each fence post and rail to ensure that the entire fence is properly aligned. Using a steel square can help you achieve a straight and level fence, enhancing its functionality and aesthetic appeal.
Send your message to us
Alloyed steel square bar
- Ref Price:
-
- Loading Port:
- China Main Port
- Payment Terms:
- TT OR LC
- Min Order Qty:
- -
- Supply Capability:
- -
OKorder Service Pledge
OKorder Financial Service
Similar products

Hot products


Hot Searches
Related keywords

