


0.3% De Chemial Element Cr For Steel Square Bar
- Ref Price:
-

- Loading Port:
- China main port
- Payment Terms:
- TT OR LC
- Min Order Qty:
- 25 m.t.
- Supply Capability:
- 10000 m.t./month
OKorder Service Pledge
OKorder Financial Service
You Might Also Like


Product Description
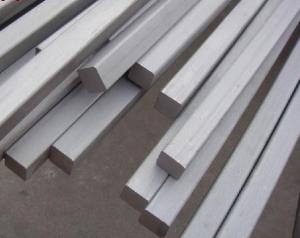
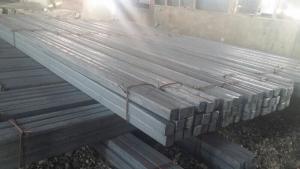
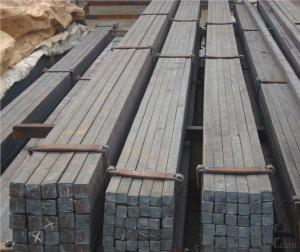
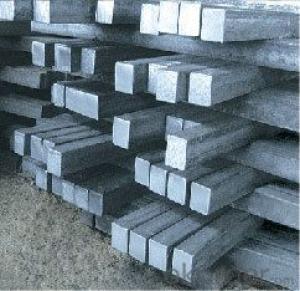
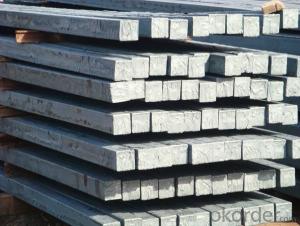
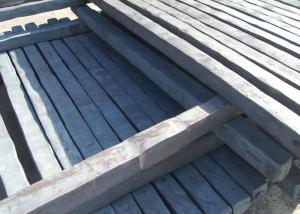
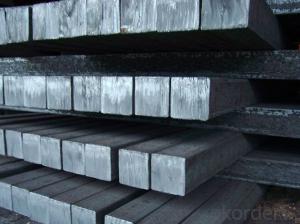
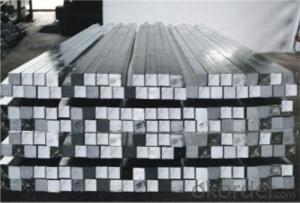
There are two types of Square Bar, one is hot rolled square bar and other one is cold drawn square bar. Our principal products is hot rolled square bar. We dedicate to products with material Q195 and Q235. We offer products with high quality and low price.
Specifications
-Standard: GB,
-Grade: Q195/Q235 or equivalent.
-Chemical Composition:
Standard | Grade | Element (%) | ||||
C | Mn | S | P | Si | ||
GB | Q195 | 0.06~0.12 | 0.25~0.50 | ≤0.050 | ≤0.045 | ≤0.30 |
GB | Q235B | 0.12~0.20 | 0.30~0.70 | ≤0.045 | ≤0.045 | ≤0.30 |
-Mechanical Properties:
Mechanical Properties | Grade | Steel diameter(mm) | |||
≤16 | 16~40 | 40~60 | 60~100 | ||
Yield Point Δs/MPa | Q195 | ≥195 | ≥185 | - | - |
Q235 | 235 | 225 | 215 | 205 | |
Tensile Strength | Q195 | 315~390 | |||
Q235 | 375~500 | ||||
Elongation δ5% | Q195 | ≥33 | ≥32 | - | - |
Q235 | 26 | 25 | 24 | 23 | |
Measures (Big measures):
(Section of Hot-rolled Square Steel Bar)
-Length of a side and Theoretical weight of Square Bar (Big measures).
Length of a side(mm) | Theoretical weight(kg/m) | Length of a side(mm) | Theoretical weight(kg/m) |
53 | 22.05 | 80 | 50.24 |
56 | 24.61 | 85 | 56.72 |
60 | 28.26 | 90 | 63.59 |
63 | 31.16 | 95 | 70.85 |
70 | 38.49 | 100 | 78.50 |
75 | 44.16 |
Notes:
1, The theoretical weights in the list, base on the density of 7.85 g/cm3.
2, Formula for theoretical weight of Square bar: a(length of a side) * a * 0.00785
3, The numbers with *mean that they are not regular or we don’t offer them.
-Regular length of Square Bar:
Steel | Length of a side (mm) | Length of steel (m) |
Normal steel | < 25 | 4~10 |
> 25 | 3~9 | |
Steel of high quality | All measure | 2~6 |
Tool steel >75 | 1~6 |
Usage/Applications
-The Square Steel is normally used as structure steel.
-Row material for other structure steel like steel angles, channels, I-beams, H-beams, etc…
-Row material for steel pipes.
Packaging & Delivery
-Packing Detail:
1, The products can be packed in bundles by steel wires.
2, The weight of each bundle no exceed normally 3 tons.
-Marks: We make tag marks and color marks for each bundle. The tag marks with white background and red company log will be tied up to each bundle. The information is usually including basic information of company and products like product name, specification, etc...and other information required by customers. As for color marks, we will paint both ends of each bundles to make sure that it will be more convenient for customers to distinguish theme from other products.
-Delivery Detail: 30~45 working days after receive buyer’s T.T. or L/C.
Payment:
-Invoicing on theoretical weight or actual weight as customer’s request.
-FOB, CFR or CIF.
-Regular terms of payment:
1, 30% payment in advance, the remaining balance (70% payment) against the copy of B/L.
2, 30% payment in advance, the remaining balance (70% L/C) against the copy of B/L.
3, Negotiable.
-The payment terms will be written in contraction detailed.
- Q: Can a steel square be used for outdoor kitchen layout and construction?
- Yes, a steel square can be used for outdoor kitchen layout and construction. Steel squares are durable and weather-resistant, making them suitable for outdoor environments. They provide accurate measurements and angles, which are essential for precise layout and construction of an outdoor kitchen.
- Q: The steel and wood preservative in the flower is how to connect
- A dovetail screw / stainless steel fixed special anticorrosive wood keel screws,
- Q: Can a steel square be used for setting up a scroll saw?
- Indeed, the setup of a scroll saw can involve the utilization of a steel square. A steel square possesses great versatility as a woodworking tool, serving multiple purposes, such as the establishment of a scroll saw. By implementing this tool, one can guarantee that the table of the scroll saw aligns flawlessly with the blade, resulting in meticulous and precise cuts. Simply position the steel square against both the blade and the table, enabling the adjustment of the table's angle until it achieves complete squareness. This technique will greatly aid in the attainment of straight and immaculate cuts when operating the scroll saw.
- Q: Can a steel square be used for checking the levelness of countertops?
- No, a steel square cannot be used for checking the levelness of countertops. A steel square is primarily used for measuring angles and ensuring the accuracy of right angles. To check the levelness of countertops, a level tool should be used. A level is a device with a bubble vial filled with liquid that allows you to determine if a surface is perfectly horizontal or vertical. This is important for countertops to ensure that they are level and provide a stable and even surface.
- Q: How do you use a steel square to measure the height of a wall?
- To use a steel square to measure the height of a wall, you can place the square's long edge vertically against the wall, ensuring it is flush with the ground. Then, mark the height on the square's blade where it meets the top of the wall. This marked measurement will represent the height of the wall.
- Q: Can a steel square be used for checking the squareness of a lathe tailstock?
- Yes, a steel square can be used for checking the squareness of a lathe tailstock. A steel square is a precision measuring tool that has a right angle, making it suitable for determining whether the tailstock is perpendicular to the lathe bed. By placing the steel square against the tailstock's base and the lathe bed, any deviation from a right angle can be easily identified. This is an important step in ensuring the accuracy of machining operations performed on the lathe.
- Q: Can a steel square be used for measuring pipe sizes?
- No, a steel square cannot be used for measuring pipe sizes as it is primarily used for measuring right angles and not suitable for measuring the diameter or circumference of a pipe.
- Q: Can a steel square be used for deck railing installation?
- Yes, a steel square can be used for deck railing installation.
- Q: Can a steel square be used for measuring pipe fittings?
- Yes, a steel square can be used for measuring pipe fittings. The straight edges of a steel square can be used to ensure that the pipe fittings are at right angles to each other. Additionally, the 90-degree angle of the square can be used to verify the accuracy of the pipe fitting's angles and ensure that they are properly aligned. However, it is important to note that for precise measurements and to account for any variations in the thickness of the pipe or fitting, specialized measuring tools such as calipers or tape measures may be more appropriate.
- Q: Can a steel square be used for checking the squareness of a miter saw fence?
- Yes, a steel square can be used for checking the squareness of a miter saw fence. A steel square is a versatile tool that can be used to ensure accurate and precise angles in various woodworking applications, including checking the squareness of a miter saw fence. By placing the steel square against the saw fence and aligning it with the blade, you can determine if the fence is perfectly perpendicular to the blade or if any adjustments are needed. The straight edges of the steel square provide a reliable reference for checking the squareness of the miter saw fence, ensuring that your cuts will be precise and accurate.
Send your message to us
0.3% De Chemial Element Cr For Steel Square Bar
- Ref Price:
-
- Loading Port:
- China main port
- Payment Terms:
- TT OR LC
- Min Order Qty:
- 25 m.t.
- Supply Capability:
- 10000 m.t./month
OKorder Service Pledge
OKorder Financial Service
Similar products
Hot products


Hot Searches
Related keywords

