


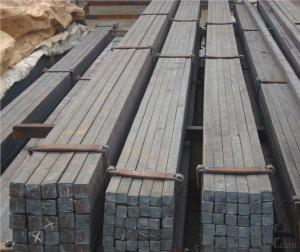
13mm*1.33kg/m square bar for construction
- Ref Price:
-

- Loading Port:
- Tianjin
- Payment Terms:
- TT OR LC
- Min Order Qty:
- 25 m.t.
- Supply Capability:
- 100000 m.t./month
OKorder Service Pledge
OKorder Financial Service
You Might Also Like


Product Description:
Product Description
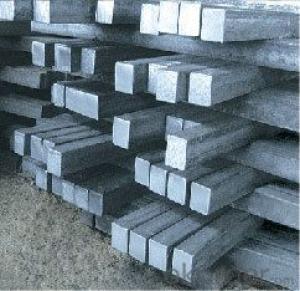
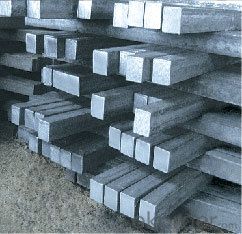
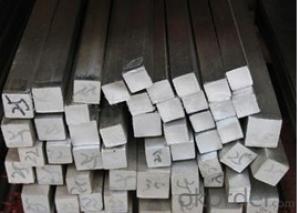
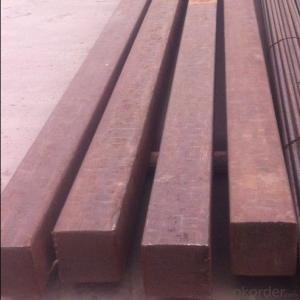
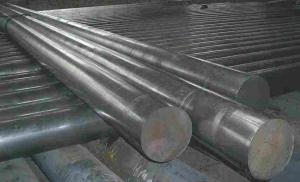
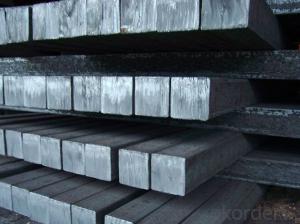
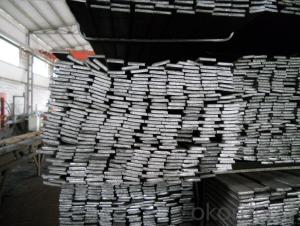
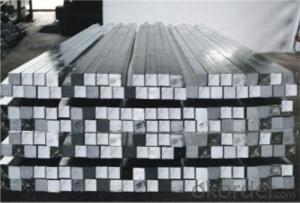
There are two types of Square Bar, one is hot rolled square bar and other one is cold drawn square bar. Our principal products is hot rolled square bar. We dedicate to products with material Q195 and Q235. We offer products with high quality and low price.
Specifications
-Standard: GB,
-Grade: Q195/Q235 or equivalent.
-Chemical Composition:
Standard | Grade | Element (%) | ||||
C | Mn | S | P | Si | ||
GB | Q195 | 0.06~0.12 | 0.25~0.50 | ≤0.050 | ≤0.045 | ≤0.30 |
GB | Q235B | 0.12~0.20 | 0.30~0.70 | ≤0.045 | ≤0.045 | ≤0.30 |
-Mechanical Properties:
Mechanical Properties | Grade | Steel diameter(mm) | |||
≤16 | 16~40 | 40~60 | 60~100 | ||
Yield Point Δs/MPa | Q195 | ≥195 | ≥185 | - | - |
Q235 | 235 | 225 | 215 | 205 | |
Tensile Strength | Q195 | 315~390 | |||
Q235 | 375~500 | ||||
Elongation δ5% | Q195 | ≥33 | ≥32 | - | - |
Q235 | 26 | 25 | 24 | 23 | |
Measures (Big measures):
(Section of Hot-rolled Square Steel Bar)
-Length of a side and Theoretical weight of Square Bar (Big measures).
Length of a side(mm) | Theoretical weight(kg/m) | Length of a side(mm) | Theoretical weight(kg/m) |
53 | 22.05 | 80 | 50.24 |
56 | 24.61 | 85 | 56.72 |
60 | 28.26 | 90 | 63.59 |
63 | 31.16 | 95 | 70.85 |
70 | 38.49 | 100 | 78.50 |
75 | 44.16 |
Notes:
1, The theoretical weights in the list, base on the density of 7.85 g/cm3.
2, Formula for theoretical weight of Square bar: a(length of a side) * a * 0.00785
3, The numbers with *mean that they are not regular or we don’t offer them.
-Regular length of Square Bar:
Steel | Length of a side (mm) | Length of steel (m) |
Normal steel | < 25 | 4~10 |
> 25 | 3~9 | |
Steel of high quality | All measure | 2~6 |
Tool steel >75 | 1~6 |
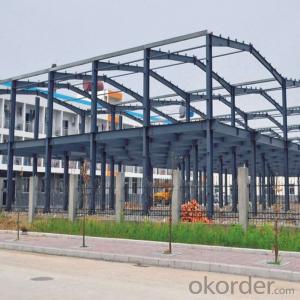
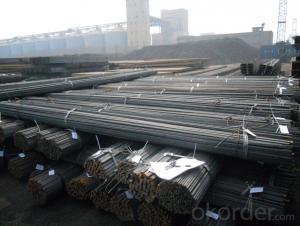
Usage/Applications
-The Square Steel is normally used as structure steel.
-Row material for other structure steel like steel angles, channels, I-beams, H-beams, etc…
-Row material for steel pipes.
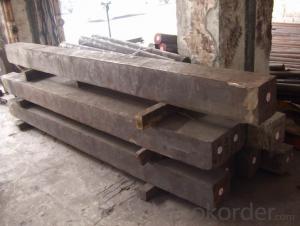
Packaging & Delivery
-Packing Detail:
1, The products can be packed in bundles by steel wires.
2, The weight of each bundle no exceed normally 3 tons.
-Marks: We make tag marks and color marks for each bundle. The tag marks with white background and red company log will be tied up to each bundle. The information is usually including basic information of company and products like product name, specification, etc...and other information required by customers. As for color marks, we will paint both ends of each bundles to make sure that it will be more convenient for customers to distinguish theme from other products.
-Delivery Detail: 30~45 working days after receive buyer’s T.T. or L/C.
Payment:
-Invoicing on theoretical weight or actual weight as customer’s request.
-FOB, CFR or CIF.
-Regular terms of payment:
1, 30% payment in advance, the remaining balance (70% payment) against the copy of B/L.
2, 30% payment in advance, the remaining balance (70% L/C) against the copy of B/L.
3, Negotiable.
-The payment terms will be written in contraction detailed.


- Q: Can a steel square be used for measuring roof pitches?
- Yes, a steel square can be used for measuring roof pitches. The markings and angles on a steel square make it a useful tool for determining the pitch or slope of a roof.
- Q: How do you use a steel square to measure and lay out a miter joint?
- To use a steel square to measure and lay out a miter joint, start by placing the square against the edge of the material and aligning the inside corner of the square with the edge. Then, mark a line along the outside edge of the square to indicate the desired angle of the miter joint. Repeat this process on the other piece of material that will be joined to ensure both angles match. Finally, cut along the marked lines to create the miter joint, ensuring a precise and snug fit.
- Q: Can a steel square be used for marking out mortise and tenon joints?
- Yes, a steel square can be used for marking out mortise and tenon joints. Steel squares are commonly used in woodworking for accurate and precise measurements, making them suitable for marking out the necessary dimensions and angles required for mortise and tenon joints.
- Q: How do you use a steel square for marking and cutting dovetail joints?
- To use a steel square for marking and cutting dovetail joints, first, align the square's long edge against the end of the board to be marked. Then, use the square's shorter edge to mark the desired angle for the dovetail joint on the board's end grain. Next, use a marking knife or pencil to trace along the square's edge, creating precise guidelines for cutting. Finally, use a saw or chisel to cut along the marked lines, following the angles indicated by the steel square, ensuring a clean and accurate dovetail joint.
- Q: How do you use a steel square to determine the slope of a gutter?
- In order to determine the slope of a gutter using a steel square, the following steps should be followed: 1. Begin by measuring the width of the gutter using the outer edges of the steel square. Make sure that the square is firmly pressed against the gutter. 2. Proceed by positioning one side of the steel square against the bottom of the gutter, ensuring that it is level. The other side of the square should extend vertically towards the top edge of the gutter. 3. Verify that the steel square is perfectly vertical by using a level. If necessary, make adjustments. 4. Once the steel square is aligned correctly, examine the measurement markings on the square. The vertical side of the square indicates the rise or fall, while the horizontal side represents the run or distance. 5. Take note of the measurement where the horizontal side of the square intersects with the top edge of the gutter. This measurement will provide you with the rise or fall of the gutter. 6. To calculate the slope, divide the measurement of the rise or fall by the width of the gutter. This will yield the slope ratio, which can be expressed as a percentage or a ratio (e.g., 1:100). Utilizing a steel square to determine the slope of a gutter is an effective technique as it enables precise measurements and guarantees the proper installation of the gutter for efficient drainage.
- Q: Can a steel square be used for making parallel lines?
- Yes, a steel square can be used for making parallel lines. Steel squares have straight edges and can be aligned with a straight edge or a ruler to create parallel lines accurately.
- Q: How do you use a steel square to determine the angle of a molding cut?
- To use a steel square to determine the angle of a molding cut, you will need to follow a few simple steps. First, ensure that the steel square is clean and free from any debris or rust. This will ensure accurate measurements. Next, place the square on the edge of the molding, aligning one side of the square with the edge of the molding. Make sure the square is positioned in a way that the other side of the square is perpendicular to the edge of the molding. Once the square is properly positioned, locate the angle markings on the square. These markings are usually found on the inside corner of the square, where the two arms meet. Now, carefully read the angle measurement indicated on the square. This measurement will help you determine the angle at which the molding needs to be cut. If the angle indicated on the square is greater than 90 degrees, it means you need to make an obtuse angle cut. If the angle is less than 90 degrees, it indicates an acute angle cut. To make the cut, transfer the angle measurement from the square to your saw or miter box. Set the saw or miter box to the desired angle and carefully cut the molding along the marked line. Remember to always wear appropriate safety gear, such as goggles and gloves, when working with tools and sharp objects. Double-check your measurements and angle settings before making any cuts to ensure accuracy and precision.
- Q: Can a steel square be used for stair railing layout and installation?
- Yes, a steel square can be used for stair railing layout and installation. A steel square, also known as a framing square or carpenter's square, is a versatile tool that is commonly used in carpentry and construction projects. It consists of a long arm and a shorter arm that meet at a 90-degree angle, forming a right triangle. When it comes to stair railing layout and installation, a steel square can be used to ensure accurate and precise measurements. It can be used to mark the angles and dimensions needed for cutting the railing components, such as balusters and handrails. The long arm of the steel square can be aligned with the edge of the stair tread or riser to accurately mark the locations for installing the railing posts. Furthermore, a steel square can be used to check for squareness and alignment during the installation process. It can be placed against the railing posts and used to verify that they are perpendicular to the stair treads and risers. This is crucial for ensuring a sturdy and level installation. In summary, a steel square is a valuable tool that can be used for stair railing layout and installation. Its versatility and accuracy make it ideal for marking angles, measuring dimensions, and checking for squareness during the installation process.
- Q: Can a steel square be used for measuring angles in metal fabrication?
- Indeed, angles in metal fabrication can be measured using a steel square. In metal fabrication, steel squares are widely employed for layout and measurement tasks. Possessing a 90-degree angle and multiple markings along the edges, they facilitate precise measurements and angle determination. Although there are more specialized tools like protractors or digital angle finders available for angle measurement, a steel square suffices for most metal fabrication applications, providing reasonably accurate outcomes. To guarantee accurate angle measurements, it is crucial to calibrate the square correctly and employ it accurately.
- Q: What are the common materials used to make steel squares?
- Steel squares are typically made using a variety of common materials. The main material used to make steel squares is, of course, steel. Steel is a widely used material due to its high strength, durability, and resistance to corrosion. It provides the necessary stability and hardness required for accurate measurements and precise marking. In addition to steel, other materials are also commonly used in the production of steel squares. One such material is brass. Brass is often used for the face of the square, as it is softer and less likely to damage delicate surfaces when used for marking or scribing. Another material that can be found in steel squares is wood. Wooden handles are often attached to steel squares to provide a comfortable grip and ease of use. Wood is chosen for its natural warmth, durability, and ability to absorb vibrations, ensuring a more stable and accurate measurement. Overall, steel squares are typically made using a combination of steel, brass, and wood. These materials work together to create a reliable and versatile tool that is commonly used in various industries such as carpentry, metalworking, and engineering.
Send your message to us
13mm*1.33kg/m square bar for construction
- Ref Price:
-
- Loading Port:
- Tianjin
- Payment Terms:
- TT OR LC
- Min Order Qty:
- 25 m.t.
- Supply Capability:
- 100000 m.t./month
OKorder Service Pledge
OKorder Financial Service
Similar products
Hot products


Hot Searches
Related keywords

