

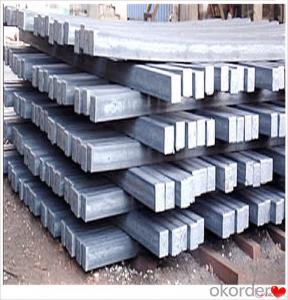
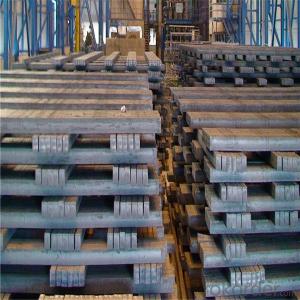
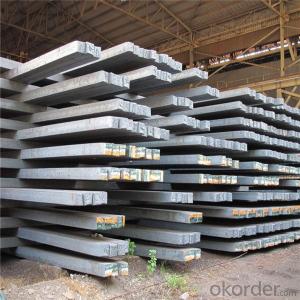
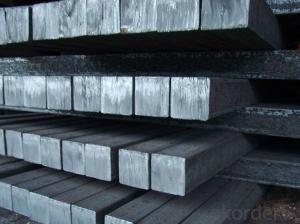
Steel Square Billet Chinese Standard Q195, Q235 and Q275
- Ref Price:
-

- Loading Port:
- Tianjin
- Payment Terms:
- TT or LC
- Min Order Qty:
- 25 m.t.
- Supply Capability:
- 10000 m.t./month
OKorder Service Pledge
OKorder Financial Service
You Might Also Like


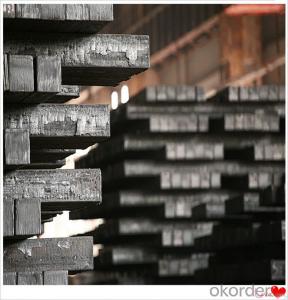
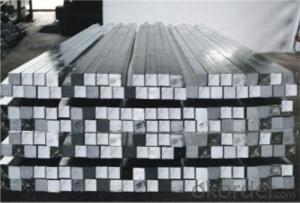
1. Structure of Steel Square Billet Description:
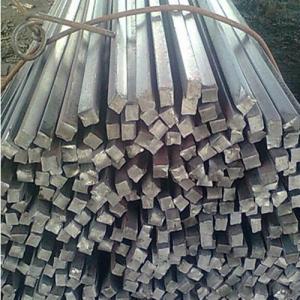
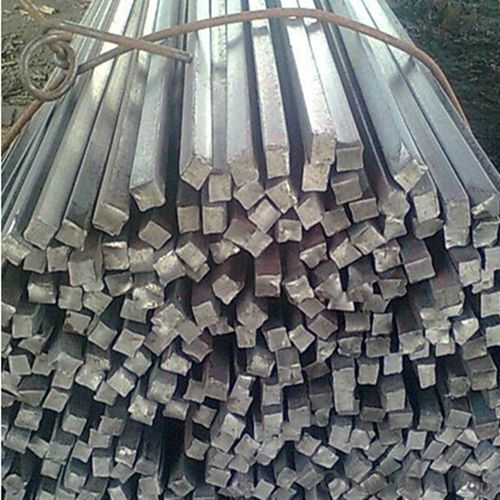
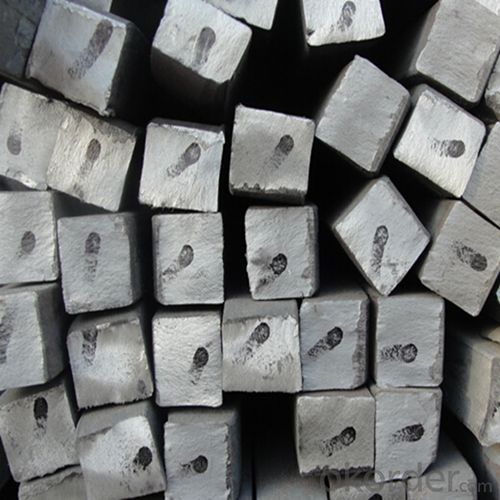
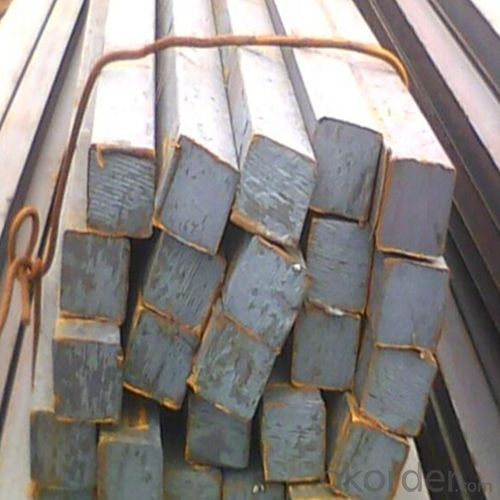
Square bars with firm sides is a bar with square shaped cross-section. It is special case of equal sides. Before steel products are sold on the market, the steel must first be processed into more functional pieces. Raw steel cannot be of use while in its pure form, thus it has to be cast into shape. The freshly made steel, square bars with firm sides is still in the form of a metal bar or rectangle. Small sizes of square bars with firm sides are used in ship building.
2. Main Features of Steel Square Billet:
• Grade: Q235
• Type: Mild carbon steel
• A quadrilateral with four equal sides and four right angles.
• Vibration: The stiffness and mass are chosen to prevent unacceptable vibrations, particularly in settings sensitive to vibrations, such as offices and libraries.
• Local yield: Caused by concentrated loads, such as at the beam's point of support.
3. Steel Square Billet Images:


4. Steel Square Billet Specification:
Mechanical Properties | Grade | Steel diameter(mm) | |||
≤16 | 16~40 | 40~60 | 60~100 | ||
Yield Point Δs/MPa | Q195 | ≥195 | ≥185 | - | - |
Q235 | 235 | 225 | 215 | 205 | |
Tensile Strength | Q195 | 315~390 | |||
Q235 | 375~500 | ||||
Elongation δ5% | Q195 | ≥33 | ≥32 | - | - |
Q235 | 26 | 25 | 24 | 23 | |
5. FAQ
We have organized several common questions for our clients,may help you sincerely:
①What is the main material?
There are two types of Square Bar, one is hot rolled square bar and other one is cold drawn square bar. Our principal products is hot rolled square bar. We dedicate to products with material Q195 and Q235. We offer products with high quality and low price.
②How to inspect the quality?
We have a professional inspection group which belongs to our company. We resolutely put an end to unqualified products flowing into the market. At the same time, we will provide necessary follow-up service assurance.
③Is there any advantage about this kind of product?
Steel I beam bar IPE has a reduced capacity in the transverse direction, and is also inefficient in carrying torsion, for which hollow structural sections are often preferred.
- Q: How accurate are steel squares for measuring angles?
- Steel squares, renowned for their precision and adherence to strict standards, offer exceptional accuracy in angle measurement. Nevertheless, external factors like wear and tear, misuse, or manufacturing defects may impact their precision. Thus, regular checks and calibrations are crucial to uphold their accuracy. All in all, when utilized correctly and maintained diligently, steel squares prove themselves as highly reliable instruments for measuring angles.
- Q: How do you use a steel square to measure and mark 191.25-degree angles?
- To use a steel square to measure and mark a 191.25-degree angle, you would need to follow a few steps: 1. Begin by aligning the long leg of the steel square with one of the sides of the angle you want to measure. Ensure that the shorter leg of the square is pointing towards the interior of the angle. 2. Next, rotate the steel square so that the edge of the shorter leg intersects with the other side of the angle. This should create a line that is perpendicular to both sides of the angle. 3. Now, using a protractor or angle finder, measure and mark a 90-degree angle from the line you just created. You can do this by placing the protractor or angle finder along the line and aligning it to read 90 degrees. 4. After marking the 90-degree angle, continue rotating the steel square along the same point of intersection, but this time in the opposite direction of the original line. Keep rotating until you reach the desired 191.25 degrees. To make the measurement more accurate, you can divide the angle into smaller increments, such as 45 degrees, 90 degrees, 135 degrees, and so on. 5. Once you have determined the correct position for the 191.25-degree angle, mark the point at which the long leg of the steel square intersects with the other side of the angle. By following these steps, you can effectively use a steel square to measure and mark a 191.25-degree angle. Remember to double-check your measurements and take your time to ensure accuracy.
- Q: Can a steel square be used for checking the alignment of posts?
- The alignment of posts can be checked using a steel square. This versatile and convenient tool is commonly employed in carpentry and woodworking. Its shape resembles a right angle with measurements marked on its edges. To ensure that the corners of the posts are at perfect right angles, a steel square can be utilized. This is crucial for maintaining the structural integrity and proper alignment of the posts. To check post alignment with a steel square, position one edge of the square against the side of the post and align it with the corner. Then, employ the other edge of the square to examine the alignment of the opposite side of the post. If the square fits perfectly against the post and the edges are aligned, it signifies that the post is properly aligned and at a right angle. Moreover, a steel square can also be employed to verify the levelness of the posts. By placing the square against the top surface of the post, you can determine if the post is level or requires adjustment. In conclusion, the alignment of posts can be assessed effectively using a steel square. It guarantees the right angles of the corners and enables the verification of levelness for the posts.
- Q: Twist steel (twisting steel) there is no standard?
- Because the steel plate for standard parts, CAD drawing without draw, only need to mark the type and size of the bearing flat steel lattice steel plate and the direction of the steel grid plate, the specific use of what types of bar, can be specified by the user, if the platform is too large, can be discharged from the layout of steel grid plate manufacturers, general row layout is free.
- Q: Can a steel square be used for measuring the width of a cabinet opening?
- Yes, a steel square can be used for measuring the width of a cabinet opening. A steel square, also known as a framing square or carpenter's square, is a versatile tool commonly used in woodworking and construction. It consists of a long arm and a shorter arm that meet at a right angle. The longer arm usually has measurements marked on it, making it easy to measure and mark straight lines and angles accurately. To measure the width of a cabinet opening using a steel square, you can place the longer arm against one side of the opening and align the shorter arm with the opposite side. By extending the longer arm until it reaches the edge of the cabinet opening, you can read the measurement marked on the longer arm to determine the width. However, it is important to note that a steel square may not be the most precise tool for measuring the width of a cabinet opening. Depending on the accuracy required for your project, you might want to consider using a measuring tape or a specialized woodworking tool such as a digital caliper for more precise measurements.
- Q: Can a steel square be used for checking the alignment of fences?
- Yes, a steel square can be used for checking the alignment of fences.
- Q: How do you use a steel square to measure and mark 258.75-degree angles?
- To use a steel square to measure and mark a 258.75-degree angle, you can follow these steps: 1. Start by placing the steel square on a flat surface or against the edge of the material you want to mark. 2. Position the long side of the steel square along the edge of the material or the line where you want to draw the angle. 3. Make sure the shorter side of the square is perpendicular to the long side and touching the material. 4. Use a pencil or a marker to mark a point on the material where the shorter side of the steel square meets the edge or line. 5. Next, you need to find the midpoint of the 90-degree angle formed by the steel square. To do this, divide the angle by 2, which gives you 129.375 degrees. 6. Rotate the steel square so that the shorter side is now aligned with the line or edge of the material, and the long side is pointing towards the midpoint you just calculated. 7. Again, use a pencil or marker to mark a point where the shorter side meets the material. 8. The line connecting the two marked points should be the desired 258.75-degree angle. Remember to always double-check your measurements and markings to ensure accuracy.
- Q: How do you use a steel square for creating accurate bevel cuts?
- To use a steel square for creating accurate bevel cuts, you need to follow a few steps. First, ensure that your steel square is clean and free from any dirt or debris that could affect its accuracy. Next, determine the desired angle for your bevel cut. This can be done by either using a protractor or by referring to a bevel angle guide or template. Once you have the angle, place your steel square on the material you want to cut, aligning one edge of the square with the edge of the material. Then, using a pencil or a scribe, mark a line along the edge of the steel square. This line will indicate the path of your bevel cut. After marking the line, carefully position your saw blade at the starting point of the line, ensuring that it aligns with the marked path. Hold the steel square firmly against the material, using it as a guide, and begin making the bevel cut along the marked line. Keep a steady hand and maintain constant pressure against the steel square throughout the cut to ensure accuracy. Once you have completed the cut, double-check the angle using a measuring tool to ensure it matches your desired bevel angle. By following these steps and using a steel square as a guide, you can achieve accurate bevel cuts with precision and confidence.
- Q: How do you use a steel square to measure and mark 180-degree angles?
- To use a steel square to measure and mark 180-degree angles, follow these steps: 1. Place the steel square on the surface or material where you want to measure the angle. 2. Align one side of the square with a reference line or edge of the material. 3. Ensure that the right-angle corner of the square is positioned at the starting point of the angle you want to measure. 4. Rotate the square until the other side aligns with the desired direction of the angle. 5. Once the desired angle is achieved, hold the square firmly in place. 6. Use a pencil or marker to mark the 180-degree angle by tracing along the edge of the square. 7. Remove the steel square, and you will have a precise 180-degree angle marked on your material. It is important to note that a steel square is designed to measure and mark right angles (90 degrees). To measure and mark 180-degree angles, you will need to utilize the right-angle corner of the square and align it accordingly to achieve the desired angle.
- Q: What are some common uses of a steel square in metalworking jewelry making?
- Some common uses of a steel square in metalworking jewelry making include measuring and marking angles, ensuring straight and accurate cuts or bends, checking for squareness or alignment, and creating precise templates or patterns. It is also helpful in layout work, scribing lines, and verifying dimensions during the fabrication process.
Send your message to us
Steel Square Billet Chinese Standard Q195, Q235 and Q275
- Ref Price:
-
- Loading Port:
- Tianjin
- Payment Terms:
- TT or LC
- Min Order Qty:
- 25 m.t.
- Supply Capability:
- 10000 m.t./month
OKorder Service Pledge
OKorder Financial Service
Similar products

Hot products


Hot Searches
Related keywords

