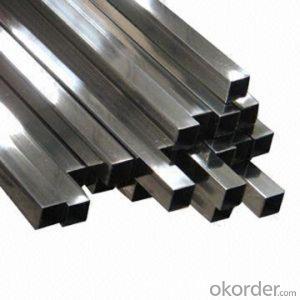

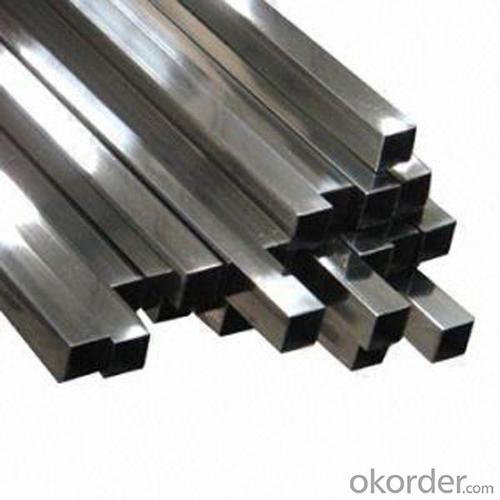

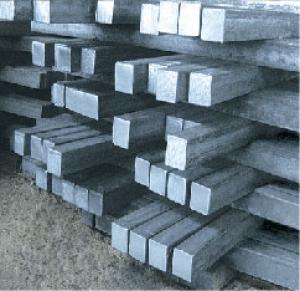
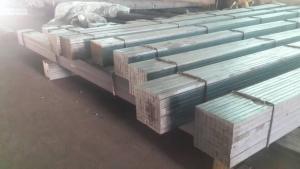
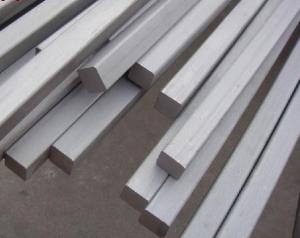
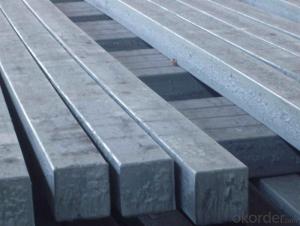
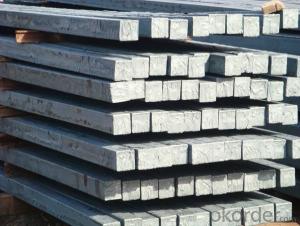
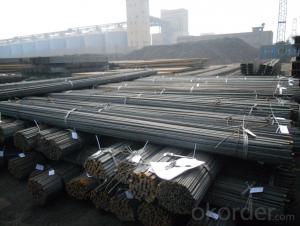
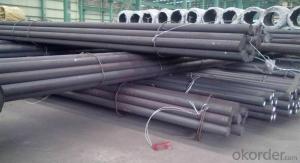
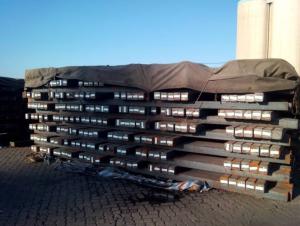
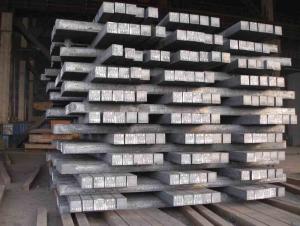
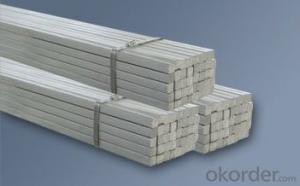
Square Bar Hot Rolled High Quality Q235 Or Q195
- Ref Price:
-

- Loading Port:
- Tianjin
- Payment Terms:
- TT OR LC
- Min Order Qty:
- 25 m.t.
- Supply Capability:
- 2000000 m.t./month
OKorder Service Pledge
OKorder Financial Service
You Might Also Like


Specification
Product Description:
OKorder is offering high quality Hot Rolled Steel I-Beams at great prices with worldwide shipping. Our supplier is a world-class manufacturer of steel, with our products utilized the world over. OKorder annually supplies products to European, North American and Asian markets. We provide quotations within 24 hours of receiving an inquiry and guarantee competitive prices.
Product Applications:
1) Suitable for making various strong cutting tool abrasion resistance, impact resistance.
2) Used to produce all kinds of high hard and super hard saw blade, drill, tap, broach, gear hob and various kinds of milling cutter.
3) Used for advanced punching die, screw die, and the toughness and complicated shape of the punch, etc.
4) Is used for cold forging die and drawing mode, etc.
5) Recommended watchcase factory, screw factory and other cold stamping products industry use.
Product Advantages:
OKorder's Steel I-Beams are durable, strong, and resist corrosion.
Main Product Features:
· Premium quality
· Prompt delivery & seaworthy packing (30 days after receiving deposit)
· Corrosion resistance
· Can be recycled and reused
· Mill test certification
· Professional Service
· Competitive pricing
Product Specifications:
Standard: GB,
-Grade: Q195 or equivalent.
-Chemical Composition:
Standard | Grade | Element (%) | ||||
GB | Q195 | C | Mn | S | P | Si |
0.06~0.12 | 0.25~0.50 | ≤0.050 | ≤0.045 | ≤0.30 | ||
Measures of HR Square Bar (small measures):
(Section of HR Square Bar)
-Length of a side and Theoretical weight of Square Bar.
Length of a side(mm) | Theoretical weight(kg/m) | Length of a side(mm) | Theoretical weight(kg/m) |
7 | 0.385 | 22 | 3.80 |
8 | 0.502 | 24 | 4.52 |
9 | 0.636 | 25 | 4.91 |
10 | 0.785 | 26 | 5.30 |
11 | 0.950 | 28 | 6.15 |
12 | 1.13 | 30 | 7.06 |
13 | 1.33 | 32 | 8.04 |
14 | 1.54 | 34 | 9.07 |
15 | 1.77 | 36 | 10.17 |
16 | 2.01 | 38 | 11.24 |
17 | 2.27 | 40 | 12.56 |
18 | 2.54 | 42 | 13.85 |
19 | 2.82 | 45 | 15.90 |
20 | 3.14 | 48 | 18.09 |
21 | 3.46 | 50 | 19.63 |
Notes:
1, The theoretical weights in the list, base on the density of 7.85 g/cm3.
2, Formula for theoretical weight of Square bar: (length of a side)2 * 0.00785
3, The numbers with *mean that they are not regular or we don’t offer them.
-Regular length of Square Bar:
Steel | Length of a side (mm) | Length of steel (m) |
Normal steel | < 25 | 4~10 |
> 25 | 3~9 | |
Steel of high quality | All measure | 2~6 |
Tool steel >75 | 1~6 |
FAQ:
Q1: How soon can we receive the product after purchase?
A1: Within three days of placing an order, we will begin production. The specific shipping date is dependent upon international and government factors, but is typically 7 to 10 workdays.
Q2: Can stainless steel rust?
A2: Stainless does not "rust" as you think of regular steel rusting with a red oxide on the surface that flakes off. If you see red rust it is probably due to some iron particles that have contaminated the surface of the stainless steel and it is these iron particles that are rusting. Look at the source of the rusting and see if you can remove it from the surface.
Q3: How do you package the angle steel when shipping?
A3: All goods are packed in bundles with steel strips and shipped by container or break bulk.


- Q: How do you use a steel square to determine angles for baseboards?
- To use a steel square to determine angles for baseboards, first, place the square against the corner where the baseboard will be installed. Then, adjust the square until one of its edges aligns with the wall and the other edge touches the baseboard. Next, read the angle measurement indicated on the square where the baseboard edge meets the square's markings. This measurement can be used as a guide to cut the baseboard accurately at the desired angle.
- Q: Can a steel square be used for checking the accuracy of a miter saw?
- Indeed, the accuracy of a miter saw can be assessed using a steel square. This precision measuring tool, typically crafted from hardened steel and possessing a right angle shape, serves as an effective means of measurement. Its application involves determining if the miter saw's blade is flawlessly cutting at a precise 90-degree angle. To carry out this assessment, one must position the steel square against both the miter saw's fence and the blade itself. By doing so, it becomes possible to determine if the blade aligns impeccably with the edge of the square. In the event of any gap or misalignment, it becomes evident that the miter saw is not cutting with the desired accuracy. Embracing this technique helps to guarantee the precision and accuracy of the miter saw's cuts, making it an invaluable tool for carpenters and woodworkers.
- Q: How do you use a steel square to measure and mark 22.5-degree angles?
- To use a steel square to measure and mark a 22.5-degree angle, you need to follow a few simple steps. Firstly, position the steel square so that the long edge (hypotenuse) is facing you, and the shorter edge (leg) is on the left side. Ensure that the right angle formed by the two edges is placed at the starting point of your angle. Next, identify the scale on the leg of the square. This scale usually represents degrees, so find the 45-degree mark on the scale, which is halfway between 0 and 90 degrees. From the 45-degree mark, count two units to the right. Each unit on the scale represents one degree, so counting two units will give us 2 degrees. This is because a 45-degree angle is halfway between 0 and 90 degrees, and half of 45 is 22.5. Once you have identified the 2-degree mark, draw a line using a pencil along the edge of the square that runs through this mark. This line will represent a 22.5-degree angle. To double-check your measurement, you can also measure the angle using a protractor. Place the protractor at the starting point of your angle and align its baseline with the line you drew using the steel square. Ensure that the protractor's zero-degree line aligns with the line from the square, and then confirm that the protractor reads 22.5 degrees. By following these steps, you can accurately measure and mark a 22.5-degree angle using a steel square.
- Q: How do you use a steel square to determine angles for chair rail molding?
- In order to determine angles for chair rail molding using a steel square, there are several steps you should follow. First and foremost, ensure that your steel square is clean and free from any debris. Proceed by placing the square against the wall where you intend to install the chair rail molding. Afterwards, adjust the position of the square so that one of its edges is flush against the wall, while the other edge is perpendicular to the floor. This will create a right angle between the wall and the square. Once you have properly positioned the square, take a pencil and trace along both edges of the square onto the wall. By doing so, you will create two perpendicular lines on the wall, representing the right angle. Now, locate the specific area on the wall where you plan to install the chair rail molding. Place the steel square against the wall, aligning one of its edges with the bottom of the chair rail molding. With care, rotate the square gently until the other edge intersects with the line representing the right angle you previously marked on the wall. Take note of the angle indicated on the scale or protractor of the square. This angle measurement will prove useful in determining the appropriate miter cut for the chair rail molding. You can then either transfer this angle measurement to a miter saw or use it as a guide when manually cutting the molding. Lastly, always remember to double-check your measurements and angles before making any cuts, as accuracy is of utmost importance to achieve a proper fit.
- Q: What are the different types of steel squares available on the market?
- There are several different types of steel squares available on the market, each designed for specific purposes. Some of the most common types include: 1. Engineer's Square: This type of square is typically larger in size and features a 90-degree angle. It is commonly used in engineering and metalworking to ensure accurate right angles and measurements. 2. Combination Square: A combination square is a versatile tool that includes a 90-degree angle and a sliding blade or ruler. It can be used for measuring, marking, and checking both 90-degree and 45-degree angles. 3. Try Square: A try square is a smaller-sized square with a handle and a 90-degree angle. It is primarily used in woodworking to check the accuracy of right angles and to mark straight lines. 4. Rafter Square: Also known as a framing square, this type of square is larger and heavier than other squares. It is commonly used in carpentry and construction for laying out and cutting roof rafters, stairs, and other angled cuts. 5. Speed Square: Speed squares, also called rafter squares, are compact and portable squares with multiple functions. They typically have a 90-degree angle, a 45-degree angle, and a built-in protractor for measuring and marking various angles. 6. Carpenter's Square: A carpenter's square is similar to a try square but usually larger and more robust. It is designed specifically for carpentry tasks, such as checking for squareness, marking lines, and measuring angles. 7. Machinist's Square: This square is precision-engineered and commonly used in machining and metalworking. It has an accurate 90-degree angle for precise measurements and layout work. These are just a few examples of the different types of steel squares available on the market. Each square has its unique design and features, catering to specific needs in various industries such as engineering, woodworking, construction, and metalworking.
- Q: What are some common techniques for using a steel square in roofing?
- Using a steel square in roofing is a common practice among roofers to ensure accuracy, precision, and efficiency in their work. Here are some of the most common techniques for using a steel square in roofing: 1. Layout and measurement: The steel square is an essential tool for laying out and measuring angles, cuts, and dimensions on roofing materials. It helps roofers accurately mark and measure the length, width, and angles required for different roofing components. 2. Cutting rafters and trusses: Roofers use the steel square to accurately mark and cut rafters and trusses. The square is used to determine the angles and lengths of the rafters, allowing for precise and efficient cuts that fit perfectly into the roof structure. 3. Determining pitch and slope: The steel square can be used to determine the roof's pitch or slope. By placing the square against the roof surface, roofers can easily measure the angle of the slope, ensuring proper water drainage and preventing potential issues like leaks or pooling. 4. Checking for squareness: Roofers use the steel square to ensure that the roof is square and properly aligned. By placing the square against the corners of the roof structure, they can check for any deviations or inconsistencies that could affect the overall stability and integrity of the roof. 5. Creating roof valleys and hip cuts: Roof valleys and hip cuts require precise measurements and cuts to ensure a tight fit and proper water runoff. The steel square is used to determine the angles and lengths needed for these cuts, allowing roofers to create clean and accurate joints. 6. Installing shingles and tiles: Roofers can utilize the steel square to ensure proper alignment and spacing while installing shingles or tiles. By using the square as a guide, they can maintain consistent and even rows, resulting in a visually appealing and structurally sound roof. In conclusion, a steel square is an indispensable tool for roofers, enabling them to accurately measure, mark, and cut various roofing components. Its versatility and precision contribute to the successful completion of roofing projects while ensuring quality workmanship.
- Q: Can a steel square be used for checking the squareness of deck posts?
- Yes, a steel square can be used for checking the squareness of deck posts. A steel square, also known as a framing square or carpenter's square, is a versatile tool commonly used in carpentry and construction. It consists of a long arm and a shorter arm, forming a right angle. One of the primary purposes of a steel square is to ensure that corners and angles are perfectly square. To use a steel square for checking the squareness of deck posts, you can follow these steps: 1. Position the steel square against one side of the deck post, ensuring that the long arm rests against the post while the shorter arm extends vertically. 2. Observe the alignment of the shorter arm against the adjacent side of the deck post. If the post is perfectly square, the shorter arm of the steel square should be flush against the post without any gaps or overlaps. 3. Repeat this process on all four sides of the deck post to confirm its squareness. If the steel square consistently aligns flush with all sides, the post can be considered square. 4. In case the steel square does not align properly or there are gaps or overlaps, adjustments can be made to the post. This can involve repositioning or re-measuring the post, ensuring it is at right angles to the deck surface. It is important to note that while a steel square is an effective tool for checking the squareness of deck posts, it should be used in combination with other methods, such as measuring diagonals or using a level, to ensure accurate and precise results.
- Q: How do you use a steel square to measure the height of a window opening?
- To measure the height of a window opening using a steel square, adhere to the following guidelines: 1. Place the steel square vertically against one side of the window opening, ensuring it is flush against the side. 2. Securely hold the square in position, ensuring it is level and straight. 3. Observe the markings on the blade of the square, typically denoting measurements in inches and centimeters. 4. Commencing from the bottom of the window opening, align the edge of the square's blade with the lower edge of the opening. 5. Determine the measurement on the blade at the upper edge of the opening. This will provide the height of the window opening. 6. Document the measurement and repeat the procedure on the opposing side of the window opening to ensure precision. By utilizing a steel square, an accurate measurement of the window opening's height is obtained, eliminating the potential for inaccuracies that may arise when using measuring tapes or rulers.
- Q: What is the difference between a framing square and a steel square?
- Carpentry and construction employ both a framing square and a steel square, yet their designs and purposes differ. A framing square, a traditional tool, comprises two arms meeting at a right angle to form an L-shape. Typically crafted from wood, aluminum, or plastic, it measures 24 inches in length for the longer arm, known as the blade, and 16 inches for the shorter arm, called the tongue. Framing squares excel at laying out and measuring right angles, marking and cutting rafters, and assessing squareness in construction and framing endeavors. Contrarily, a steel square, also referred to as a combination square or try square, proves more versatile and precise. Manufactured entirely from steel, it possesses a 12-inch blade alongside a sliding head. This head easily locks into desired angles, enabling the square to measure and mark angles apart from 90 degrees. Steel squares often integrate extra features like levels, scribes, or protractors, rendering them invaluable for an extensive array of layout and measurement tasks. In conclusion, the divergence between a framing square and a steel square lies in their design and functionality. A framing square, a fundamental L-shaped tool, chiefly serves the purpose of measuring and marking right angles in framing and construction projects. Conversely, a steel square, composed wholly of steel and equipped with a sliding head, allows for locking at various angles, making it suitable for a broader range of layout and measurement tasks.
- Q: How do you use a steel square to measure and mark mitered angles?
- To achieve accurate measurements and markings when using a steel square to measure and mark mitered angles, follow these steps: 1. Prioritize cleaning your steel square thoroughly, removing any debris or rust. This will guarantee precise measurements and markings. 2. Determine the specific mitered angle you wish to create. For instance, let's assume we desire a 45-degree mitered angle. 3. Position the steel square against the material you are working with, aligning one edge of the square with the material's edge. 4. While keeping the square aligned with the material, rotate it until the desired angle (in this case, 45 degrees) aligns with the material's edge. 5. Once you have successfully aligned the desired angle, use a pencil or scribe to mark a line along the square's edge. This line will serve as a guide for your miter cut. 6. Repeat this process on the other piece of material you intend to miter, ensuring precise alignment of the square and accurate marking of the line. 7. Once both pieces are marked, proceed to use a miter saw or handsaw to cut along the marked lines, ensuring the preservation of the angle and the creation of a precise and clean mitered joint. Always remember to double-check your measurements and markings before making any cuts to ensure utmost accuracy. The utilization of a steel square to measure and mark mitered angles requires practice and precision.
Send your message to us
Square Bar Hot Rolled High Quality Q235 Or Q195
- Ref Price:
-
- Loading Port:
- Tianjin
- Payment Terms:
- TT OR LC
- Min Order Qty:
- 25 m.t.
- Supply Capability:
- 2000000 m.t./month
OKorder Service Pledge
OKorder Financial Service
Similar products

Hot products


Hot Searches
Related keywords

