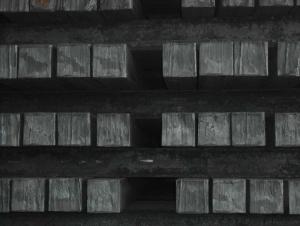

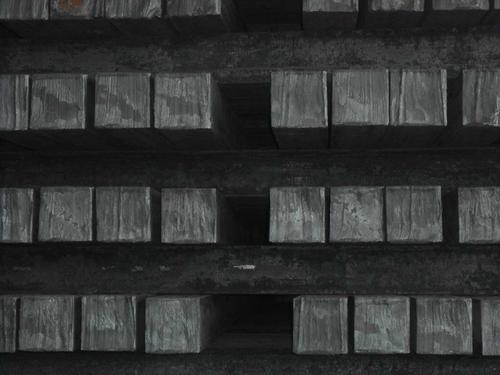

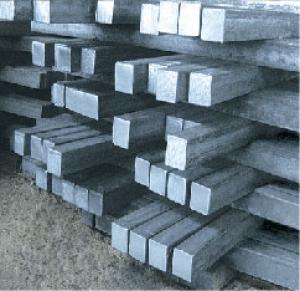
Q235 Steel bilte steel bilte for construction
- Ref Price:
-

- Loading Port:
- Tianjin
- Payment Terms:
- TT or LC
- Min Order Qty:
- 10000 m.t.
- Supply Capability:
- 100000 m.t./month
OKorder Service Pledge
OKorder Financial Service
You Might Also Like


Product Description:
OKorder is offering Q235 Steel bilte steel bilte for construction at great prices with worldwide shipping. Our supplier is a world-class manufacturer of steel, with our products utilized the world over. OKorder annually supplies products to European, North American and Asian markets. We provide quotations within 24 hours of receiving an inquiry and guarantee competitive prices.
Product Applications:
Q235 Steel bilte steel bilte for construction are ideal for structural applications and are widely used in the construction of buildings and bridges, and the manufacturing, petrochemical, and transportation industries.
Product Advantages:
OKorder's Steel bilte are durable, strong, and resist corrosion.
Main Product Features:
· Premium quality
· Prompt delivery & seaworthy packing (30 days after receiving deposit)
· Corrosion resistance
· Can be recycled and reused
· Mill test certification
· Professional Service
· Competitive pricing
Product Specifications:
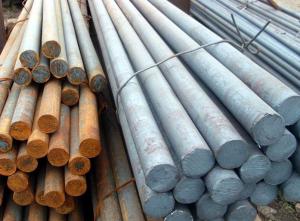
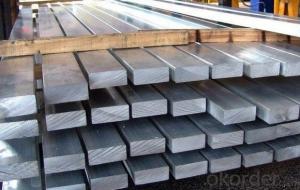
We offer Square Steel Bar with grade Q195 / Q235
Specifications of Square Steel Bar:
-Standard: GB,
-Grade: Q195/Q235 or equivalent.
Chemical Composition:
-Chemical Composition. Q195
Standard | Grade | Element (%) | ||||
GB | Q195 | C | Mn | S | P | Si |
0.06~0.12 | 0.25~0.50 | ≤0.050 | ≤0.045 | ≤0.30 | ||
-Chemical Composition. Q235
Standard | Grade | Element (%) | ||||
GB | Q235B | C | Mn | S | P | Si |
0.12~0.20 | 0.30~0.70 | ≤0.045 | ≤0.045 | ≤0.30 | ||
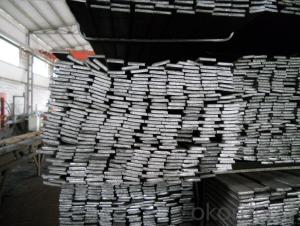
Measures and Tolerances of Square Steel Bar:

(The section of Square Steel Bar)
-The length of a side and the theoretical weight of Square Steel.
Length of a side(a, mm) | Theoretical weight(kg/m) | Length of a side(a, mm) | Theoretical weight(kg/m) |
6 | 0.283 | 32 | 8.04 |
7 | 0.385 | *33 | 8.55 |
8 | 0.502 | 34 | 9.07 |
9 | 0.636 | *35 | 9.62 |
10 | 0.785 | 36 | 10.17 |
11 | 0.950 | 38 | 11.24 |
12 | 1.13 | 40 | 12.56 |
13 | 1.33 | 42 | 13.85 |
14 | 1.54 | 45 | 15.90 |
15 | 1.77 | 48 | 18.09 |
16 | 2.01 | 50 | 19.63 |
17 | 2.27 | 53 | 22.05 |
18 | 2.54 | *55 | 23.6 |
19 | 2.82 | 56 | 24.61 |
20 | 3.14 | *58 | 26.4 |
21 | 3.46 | 60 | 28.26 |
22 | 3.80 | 63 | 31.16 |
*23 | 4.15 | *65 | 33.17 |
24 | 4.52 | *68 | 36.3 |
25 | 4.91 | 79 | 38.49 |
26 | 5.30 | 75 | 44.16 |
*27 | 5.72 | 80 | 50.24 |
28 | 6.15 | 85 | 56.72 |
*29 | 6.60 | 90 | 63.59 |
30 | 7.06 | 95 | 70.85 |
*31 | 7.54 | 100 | 78.50 |
Notes:
1, The theoretical weights in the list, base on the density of 7.85 g/cm3.
2, The numbers with *mean that they are not regulars or we don’t offer them.
-The allowed tolerance of Square Steel:
Length of a side(mm) | Allowed Tolerance | ||
Group1 | Group2 | Group3 | |
5.5~7 | ±0.20 | ±0.30 | ±0.40 |
7~20 | ±0.25 | ±0.35 | ±0.40 |
20~30 | ±0.30 | ±0.40 | ±0.50 |
30~50 | ±0.40 | ±0.50 | ±0.60 |
60~80 | ±0.60 | ±0.70 | ±0.80 |
80~110 | ±0.90 | ±1.0 | ±1.1 |
110~150 | ±1.2 | ±1.3 | ±1.1 |
150~190 | ―― | ―― | ±2.0 |
190~250 | ―― | ―― | ±2.5 |
Usage/Applications of Steel Square Bar:
-The Square Steel is normally used as structure steel.
-Row material for other structure steel like steel angles, channels, I-beams, H-beams, etc…
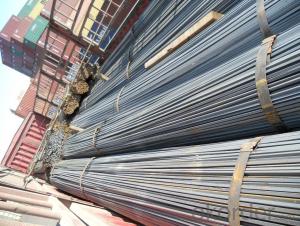
Packaging & Delivery of Steel Square Bar:
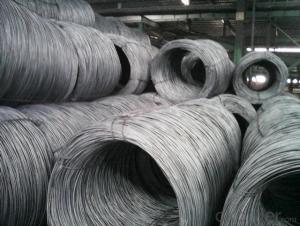
-Packing Detail: The products can be packed in bundles by steel wires.
-Marks:
1, Tag marks: the tag marks will be tied up to each bundle of the products. The information is usually including supplier’s logo and name, product name, made in China, products’ specifications, the painted color and other information requested by customers.
2, Color marks: we will paint both ends of the bundles of these products to make sure that they are more evident. It’s will be more convenient for the customers to distinguish them at the destination port.
-Delivery Detail: 30~45 working days after receive buyer’s T.T. or L/C.
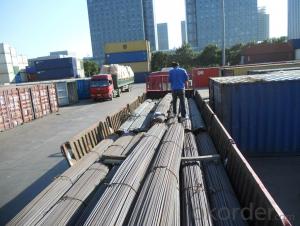
Transportation:
-The products can be delivered by bulk vessel or by container. As for container, products with the length of 6m will be loaded in 20’ container, with 9m or 12m, in 40’ container.
-The maximum quantity of loading of container is 25 tons.
-The products usually are transported to the nearest port from the production place.
Payment:
-Invoicing on theoretical weight or actual weight a s customer’s request.
-FOB, CFR or CIF.
-Regular terms of payment:
1, 30% payment in advance, the remaining balance (70% payment) against the copy of B/L.
2, 30% payment in advance, the remaining balance (70% L/C) against the copy of B/L.
3, Negotiable.
FAQ:
Q1: How do we guarantee the quality of our products?
A1: We have established an advanced quality management system which conducts strict quality tests at every step, from raw materials to the final product. At the same time, we provide extensive follow-up service assurances as required.
Q2: How soon can we receive the product after purchase?
A2: Within three days of placing an order, we will begin production. The specific shipping date is dependent upon international and government factors, but is typically 7 to 10 workdays.


- Q: How do you use a steel square to scribe a line?
- To use a steel square to scribe a line, align one edge of the square with the material's edge and hold it firmly in place. Then, using a sharp pencil or scribe, trace along the other edge of the square to create a straight and accurate line.
- Q: Can a steel square be used for outdoor kitchen layout and construction?
- Yes, a steel square can be used for outdoor kitchen layout and construction. Steel squares are durable and weather-resistant, making them suitable for outdoor environments. They provide accurate measurements and angles, which are essential for precise layout and construction of an outdoor kitchen.
- Q: Can a steel square be used for welding?
- Yes, a steel square can be used for welding. A steel square is a versatile tool commonly used in welding to ensure accurate right angles and precise measurements. It is often used to align and check the squareness of joints, ensuring proper fit-up during welding processes.
- Q: Can a steel square be used for fence installation?
- Yes, a steel square can be used for fence installation. It is commonly used for measuring and marking angles, ensuring accuracy and proper alignment during the installation process.
- Q: How do you use a steel square to determine the angle of a compound miter and bevel cut?
- To use a steel square to determine the angle of a compound miter and bevel cut, you need to align the square's blade with the edge of the material you are working with. Then, you can adjust the square's protractor to match the desired angle for the cut. By accurately measuring and aligning the square with the material, you can determine the correct angle for the compound miter and bevel cut.
- Q: Can a steel square be used for tile work?
- Yes, a steel square can be used for tile work. It can be a useful tool for measuring and marking tiles accurately, ensuring precise cuts and angles.
- Q: How do you use a steel square to lay out a pyramid shape?
- In order to lay out a pyramid shape, it is necessary to follow a few steps using a steel square. The steel square is a triangular measuring tool with different angles marked on each side, and it is important to have one before beginning the process. To start, the desired base length of the pyramid must be determined. Let's assume a base of 10 feet is desired. 1. Position the steel square on a flat surface, ensuring that the long side, known as the blade, is facing towards you. 2. Measure and indicate a point that is 10 feet away from the bottom corner of the blade, which will serve as the base length. 3. Proceed to measure and mark a point that is 10 feet along the blade, starting from the base length mark made in the previous step. This will establish the height of the pyramid. 4. In order to find the center point of the base, measure and mark the midpoint between the two base length marks. 5. Use a straightedge or ruler to connect the center point with each of the base length marks. This will form the base of the pyramid. 6. Subsequently, connect the center point with the top point that was marked for the height. This will create the sides of the pyramid. 7. Repeat steps 1-6 on the opposite side of the steel square to finalize the pyramid shape. By utilizing the steel square, one can ensure the accuracy of all angles and measurements, enabling the precise laying out of a pyramid shape.
- Q: How do you use a steel square to determine the slope of a wheelchair ramp with different heights?
- To use a steel square to determine the slope of a wheelchair ramp with different heights, follow these steps: 1. Begin by placing the steel square on the ramp's surface, ensuring that one edge of the square is parallel to the ground and the other edge is perpendicular to it. 2. Position the square at the bottom of the ramp, aligning the perpendicular edge with the ground. Make sure it is firmly against the surface. 3. Measure the vertical rise or height of the ramp from the ground level to the highest point at the top of the ramp. 4. Slide the square up the ramp while keeping the perpendicular edge aligned with the ground. Stop once the horizontal (parallel to the ground) edge is touching the highest point of the ramp. 5. Observe where the vertical edge of the square intersects with the ramp's surface. This point indicates the horizontal distance traveled along the ramp for the given vertical rise. 6. Measure the horizontal distance from the starting point (where the square first touched the ground) to the point where the vertical edge intersects with the ramp's surface. 7. Now, to determine the slope of the ramp, divide the vertical rise by the horizontal distance traveled along the ramp. This will give you the slope ratio or the rise-to-run ratio. For example, if the vertical rise is 24 inches and the horizontal distance is 192 inches, the slope ratio would be 24/192, which simplifies to 1/8. This means that for every 8 units traveled horizontally along the ramp, there is a rise of 1 unit vertically. Using a steel square in this manner allows you to accurately determine the slope of a wheelchair ramp with different heights, ensuring it meets the necessary requirements for accessibility and safety.
- Q: How do you use a steel square to determine the angle of a cut?
- Achieving the desired angle for a cut using a steel square involves a straightforward process. Begin by ensuring that your steel square is free from any debris or dirt, as cleanliness is crucial. Next, firmly position the square's base against the material's edge that you intend to cut, ensuring proper alignment. Then, utilize the markings on the square to determine the desired angle. While the most common angle measurements are 45 degrees and 90 degrees, some squares may include additional markings for other angles. Once you have identified the angle, employ a pencil or marker to draw a guiding line along the square's edge. This line will serve as a reference for your cut. Finally, exercise caution and precision as you follow the marked line with either a saw or another appropriate cutting tool. Maintaining steady control and ensuring the saw is properly aligned with the marked line are vital for achieving an accurate cut.
- Q: What are the different markings on a steel square and what do they mean?
- The different markings on a steel square typically include measurements in inches and centimeters, angles such as 90 degrees and 45 degrees, and various scales or gradations for precise measurements and layout work. These markings serve as guides for accurate measurements, layout, and carpentry tasks, helping users achieve square and precise cuts, angles, and layouts when working with wood or metal.
Send your message to us
Q235 Steel bilte steel bilte for construction
- Ref Price:
-
- Loading Port:
- Tianjin
- Payment Terms:
- TT or LC
- Min Order Qty:
- 10000 m.t.
- Supply Capability:
- 100000 m.t./month
OKorder Service Pledge
OKorder Financial Service
Similar products


Hot products


Hot Searches
Related keywords

