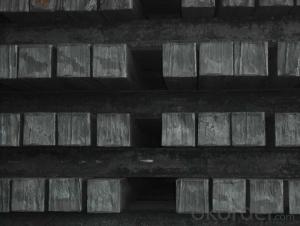
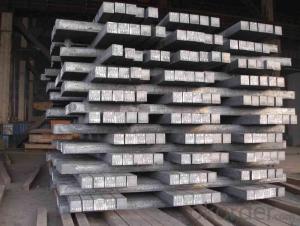


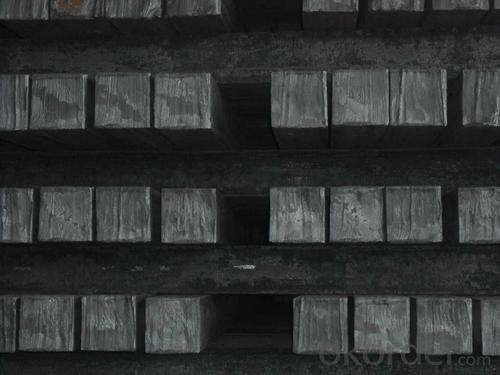
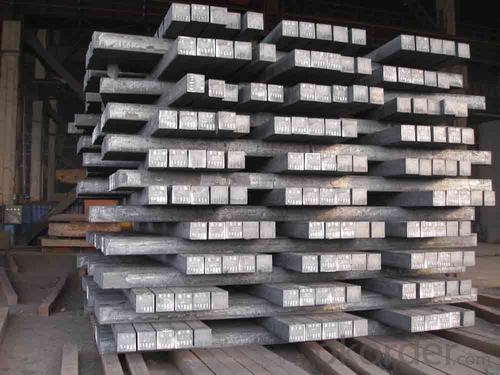
Hot rolled steel square bar
- Ref Price:
-

- Loading Port:
- China Main Port
- Payment Terms:
- TT OR LC
- Min Order Qty:
- -
- Supply Capability:
- -
OKorder Service Pledge
Quality Product, Order Online Tracking, Timely Delivery
OKorder Financial Service
Credit Rating, Credit Services, Credit Purchasing
You Might Also Like


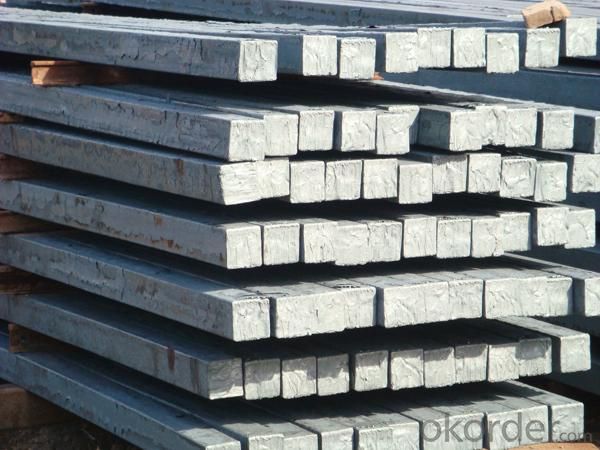
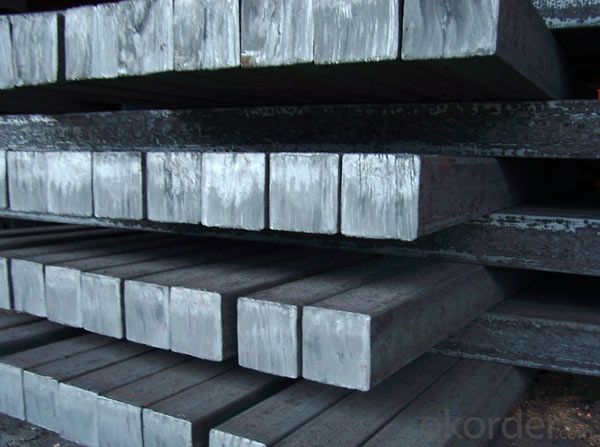
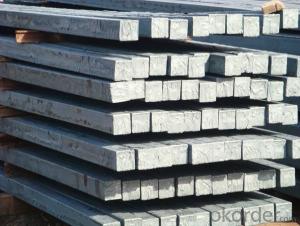
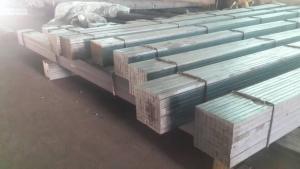
Product Description
The Detail of Product
| Name: | steel billets |
| LENGTH: | 6 meter to 12 meter (+ 50mm) |
| Size: | 100*100, 120*120, 150*150, 200*200 |
| Grade: | 3SP,5SP,Q235,20MnSi. |
| Shape: | Square, Round |
| Technique: | Hot-Rolled |
| Standard: | ASTM/GB |
| BENDING | No more than 5mm in 1 meter No more than 30mm in 6 meter No more than 60mm in 12 meter |
| ANGULAR TWIST | No more than 1 degree per meter and not more than 6 degree over 12 meter length. |
| Chemical composition | C, Si, Mn, P, S, N, etc |
Chemical Properties
| Size | 60*60/90*90/100*100/120*120/150*150 |
| Length | 6000mm-12000mm |
| Standard | GB |
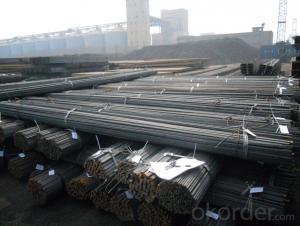
| Applicaton | To produce bars or other applications |
| Grade | Q195/Q235/Q275/3SP/5SP/20MnSi |
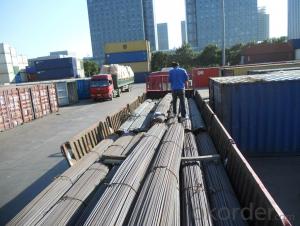
| Packing terms | TT/LC |
| Package | Mill's standard packing or as client's requirment |
| Delivery time | Within 10-30 days after receiving the deposit or LC |
Chemical Comosition
| Standard | C(%) | Mn(%) | S(%) | P(%) | Si(%) |
| Q195 | ≤0.12 | ≤0.50 | ≤0.040 | ≤0.035 | ≤0.30 |
| Q235 | ≤0.20 | ≤1.40 | ≤0.045 | ≤0.045 | ≤0.35 |
| Q275 | ≤0.22 | ≤1.50 | ≤0.045 | ≤0.045 | ≤0.35 |
| 20MnSi | 0.17-0.25 | 1.2-1.6 | ≤ 0.050 | ≤ 0.050 | 0.40-0.80 |
| 3SP | 0.14-0.22 | 0.40-0.85 | ≤ 0.050 | ≤ 0.040 | 0.05-0.15 |
| 5SP | 0.28-0.37 | 0.50-1.00 | ≤ 0.050 | ≤ 0.040 | 0.15-0.30 |
- Q: Can a steel square be used for baseboard installation?
- Baseboard installation can be facilitated using a steel square. A steel square, also referred to as a framing square or a carpenter's square, is a multifunctional tool commonly utilized in woodworking and construction projects. Constructed from durable steel, this tool features a 90-degree angle and a ruler along its edge. The utilization of a steel square can greatly benefit baseboard installation. It aids in achieving precise and accurate cuts on the baseboard material, as well as measuring and marking angles for corners and joints. The 90-degree angle of the steel square is particularly advantageous for marking and cutting baseboards that necessitate perfect fitting into corners or against walls. Moreover, a steel square can be employed to assess the levelness and squareness of the baseboards during the installation process. By placing the square against both the baseboard and the wall, it is effortless to determine if the baseboard is straight and properly aligned. In conclusion, although alternative tools are available for baseboard installation, a steel square is a dependable and versatile choice that can be effectively employed in this task.
- Q: Can a steel square be used for checking the squareness of a drill press quill?
- Checking the squareness of a drill press quill can be done using a steel square. This precision measuring tool has a right angle and can be utilized to determine if two surfaces or components are perpendicular. By placing the steel square against the quill and ensuring it is flush with both the quill and the base, one can visually inspect the quill's perpendicularity to the base. If the steel square meets both surfaces at a 90-degree angle, the quill is square. However, if there is a gap or the angle is not precisely 90 degrees, adjustments may be necessary to align the drill press quill correctly.
- Q: How do you use a steel square to mark out parallel lines on inclined surfaces?
- Before you can begin marking out parallel lines on inclined surfaces using a steel square, it is necessary to have a good understanding of the steel square itself and its different components. The steel square is comprised of two arms, namely the blade and the tongue. The blade is the longer arm, while the tongue is the shorter one. These arms intersect at a right angle and have markings along their edges for taking measurements. To mark parallel lines on inclined surfaces, it is important to follow these steps: 1. Start by familiarizing yourself with the angle of inclination of the surface or slope you are working on. This knowledge is crucial in order to achieve accurate markings for the parallel lines. 2. Place the steel square on the inclined surface, ensuring that the blade is resting on the surface and that the tongue is aligned with the desired direction of the parallel lines. 3. Use one hand to securely hold the steel square in place, preventing any unwanted movement. 4. With your other hand, utilize a pencil or marker to create marks along the edge of the tongue. This will generate a straight line that runs parallel to the inclined surface. 5. Repeat the process as necessary, making sure that the blade of the steel square remains in constant contact with the surface and that the tongue remains aligned with the desired direction of the parallel lines. 6. If you require multiple parallel lines, you can utilize the markings on the blade to measure the desired spacing between each line. Simply move the steel square along the surface while keeping the tongue aligned with the previous line, and mark the new line accordingly. In order to obtain accurate parallel lines, it is crucial to maintain a steady hand and proper alignment throughout the entire process. Additionally, it is important to ensure that the steel square is clean and free from any debris that could potentially affect the markings.
- Q: How do you use a steel square to find angles for scribe cuts?
- To use a steel square to find angles for scribe cuts, you need to follow a few steps. Firstly, ensure that your steel square is clean and in good condition. This will ensure accurate measurements. Next, place the square against the edge of the material you want to make the scribe cut on, with one side of the square parallel to the edge. Then, adjust the position of the square until the other side of the square aligns with the desired angle for the scribe cut. Once the square is in position, use a pencil or scribe to mark a line along the edge of the square. After marking the line, remove the square and double-check the line you marked to ensure it is straight and accurate. Finally, you can proceed to make the scribe cut along the marked line using a suitable cutting tool. Using a steel square in this way allows you to easily find and transfer angles for scribe cuts, ensuring precise and clean results.
- Q: How do you use a steel square to check for flatness?
- To use a steel square to check for flatness, you need to follow a few simple steps. First, ensure that the steel square is clean and free from any dirt or debris that could affect the accuracy of the measurement. Next, place the steel square on the surface that you want to check for flatness. Make sure that the square is positioned in such a way that it covers a significant portion of the surface area. Once the steel square is in place, observe the contact between the square and the surface. If the surface is flat, the steel square will make full and even contact with the surface along its entire length. There should be no gaps or deviations between the square and the surface. If, on the other hand, the surface is not flat, you will notice gaps or deviations between the steel square and the surface. These gaps indicate areas where the surface is not level or flat. To determine the extent of the flatness issue, you can move the steel square along different parts of the surface and repeat the observation. This will help identify any localized areas of unevenness or irregularities. Overall, using a steel square to check for flatness is a simple yet effective method. It allows you to quickly assess the flatness of a surface and identify any discrepancies. By doing so, you can ensure that your workpieces or projects are being built on a level and even foundation, thus promoting accuracy and precision.
- Q: Can a steel square be used for measuring heights or depths?
- Typically, a steel square is not employed for measuring heights or depths. In the realm of woodworking and carpentry, a steel square serves as a multifunctional instrument primarily utilized for delineating and gauging angles, as well as serving as a reference for crafting precise straight cuts. Comprised of a lengthy arm and a shorter arm, it converges at a 90-degree angle. Although it can be employed for measuring distances and establishing lines, it is not intended for accurately measuring heights or depths. For such purposes, tools specifically designed for measuring, such as tape measures, rulers, or calipers, are more appropriate.
- Q: Can a steel square be used for marking out tenons?
- Indeed, the utilization of a steel square is suitable for the purpose of marking out tenons. This versatile tool, commonly referred to as a framing square or carpenter's square, is extensively employed in the fields of woodworking and carpentry to attain accurate measurements and establish precise angles. In the process of marking out tenons, which are the protruding ends of a wooden piece designed to fit into a mortise, the steel square proves to be an invaluable resource for ensuring precise and perpendicular cuts. By aligning the square with the wood's edge and marking lines along its straight boundaries, woodworkers can consistently and precisely fashion their tenons. The robust construction and straight edges of this square render it an ideal instrument for marking out tenons as well as other woodworking joints.
- Q: Can a steel square be used for porch layout and construction?
- Porch layout and construction can benefit greatly from the use of a steel square. This tool, also referred to as a framing square or carpenter's square, is widely used in construction projects due to its versatility. It comprises a long blade and a shorter tongue positioned at a right angle, enabling precise measurements and angles. The applications of a steel square in porch layout and construction are diverse. It aids in accurately establishing the foundation, ensuring that the corners are square and the dimensions are correct. Furthermore, it can be utilized to verify the levelness and plumbness during the construction process, guaranteeing the porch's proper alignment and structural integrity. Moreover, a steel square proves invaluable in crafting meticulous cuts and angles on materials like lumber and decking boards. It facilitates the marking and cutting of rafters, stairs, and other key structural elements of the porch. The measurements and angles provided by a steel square ensure seamless integration of all components, resulting in a well-constructed and durable porch. Ultimately, a steel square is an indispensable tool for porch layout and construction. Its adaptability, precision, and assistance in various tasks render it essential for any construction project, including porch construction.
- Q: How do you use a steel square for checking corner squareness?
- In order to check the squareness of a corner using a steel square, the following steps should be followed: 1. Position the steel square against one corner of the object or surface to be checked. Make sure that the long edge of the square aligns perfectly with one side of the object or surface. 2. Securely hold the square in place, ensuring that it remains stable and doesn't move or shift during the measurement. 3. Extend the blade of the square along the adjacent side of the object or surface, ensuring that it runs parallel to the corresponding side. 4. Take note of the point where the blade intersects with the object or surface. If the corner is perfectly square, the blade should align perfectly with the adjacent side, creating a 90-degree angle. 5. If the corner is not square, you will observe either a gap or an overlap between the blade and the adjacent side. Observe the degree of deviation from the desired 90-degree angle. 6. Repeat the process for all corners of the object or surface being checked, ensuring that each corner is square. By utilizing a steel square in this manner, you can easily determine whether a corner is perfectly square or not. This will aid in ensuring precise measurements and accurate construction or alignment.
- Q: How do you use a steel square to determine the angle of a roof truss?
- To use a steel square to determine the angle of a roof truss, you would need to follow these steps: 1. Start by placing the steel square against the edge of the truss where the angle needs to be measured. Make sure the square is aligned properly and securely against the truss. 2. Take note of the scale on the steel square. This scale usually consists of numbers and lines that represent degrees. The most common steel square has scales for measuring 90 degrees, 45 degrees, and 30 degrees. 3. Locate the line on the scale that corresponds to the desired angle you are trying to measure. For example, if you want to determine the angle of a truss that is 30 degrees, find the line on the scale that reads 30 degrees. 4. Next, align the line on the steel square that corresponds to the desired angle with the edge of the truss. This line should be parallel to the truss edge. 5. Once the line on the steel square is aligned with the truss edge, check the other side of the square. There should be another line or edge that intersects with the truss. This intersecting point will give you the angle measurement. 6. Read the angle measurement directly from the scale on the steel square at the intersecting point. This will give you the exact angle of the roof truss. Remember to ensure that the steel square is properly aligned and securely positioned against the truss to get accurate measurements. Additionally, it is essential to use the correct scale on the steel square that matches the desired angle you are trying to determine.
Send your message to us
Hot rolled steel square bar
- Ref Price:
-
- Loading Port:
- China Main Port
- Payment Terms:
- TT OR LC
- Min Order Qty:
- -
- Supply Capability:
- -
OKorder Service Pledge
Quality Product, Order Online Tracking, Timely Delivery
OKorder Financial Service
Credit Rating, Credit Services, Credit Purchasing
Similar products


Hot products


Hot Searches
Related keywords

