


Hot Rolled Steel Flat Bars
- Ref Price:
-

- Loading Port:
- Tianjin
- Payment Terms:
- TT OR LC
- Min Order Qty:
- -
- Supply Capability:
- 200000 m.t./month
OKorder Service Pledge
OKorder Financial Service
You Might Also Like


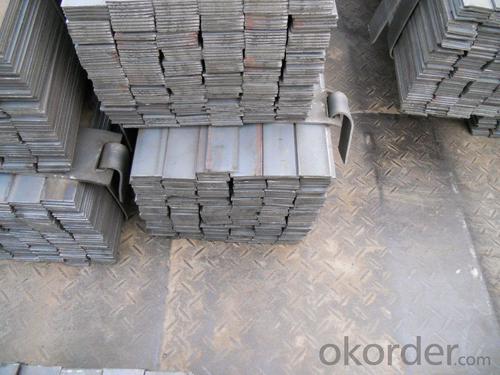
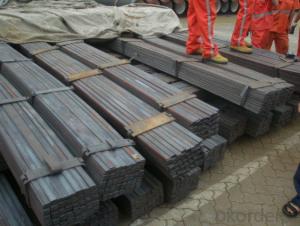
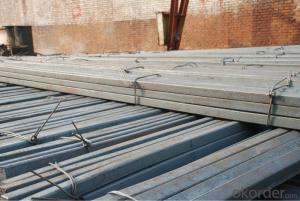
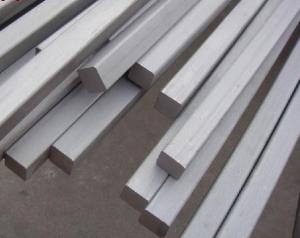
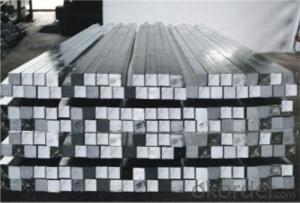
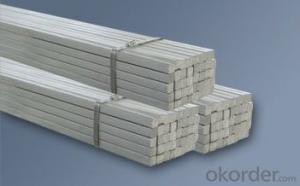
Specification of Hot Rolled Steel Flat Bar
Commodity: Hot Rolled Steel Flat Bar
Standard: GB;JIS
Material: Q195-Q235
Brand name: FLATSPACE
Origin place: China
Thickness: 3mm-30mm
Width:20mm-200mm
Length: Max 12m
Certification: SGS/BV
Chemical composition of Q235
Alloy No | Grade | Element(%) | ||||
C | Mn | S | P | Si | ||
Q235 | B | 0.12—0.20 | 0.3—0.7 | ≤0.045 | ≤0.045 | ≤0.3 |
Physical properties of Q235
Alloy No | Grade | Yielding strength point(Mpa) | Tensile strength (Mpa) | Elongation after fracture(%) | ||||||
Thickness (mm) | Thickness (mm) | |||||||||
≤16 | >16--40 | >40--60 | >60--100 | ≤16 | >16--40 | >40--60 | >60--100 | |||
≥ | ≥ | |||||||||
Q235 | B | 235 | 225 | 215 | 205 | 375--500 | 26 | 25 | 24 | 23 |
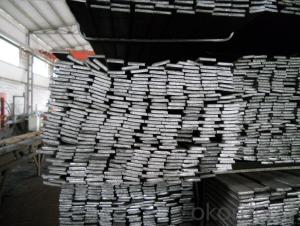
Usage/Applications of Hot Rolled Steel Flat Bar
Widely used for construction, Machinery manufacturing, Iron tower steel structure, Shipbuilding; Steel grating, Staircase, Bridge, Viaduct, Railway spare parts, Boilers making etc.
Production Flow of Hot Rolled Steel Flat Bar
The steel flat bar is made through three processes:
1.Feeding the material: Feeding the row material (the steel plate) to Slitting Line.
2.Slitting:The steel plate would be slitted into expected width by lengthways cutter.
3. Leveled and cutting: The plat bar would be ground into level by the grinder and then cut into required length.
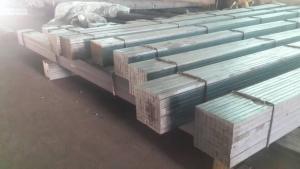
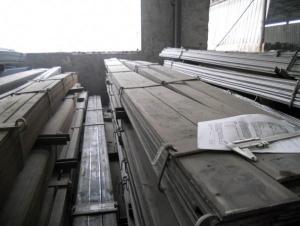
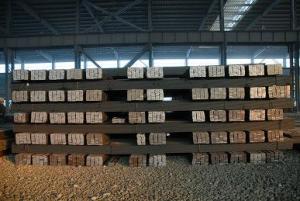
Packaging & Delivery of Hot Rolled Steel Flat Bar
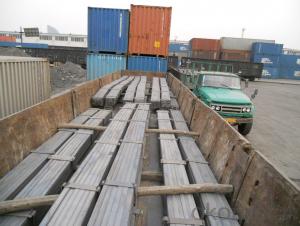
1.Packaging Details: The Steel Flat Bars are packed in bundles and loaded in 20 feet/40 feet container, or shipped by bulk cargo ,also we can do as customer's requirements.
2.Delivery Details:30~45 days upon the receipt of buyer payment by T.T. or L/C.
3. Marks:
Color marking: There will be color marking on both end of the bundle for the cargo delivered by bulk vessel. That makes it easily to distinguish at the destination port.
Tag mark: there will be tag mark tied up on the bundles. The information usually including supplier logo and name, product name, made in China, shipping marks and other information request by the customer.
If loading by container the marking is not needed, but we will prepare it as customer requests.


.
- Q: Can a steel square be used for checking the plumbness of a post hole?
- Yes, a steel square can be used for checking the plumbness of a post hole. A steel square is a versatile tool that is commonly used in woodworking and construction. It has a 90-degree angle that can be aligned with the sides of the post hole to check for plumbness. By placing the steel square against the sides of the hole, one can determine if the walls are straight and vertical. If the steel square does not align properly, adjustments can be made to ensure the post is set in a plumb position. However, it's important to note that while a steel square can be helpful for initial checking, a more accurate measurement can be obtained by using a plumb bob or a level to ensure the post is perfectly vertical.
- Q: How do you use a steel square to measure and mark 101.25-degree angles?
- In order to measure and mark a 101.25-degree angle using a steel square, the following steps should be followed: To begin, position the blade of the steel square, which is the long side, flat against the desired edge of the material. Ensure that the square is properly aligned and securely positioned against the edge. Next, locate the degree scale on the square. This scale is typically situated on the inside of the square near the corner where the blade and the tongue meet. Identify the 90-degree mark on the degree scale, which is usually the largest mark and represents a right angle. Align this mark with the edge of the material. Now, find the 0-degree mark on the scale, which is generally the starting point closest to the blade and signifies a straight angle. Align this mark with the edge of the material as well. Once the 90-degree mark and the 0-degree mark are aligned, proceed to locate the 101.25-degree mark on the scale. It may be necessary to estimate this position, as most steel squares do not have specific markings for angles beyond 90 degrees. Once the approximate position for 101.25 degrees is identified, make a small mark on the material at that point. To ensure accuracy, a pencil or scribe can be used. To verify the measurement, utilize the square to draw a line through the marked point. This line should form a 90-degree angle with the edge of the material. If the line is not perpendicular, it may be necessary to readjust the measurement and mark. Please keep in mind that measuring and marking angles beyond 90 degrees with a steel square may require estimation, and accuracy may vary. If available, it is advisable to use a protractor or angle measuring tool for more precise measurements.
- Q: How do you use a steel square to find the length of a line?
- To use a steel square to find the length of a line, you can follow these steps: 1. Place the steel square against one end of the line, ensuring that one side of the square aligns perfectly with the line. 2. Hold the square firmly in place and extend the other side of the square along the line. 3. If the line is longer than the length of the square, you will need to move the square along the line, keeping the aligned side in position, until you reach the end of the line. 4. Once the square is aligned with the end of the line, measure the distance from the aligned side of the square to the end of the extended side. 5. This measurement will give you the length of the line. It is important to note that using a steel square may not be as accurate as using a measuring tape or ruler, especially for longer distances. Steel squares are primarily used for measuring right angles and checking for squareness, so if precise measurements are required, it is recommended to use a more precise measuring tool.
- Q: Can a steel square be used for welding projects?
- A steel square is an essential tool for welding projects. Also referred to as a framing square or carpenter's square, this versatile tool serves multiple purposes in welding tasks. It is commonly utilized for measuring angles, marking angles, verifying squareness, and ensuring precise measurements and alignment during the welding process. The sturdy and durable construction of the steel square enables it to withstand the intense heat and demands of welding applications. Moreover, its straight edges and right angles facilitate the creation of precise weld joints and the maintenance of proper alignment. In summary, a steel square is an invaluable tool that greatly contributes to the achievement of accurate and high-quality welds in a wide range of welding projects.
- Q: How do you use a steel square to determine angles for picture hanging?
- To use a steel square for determining angles for picture hanging, you can follow these steps: 1. Place the steel square on a flat surface, ensuring that the right-angle corner is facing towards you. 2. Align the bottom edge of the steel square with the wall where you intend to hang the picture. 3. Hold the steel square firmly against the wall, making sure it is level. 4. Use a leveler or a bubble level to ensure that the steel square is perfectly vertical. 5. Once the steel square is in position, you can measure the desired angle by using the markings on the square's blade. 6. Align the top edge of the steel square with the desired angle, making sure it remains level. 7. With the steel square still in place, you can use a pencil or a tape to mark the wall at the desired angle for picture hanging. 8. Remove the steel square and use the marked point as a reference for hanging your picture at the correct angle. By using a steel square, you can obtain accurate and consistent angles for picture hanging, ensuring a visually pleasing display.
- Q: How do you use a steel square to measure and mark 84.375-degree angles?
- To use a steel square to measure and mark 84.375-degree angles, you would typically refer to the protractor scale on the square. Align one edge of the square with the reference line, and then locate the angle measurement on the protractor scale that corresponds to 84.375 degrees. Once identified, mark the desired angle on the material using a pencil or any suitable marking tool.
- Q: Can a steel square be used for measuring the pitch of a roof?
- Yes, a steel square can be used for measuring the pitch of a roof. A steel square, also known as a framing square or carpenter's square, is a versatile tool used by carpenters and roofers for various measurements and calculations. To measure the pitch of a roof, you can use the square's graduated scales and angles to determine the angle and slope of the roof. By placing the square on the roof's surface and aligning it with the rafters or trusses, you can easily determine the pitch by reading the scale or using the square's built-in formulas. However, it is important to note that using a steel square may not provide the most accurate measurements for complex or irregular roof shapes, and specialized roofing tools or instruments may be more suitable in those cases.
- Q: Can a steel square be used for setting up a miter saw?
- Yes, a steel square can be used for setting up a miter saw. A steel square is a versatile tool that can be used for measuring and checking angles, making it suitable for aligning the blade of a miter saw to ensure accurate and precise cuts.
- Q: Can a steel square be used for marking out lap joints?
- Absolutely, lap joints can be easily marked out using a steel square. Carpenters and woodworkers frequently rely on the versatility of this tool for measuring and indicating right angles. In the realm of woodworking, lap joints are commonly utilized, and a steel square serves as a precise instrument to mark the exact spots where the two wooden pieces will intersect. By aligning the square with the wood's edges, you guarantee a precise marking and cutting process, ultimately leading to a snug and flawless fit. The steel square acts as a dependable and precise reference point for marking out lap joints, making it an indispensable tool in this regard.
- Q: Can a steel square be used for porch layout and construction?
- Yes, a steel square can be used for porch layout and construction. Steel squares are versatile tools that are commonly used by carpenters and builders for various construction projects, including porches. They provide accurate measurements and angles, allowing for precise layout and construction of porch components such as posts, beams, and joists.
Send your message to us
Hot Rolled Steel Flat Bars
- Ref Price:
-
- Loading Port:
- Tianjin
- Payment Terms:
- TT OR LC
- Min Order Qty:
- -
- Supply Capability:
- 200000 m.t./month
OKorder Service Pledge
OKorder Financial Service
Similar products
Hot products


Hot Searches
Related keywords

