


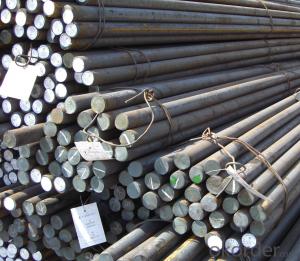
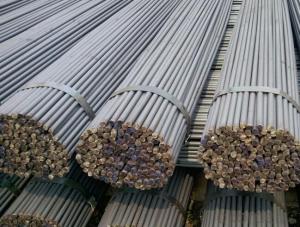
Low Carbon Hot Rolled Steel Square Bar High Quality
- Ref Price:
-

- Loading Port:
- Shanghai
- Payment Terms:
- TT OR LC
- Min Order Qty:
- 50 m.t.
- Supply Capability:
- 10000 m.t./month
OKorder Service Pledge
OKorder Financial Service
You Might Also Like


Specification
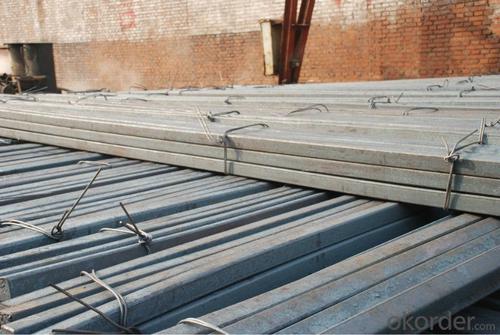
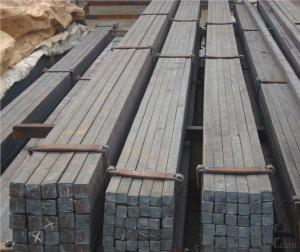
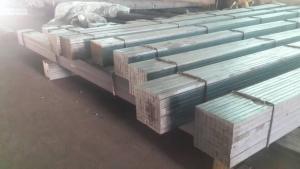
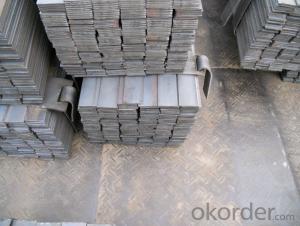
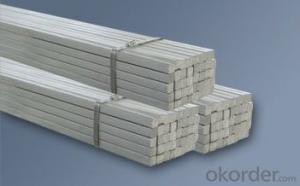
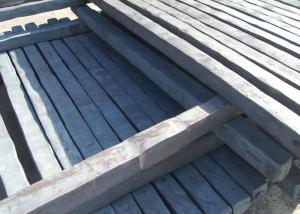
Low Carbon Hot Rolled Steel Square Bar in Bundle
Product Description:
OKorder is offering Low Carbon Hot Rolled Steel Square Bar in Bundle at great prices with worldwide shipping. Our supplier is a world-class manufacturer of steel, with our products utilized the world over. OKorder annually supplies products to African, South American and Asian markets. We provide quotations within 24 hours of receiving an inquiry and guarantee competitive prices.
Product Applications:
Low Carbon Hot Rolled Steel Square Bar in Bundle are ideal for structural applications and are widely used in the construction of buildings and bridges, and the manufacturing, petrochemical, and transportation industries.
Main Product Features:
· Premium quality
· Prompt delivery & seaworthy packing (30 days after receiving deposit)
· Corrosion resistance
· Can be recycled and reused
· Mill test certification
· Professional Service
· Competitive pricing
Product Specifications:
Manufacture: Hot rolled
Grade: Q195 – 235
Certificates: ISO, SGS, BV, CIQ
Length: 6m – 12m, as per customer request
Packaging: Export packing, nude packing, bundled
| SQUARE BAR | |
| SIZE a(mm) | theoretical kg/m |
| 5.5 | 0.237 |
| 6 | 0.283 |
| 7 | 0.385 |
| 8 | 0.502 |
| 9 | 0.636 |
| 10 | 0.785 |
| 11 | 0.95 |
| 12 | 1.13 |
| 13 | 1.33 |
| 14 | 1.54 |
| 15 | 1.77 |
| 16 | 2.01 |
| 17 | 2.27 |
| 18 | 2.54 |
| 19 | 2.83 |
| 20 | 3.14 |
| 21 | 3.46 |
| 22 | 3.8 |
| 24 | 4.52 |
| 25 | 4.91 |
| 26 | 5.31 |
| 28 | 6.15 |
| 30 | 7.06 |
| 32 | 8.04 |
| 34 | 9.07 |
| 36 | 10.2 |
| 38 | 11.3 |
| 40 | 12.6 |
| 42 | 13.8 |
| 45 | 15.9 |
| 48 | 18.1 |
| 50 | 19.6 |
| 53 | 22 |
| 56 | 24.6 |
| 60 | 28.3 |
| 63 | 31.2 |
| 65 | 33.2 |
| 70 | 38.5 |
| 75 | 44.2 |
| 80 | 50.2 |
| 85 | 56.7 |
| 90 | 63.6 |
| 95 | 70.8 |
| 100 | 78.5 |

- Q: How do you use a steel square to lay out a cone shape?
- To use a steel square to lay out a cone shape, you will need to follow a few steps. First, determine the desired dimensions of the cone, such as the height and the base diameter. Make sure you have these measurements handy before starting the layout process. Next, draw a horizontal line on a flat surface or workbench. This line will act as the baseline for the cone. Mark the midpoint of the line as this will be the apex of the cone. Now, take your steel square and place one side of it along the baseline. Align the apex of the square with the midpoint of the line. This will create a right angle. From the apex, measure the desired height of the cone along the vertical arm of the steel square and make a mark. From this mark, draw a line that extends to the baseline. This line will represent the slant height of the cone. To determine the base diameter of the cone, measure the desired diameter along the horizontal arm of the steel square. Make a mark at this distance on both sides of the baseline. Connect the marks on the baseline to the apex using a curved line. This line will represent the outline of the cone. Lastly, double-check all the measurements and lines to ensure accuracy before proceeding with any cutting or construction. By following these steps and utilizing a steel square, you can successfully lay out a cone shape with precision and accuracy.
- Q: Can a steel square be used for checking the alignment of metal studs?
- Yes, a steel square can be used for checking the alignment of metal studs. A steel square, also known as a framing square or carpenter's square, is a versatile tool that is commonly used in carpentry and construction. It consists of two arms, one longer than the other, joined at a right angle. The longer arm is typically 24 inches long, while the shorter arm is around 16 inches. To check the alignment of metal studs, you can place the steel square against the stud's edge or face and ensure that it is perfectly vertical or horizontal. The longer arm of the square can be used to align the stud's edge, while the shorter arm can be used to align the stud's face. By visually inspecting and comparing the alignment of multiple studs, you can ensure that they are all parallel and straight, which is essential for the structural integrity and stability of the wall or structure being built. In addition to checking alignment, a steel square can also be used for other tasks related to metal stud installation, such as marking and cutting studs, checking and transferring angles, and measuring distances. Its sturdy and precise design makes it a reliable tool for various applications in construction and carpentry.
- Q: Can a steel square be used for constructing stairs?
- Yes, a steel square can be used for constructing stairs. A steel square, also known as a framing square or carpenter's square, is a versatile tool commonly used in construction and woodworking. It is primarily used for measuring and marking right angles, making it ideal for accurately laying out stair stringers, determining the rise and run of each step, and ensuring precise cuts. The durability and strength of steel make it a reliable material for constructing stairs that can withstand heavy traffic and provide long-lasting stability.
- Q: How do you use a steel square to find the length of a board?
- To use a steel square to find the length of a board, follow these steps: 1. Begin by placing the steel square against one end of the board, ensuring that it is aligned properly with the edge. 2. Hold the steel square firmly in place, making sure it doesn't move during the measurements. 3. Look at the long side of the steel square, which is often referred to as the blade. It will have measurements marked on it. 4. Locate the inch markings on the blade and find the line that corresponds to the width of the board. For example, if the board is 6 inches wide, find the line labeled "6". 5. Once you have found the correct line, look at the short side of the steel square, called the tongue. It will have measurements marked on it as well. 6. Align the tongue with the edge of the board, ensuring that it is flush against the side. 7. While keeping the steel square and tongue in place against the board, extend the blade along the length of the board. 8. Now, observe the measurement marked on the blade where it aligns with the opposite end of the board. This measurement indicates the length of the board. 9. Take note of the measurement or use a pencil to mark it on the board for future reference. By using a steel square in this manner, you can accurately determine the length of a board, providing you with the necessary information for your woodworking or construction project.
- Q: Can a steel square be used for window and door framing?
- Window and door framing can indeed utilize a steel square. These squares, which are also referred to as framing squares or carpenter squares, serve as versatile tools that are commonly employed in construction and carpentry. They possess the capacity to provide accurate and square measurements and angles, thereby rendering them suitable for a variety of framing tasks, including window and door installation. By virtue of their robust construction and precise markings, steel squares contribute to ensuring that windows and doors are properly aligned and securely fitted within the frame. However, it is worth noting that specific aspects of window and door framing may necessitate other specialized tools and techniques, such as shimming and leveling.
- Q: What are some common uses of a steel square in woodworking joinery?
- A steel square, also known as a framing square or carpenter's square, is an essential tool in woodworking joinery. It is primarily used for measuring, marking, and checking right angles in woodworking projects. Here are some common uses of a steel square in woodworking joinery: 1. Marking and measuring right angles: The steel square is used to mark and measure 90-degree angles accurately. It helps in marking square lines, guiding saw cuts, and ensuring precise joinery. 2. Checking for squareness: Woodworkers use a steel square to check if a joint or corner is square. By placing the square against the joint or corner, they can quickly determine if it is perfectly square or needs adjustment. 3. Determining and transferring angles: Steel squares often have additional markings that allow woodworkers to determine and transfer angles other than 90 degrees. This ability is particularly useful for creating bevels, mitered corners, and complex joinery. 4. Layout and marking: Steel squares are used for laying out and marking components of a woodworking project. They help in transferring measurements accurately, marking cut lines, and ensuring precise positioning of joints and connections. 5. Guiding hand saw cuts: Woodworkers often use a steel square as a guide to ensure straight and accurate cuts with a hand saw. By aligning the square's edge with the cut line, they can maintain a consistent angle and achieve clean, precise cuts. 6. Checking for flatness: A steel square can also be used to check the flatness of a surface or board. By placing the square across the wood's width or length, woodworkers can identify any twists, bows, or warping that may affect the overall quality of the joinery. 7. Creating perpendicular lines and notches: The steel square is handy for creating perpendicular lines and notches in woodworking projects. It assists in aligning and marking where joinery elements such as mortises, tenons, or dovetails should be cut. Overall, the steel square is a versatile tool that plays a crucial role in ensuring accuracy, precision, and quality in woodworking joinery. Its multiple uses make it indispensable for woodworkers of all levels, from hobbyists to professionals.
- Q: How do you use a steel square to measure and mark 78.75-degree angles?
- In order to measure and mark a 78.75-degree angle using a steel square, a few steps need to be followed. Firstly, it is imperative to ensure that the steel square is clean and devoid of any debris or rust. Following this, locate the 45-degree angle on the steel square. This angle is commonly denoted as a right angle and will possess a 45-degree angle on one of its sides. Afterward, locate the 90-degree angle on the steel square. This angle forms a perfect right angle and is typically labeled as "90" on the square. Once the 45-degree and 90-degree angles have been identified, the measurement of the 78.75-degree angle can commence. Place the steel square on the surface or material to be measured, ensuring that the 90-degree corner aligns with one side of the material. Next, rotate the square until the 45-degree angle aligns with the opposite side of the material. This action will result in a 45-degree angle. Finally, make a slight adjustment to the square until the desired 78.75-degree angle is achieved. Take note of the intersection point between the 78.75-degree line and the opposite side of the material, and mark it accordingly. It is important to be aware that a steel square typically possesses fixed angles of 45 and 90 degrees. Consequently, measuring a 78.75-degree angle accurately with a steel square may necessitate some estimation and adjustment.
- Q: What are the common mistakes to avoid when using a steel square?
- When using a steel square, there are several common mistakes that should be avoided to ensure accurate measurements and precise angles: 1. Misalignment: One of the most common mistakes is not properly aligning the steel square with the workpiece. It is essential to ensure that the square is perfectly parallel to the edges or surfaces being measured. Any misalignment can lead to inaccurate measurements and flawed angles. 2. Inconsistent pressure: Applying inconsistent pressure while marking or cutting can result in variations in the measurements. It is crucial to maintain a steady and consistent pressure while using a steel square to ensure accuracy. 3. Ignoring squareness: Over time, steel squares can lose their squareness due to wear and tear. It is important to regularly check the squareness of the tool and make any necessary adjustments or replacements. Ignoring squareness can lead to skewed measurements and inaccurate angles. 4. Incorrect positioning: Placing the steel square in the wrong position can also lead to errors. It is essential to position the square firmly against the edges or surfaces being measured to obtain accurate readings. Improper positioning can result in imprecise measurements and angles. 5. Neglecting cleanliness: Accumulated dirt, dust, or debris on the steel square can interfere with accurate measurements. Regularly clean the square to ensure smooth movements and precise readings. By avoiding these common mistakes, users can effectively utilize a steel square for measuring, marking, and cutting tasks, ensuring precise angles and accurate measurements.
- Q: Can a steel square be used for metal fabrication?
- Yes, a steel square can be used for metal fabrication. It is a versatile tool that can be used for measuring, marking, and checking angles in metal fabrication projects.
- Q: Can a steel square be used for marking out finger joints?
- Certainly! The utilization of a steel square for marking out finger joints is indeed possible. In the realm of woodworking and carpentry, a steel square is a tool of great versatility and precision. It boasts a 90-degree angle and a ruler positioned along its edge, rendering it an ideal instrument for delineating straight lines and angles. In order to achieve a proper fit, accuracy plays a pivotal role when crafting finger joints. By employing a steel square, one can skillfully designate the necessary lines and angles required to fabricate these joints, thereby enabling meticulous and immaculate cuts. It is worth noting, however, that finger joints necessitate meticulous measurements and layout. Thus, for optimal outcomes, it is recommended to employ either a specialized finger joint jig or a dado blade on a table saw.
Send your message to us
Low Carbon Hot Rolled Steel Square Bar High Quality
- Ref Price:
-
- Loading Port:
- Shanghai
- Payment Terms:
- TT OR LC
- Min Order Qty:
- 50 m.t.
- Supply Capability:
- 10000 m.t./month
OKorder Service Pledge
OKorder Financial Service
Similar products
Hot products


Hot Searches
Related keywords

