


Hot Rolled Square Steel Bars 6mm-150mm
- Ref Price:
-

- Loading Port:
- Tianjin
- Payment Terms:
- TT OR LC
- Min Order Qty:
- -
- Supply Capability:
- 100000 m.t./month
OKorder Service Pledge
OKorder Financial Service
You Might Also Like


Product Description:
There are two types of Square Bar, one is hot rolled square bar and other one is cold drawn square bar. Our principal products is hot rolled square bar. We dedicate to products with material Q195 and Q235. We offer products with high quality and low price.
Specifications of Hot-rolled Square Steel Bar:
-Standard: GB,
-Grade: Q195/Q235 or equivalent.
-Chemical Composition:
Standard | Grade | Element (%) | ||||
C | Mn | S | P | Si | ||
GB | Q195 | 0.06~0.12 | 0.25~0.50 | ≤0.050 | ≤0.045 | ≤0.30 |
GB | Q235B | 0.12~0.20 | 0.30~0.70 | ≤0.045 | ≤0.045 | ≤0.30 |
-Mechanical Properties:
Mechanical Properties | Grade | Steel diameter(mm) | |||
≤16 | 16~40 | 40~60 | 60~100 | ||
Yield Point Δs/MPa | Q195 | ≥195 | ≥185 | - | - |
Q235 | 235 | 225 | 215 | 205 | |
Tensile Strength | Q195 | 315~390 | |||
Q235 | 375~500 | ||||
Elongation δ5% | Q195 | ≥33 | ≥32 | - | - |
Q235 | 26 | 25 | 24 | 23 | |
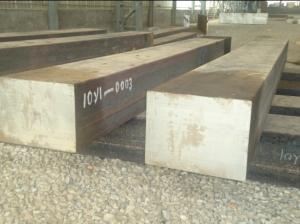
Measures of Hot-rolled Square Steel Bar (Big measures):

(Section of Hot-rolled Square Steel Bar)
-Length of a side and Theoretical weight of Square Bar (Big measures).
Length of a side(mm) | Theoretical weight(kg/m) | Length of a side(mm) | Theoretical weight(kg/m) |
53 | 22.05 | 80 | 50.24 |
56 | 24.61 | 85 | 56.72 |
60 | 28.26 | 90 | 63.59 |
63 | 31.16 | 95 | 70.85 |
70 | 38.49 | 100 | 78.50 |
75 | 44.16 |
|
|
Notes:
1, The theoretical weights in the list, base on the density of 7.85 g/cm3.
2, Formula for theoretical weight of Square bar: a(length of a side) * a * 0.00785
3, The numbers with *mean that they are not regular or we don’t offer them.
-Regular length of Square Bar:
Steel | Length of a side (mm) | Length of steel (m) |
Normal steel | < 25 | 4~10 |
> 25 | 3~9 | |
Steel of high quality | All measure | 2~6 |
Tool steel >75 | 1~6 |
Usage/Applications of Hot-rolled Square Steel Bar:
-The Square Steel is normally used as structure steel.
-Row material for other structure steel like steel angles, channels, I-beams, H-beams, etc…
-Row material for steel pipes.
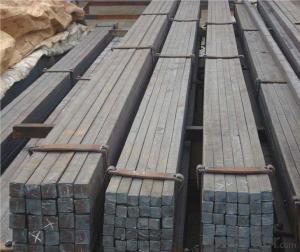
Packaging & Delivery of Hot-rolled Square Steel Bar:
-Packing Detail:
1, The products can be packed in bundles by steel wires.
2, The weight of each bundle no exceed normally 3 tons.
-Marks: We make tag marks and color marks for each bundle. The tag marks with white background and red company log will be tied up to each bundle. The information is usually including basic information of company and products like product name, specification, etc...and other information required by customers. As for color marks, we will paint both ends of each bundles to make sure that it will be more convenient for customers to distinguish theme from other products.
-Delivery Detail: 30~45 working days after receive buyer’s T.T. or L/C.
Payment:
-Invoicing on theoretical weight or actual weight as customer’s request.
-FOB, CFR or CIF.
-Regular terms of payment:
1, 30% payment in advance, the remaining balance (70% payment) against the copy of B/L.
2, 30% payment in advance, the remaining balance (70% L/C) against the copy of B/L.
3, Negotiable.
-The payment terms will be written in contraction detailedly.
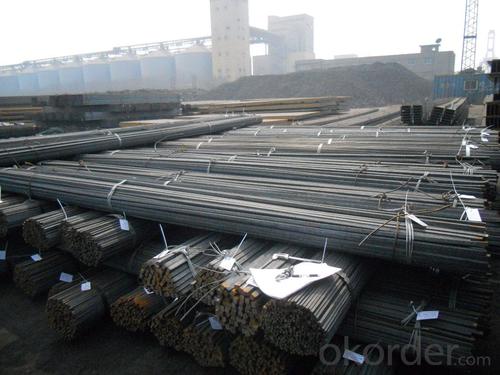
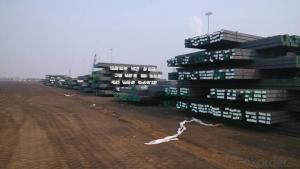
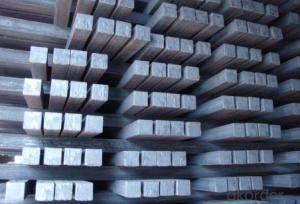
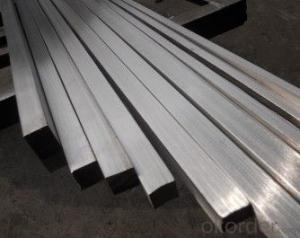
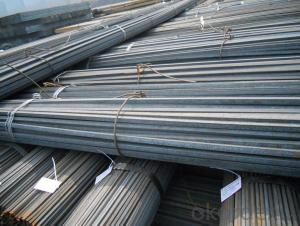
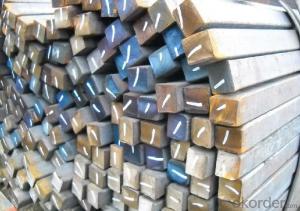
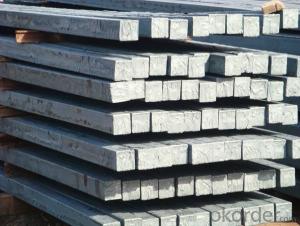
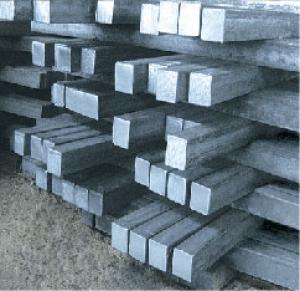
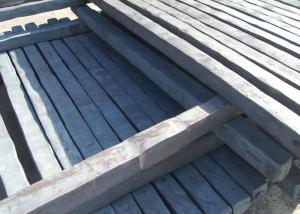
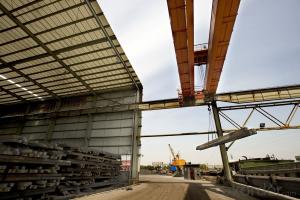
Photos of Hot-rolled Square Steel Bar:


We sincerely welcome partners around the world to establish business cooperation with us on the basis of mutual trust, benefit and development.
- Q: What are some common applications for a steel square in fence construction?
- In fence construction, a steel square proves to be a versatile and reliable tool. Its precision and durability make it a common choice for fence builders. Here are some typical uses of a steel square in this field: 1. Accurate angle measurement and marking: To guarantee the correct alignment and levelness of fence posts and rails, a steel square is frequently employed to precisely measure and mark angles. 2. Squareness verification: Ensuring that corners are perfectly square is essential in fence construction. A steel square becomes an indispensable aid in this task, as it allows builders to confirm the alignment of fence panels and the overall stability of the structure. 3. Determining lengths and cuts: Fence rails, pickets, and panels need to be cut to the correct length. A steel square can be effectively utilized for measuring and marking these dimensions, ensuring uniformity and seamless fitting of all components. 4. Creation of straight lines: A steel square is invaluable for establishing straight lines, whether it is marking the initial boundary or aligning fence elements. By using the square's edge as a guide, builders can achieve greater precision and aesthetic appeal in their construction. 5. Levelness assessment: Fence posts and rails must be level for optimum performance. By placing a steel square against the vertical surface, builders can determine if adjustments are needed to achieve perfect vertical alignment. 6. Gate frame squareness: When constructing a gate, achieving a perfectly square frame is crucial to prevent sagging and ensure smooth operation. A steel square is an indispensable tool for this purpose, providing accuracy in the construction process. Overall, a steel square is an invaluable tool in fence construction. Its ability to provide accurate measurements, levelness, and squareness results in the creation of professionally built and sturdy fences.
- Q: What are the different techniques for using a steel square in metalworking fabrication?
- Metalworking fabrication offers a range of techniques for utilizing a steel square. To begin with, one frequently employed method involves measuring and marking right angles. This is accomplished by placing the blade, or long side, against the metal's edge and sliding the square along while marking the desired angle. This guarantees a perfect square angle. Another technique entails using the steel square as a cutting guide. By securely clamping the square to the metal sheet, one can achieve precise and straight cuts by running a cutting tool, such as a grinder or saw, along the square's edge. This is particularly valuable for creating clean edges and making accurate cuts for joints or corners. Furthermore, the steel square can be employed to inspect the flatness or straightness of a metal surface. By positioning the square against the metal and observing the gap between the blade and the surface, one can identify any imperfections or unevenness. This is especially crucial when working on projects that require precise measurements or when ensuring accurate component fitting. Additionally, the steel square serves as a guide for drilling holes in metal. By aligning the desired drill location with the appropriate markings on the square and positioning it against the metal surface, one can achieve accurate and consistent hole placement. Lastly, the steel square can function as a layout tool. By using the square to mark lines or angles on the metal, fabricators can ensure proper alignment and symmetry in their workpieces. This is particularly beneficial when working on intricate or complex designs that necessitate precise measurements and angles. In conclusion, the utilization of a steel square in metalworking fabrication encompasses techniques such as measuring and marking right angles, guiding cutting tools, checking flatness or straightness, guiding drilling operations, and serving as a layout tool. These techniques enable fabricators to achieve accurate and precise results in their metalworking projects.
- Q: Can a steel square be used for checking the squareness of a router base plate?
- Yes, a steel square can be used for checking the squareness of a router base plate. A steel square is a precise and accurate tool that can be used to measure and verify the right angles of various objects. To check the squareness of a router base plate, simply place the steel square against the edge of the base plate and observe if it aligns perfectly with the sides of the square. If there is any gap or misalignment, it indicates that the base plate is not perfectly square. This can be useful for ensuring the accuracy and precision of router cuts and ensuring that the base plate is properly aligned with the router bit.
- Q: How do you use a steel square to determine the angle of a profile cut?
- In order to determine the angle of a profile cut, you must follow a few steps using a steel square. Firstly, make sure that your steel square is clean and free from debris or rust. Then, place the steel square flush against the side of the material you want to cut at a right angle, ensuring a snug fit against the surface. Once the steel square is properly positioned, examine the markings on it. Most steel squares have markings indicating angles, typically ranging from 0 to 90 degrees. These markings can be found on both the blade and the tongue of the square. To determine the angle of the profile cut, locate the marking on the blade that aligns with the edge of the material. This marking will indicate the angle at which the cut should be made. If the marking on the blade is not an exact match, you can estimate the angle by looking at the closest marking and measuring the difference. After determining the angle, you can transfer it to your cutting tool or machine to make an accurate profile cut. It is important to note that the accuracy of the angle measurement depends on the precision and calibration of your steel square, so ensure that it is in good condition before using it for such measurements. Using a steel square to determine the angle of a profile cut is a straightforward and efficient method, particularly when dealing with materials that require precise and accurate cuts.
- Q: Can a steel square be used for wainscoting installation?
- Yes, a steel square can be used for wainscoting installation. A steel square is a versatile and durable tool that is commonly used in carpentry and woodworking projects. Its primary purpose is to assist in measuring and marking right angles and ensuring accurate cuts and joinery. When installing wainscoting, a steel square can be used to mark and measure the height and width of the panels, as well as to ensure proper alignment and levelness during installation. It can also be used to check for squareness and make precise cuts when trimming the panels to fit around corners or obstacles. Overall, a steel square can be a valuable tool for achieving precise and professional-looking wainscoting installation.
- Q: Can a steel square be used for checking the squareness of a cabinet door opening?
- Yes, a steel square can be used for checking the squareness of a cabinet door opening.
- Q: Can a steel square be used for window and door framing?
- Yes, a steel square can be used for window and door framing. Steel squares are commonly used in carpentry and construction to ensure accurate and square angles when framing windows and doors. They provide a sturdy and reliable tool for measuring and marking out the layout and cuts needed for proper installation.
- Q: Can a steel square be used for marking straight lines?
- Yes, a steel square can be used for marking straight lines. It is a versatile tool commonly used by carpenters, metalworkers, and other tradespeople to ensure accurate measurements and straight lines when cutting or marking materials.
- Q: Can a steel square be used for plumbing layout and installation?
- Yes, a steel square can be used for plumbing layout and installation. Steel squares are versatile tools that can be used for measuring angles, checking right angles, and marking straight lines, making them suitable for various plumbing tasks such as aligning pipes, determining angles for connections, and verifying the squareness of installations.
- Q: How do you use a steel square to measure and mark 67.5-degree angles?
- To use a steel square to measure and mark a 67.5-degree angle, you would align the long edge of the square with the baseline of the angle and then adjust the square until the angle indicator (usually located at the corner of the square) reaches 67.5 degrees. Once aligned, you can then use the square to mark the desired angle accurately.
Send your message to us
Hot Rolled Square Steel Bars 6mm-150mm
- Ref Price:
-
- Loading Port:
- Tianjin
- Payment Terms:
- TT OR LC
- Min Order Qty:
- -
- Supply Capability:
- 100000 m.t./month
OKorder Service Pledge
OKorder Financial Service
Similar products


Hot products


Hot Searches
Related keywords

