


Steel Bar of Square Shape for Deformed Steel Bar Fabrication
- Ref Price:
-

- Loading Port:
- Tianjin
- Payment Terms:
- TT or LC
- Min Order Qty:
- 25 m.t.
- Supply Capability:
- 10000 m.t./month
OKorder Service Pledge
OKorder Financial Service
You Might Also Like


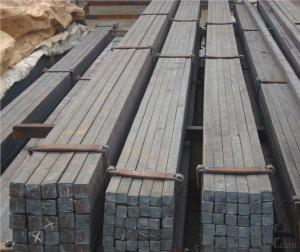
1. Structure of Steel Bar of Square Shape Description:
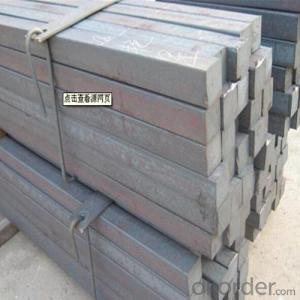
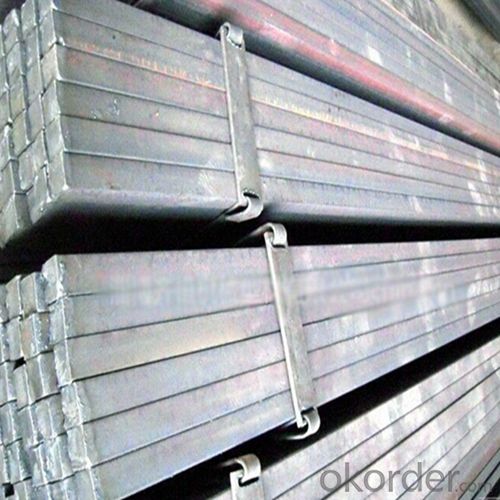
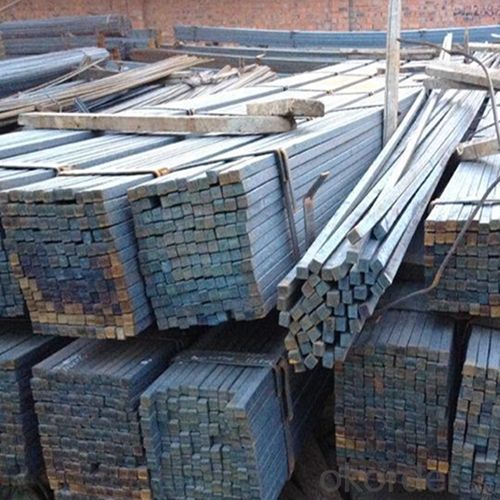
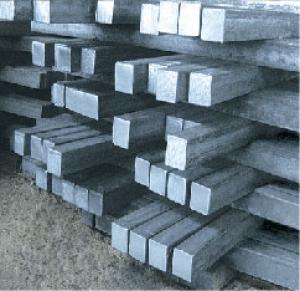
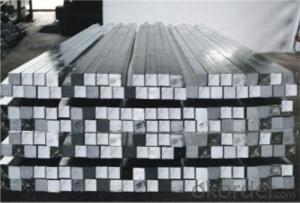
Steel bar of square shape is a bar with square shaped cross-section. It is special case of equal sides. Before steel products are sold on the market, the steel must first be processed into more functional pieces. Raw steel cannot be of use while in its pure form, thus it has to be cast into shape. The freshly made steel, steel bar of square shape is still in the form of a metal bar or rectangle. Small sizes of steel bar of square shape are used in ship building.
2. Main Features of Steel Bar of Square Shape:
• Grade: Q235
• Type: Mild carbon steel
• A quadrilateral with four equal sides and four right angles.
• Vibration: The stiffness and mass are chosen to prevent unacceptable vibrations, particularly in settings sensitive to vibrations, such as offices and libraries.
• Local yield: Caused by concentrated loads, such as at the beam's point of support.
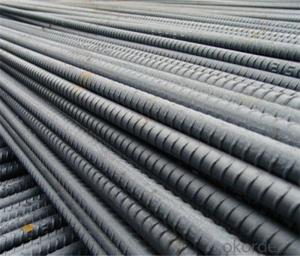
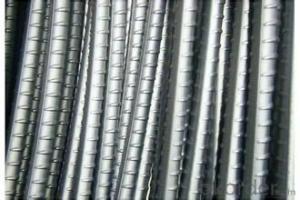
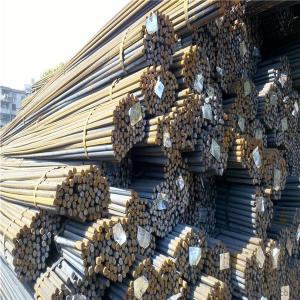
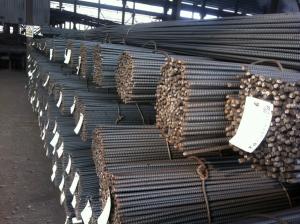
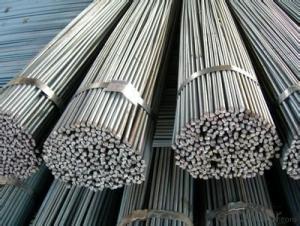
3. Steel Bar of Square Shape Images:


4. Square Bars with Firm Sides Specification:
Mechanical Properties | Grade | Steel diameter(mm) | |||
≤16 | 16~40 | 40~60 | 60~100 | ||
Yield Point Δs/MPa | Q195 | ≥195 | ≥185 | - | - |
Q235 | 235 | 225 | 215 | 205 | |
Tensile Strength | Q195 | 315~390 | |||
Q235 | 375~500 | ||||
Elongation δ5% | Q195 | ≥33 | ≥32 | - | - |
Q235 | 26 | 25 | 24 | 23 | |
5. FAQ
We have organized several common questions for our clients,may help you sincerely:
①What is the main material?
There are two types of Square Bar, one is hot rolled square bar and other one is cold drawn square bar. Our principal products is hot rolled square bar. We dedicate to products with material Q195 and Q235. We offer products with high quality and low price.
②How to inspect the quality?
We have a professional inspection group which belongs to our company. We resolutely put an end to unqualified products flowing into the market. At the same time, we will provide necessary follow-up service assurance.
③Is there any advantage about this kind of product?
Steel I beam bar IPE has a reduced capacity in the transverse direction, and is also inefficient in carrying torsion, for which hollow structural sections are often preferred.
- Q: The steel and wood preservative in the flower is how to connect
- Through an angle, angle steel and steel welding, anticorrosive wood frame strip and steel bolted.
- Q: What are the different types of steel used in manufacturing steel squares?
- There are several different types of steel used in manufacturing steel squares, each with its own unique properties and characteristics. 1. Carbon Steel: This is the most common type of steel used in manufacturing steel squares. It is a versatile material that offers a good balance of strength and affordability. Carbon steel squares are durable and can withstand heavy use. 2. Stainless Steel: This type of steel is known for its corrosion resistance and high strength. Stainless steel squares are often used in industries where hygiene and cleanliness are important, such as food processing or medical equipment manufacturing. 3. Alloy Steel: Alloy steel squares are made by adding other elements to carbon steel, such as chromium, molybdenum, or nickel. This results in improved strength, toughness, and wear resistance. Alloy steel squares are commonly used in applications that require high strength and durability, such as construction or automotive manufacturing. 4. Tool Steel: Tool steel squares are specifically designed for use in cutting, shaping, or forming other materials. They have excellent hardness, wear resistance, and heat resistance. Tool steel squares are commonly used in tool and die making, machining, or metalworking industries. 5. High-Speed Steel: High-speed steel squares are a type of tool steel that has been specially designed to withstand high temperatures and cutting speeds. They are commonly used in applications that involve high-speed machining or cutting, such as drilling or milling. Overall, the choice of steel for manufacturing steel squares depends on the specific application and requirements. Each type of steel offers unique properties that can enhance the performance and durability of the steel squares.
- Q: How do you use a steel square to determine roof pitch?
- To determine the roof pitch using a steel square, you can place one leg of the square on the roof surface and align the other leg with the horizontal run or rise of the roof. By reading the measurements on the square, you can easily determine the angle or pitch of the roof.
- Q: How do you use a steel square for marking perpendicular lines?
- To use a steel square for marking perpendicular lines, place the long side of the square against the edge of the material you want to mark. Then, align the short side of the square with the edge of the material, making sure it forms a right angle with the long side. Finally, use a pencil or marking tool to trace along the edge of the short side, creating a straight and perpendicular line.
- Q: What are the common applications of a steel square in woodworking?
- Woodworking relies heavily on the versatility and accuracy of a steel square, also known as a framing square or carpenter's square. Consisting of a long arm and a perpendicular arm, forming an L-shape, this tool is crucial in woodworking. Here are some common uses of a steel square in woodworking: 1. Precise layout and marking: The primary function of a steel square is to accurately lay out and mark right angles. It aids in marking perpendicular lines, square corners, and parallel lines on wood surfaces, ensuring precise cuts and joinery. 2. Squareness inspection: Woodworkers frequently employ a steel square to check if components or assemblies are square. By aligning the square against edges or corners, they can verify if the angles are 90 degrees and make necessary adjustments. 3. Measurement and squaring of boards: Steel squares have measurement scales along the long arm, allowing for precise measurement and marking of specific lengths on boards. They can also ensure the edges of boards are perfectly square by aligning the square against the edge and marking or cutting accordingly. 4. Angle determination: Steel squares often feature degree markings on the shorter arm, enabling woodworkers to measure and mark angles other than 90 degrees. This is particularly useful for projects requiring precise angles, such as mitered joints or bevels. 5. Machinery and tool setup: Steel squares are invaluable for aligning and setting up woodworking machinery and tools. They can be used to check the squareness of saw blades, fences, drill press tables, or other components, ensuring accurate and safe operation. 6. Creation of geometric shapes: By utilizing the measurement scales and angle markings, woodworkers can employ a steel square to create various geometric shapes or patterns. Triangles, hexagons, octagons, and other shapes requiring specific angles and dimensions can be easily drawn using a steel square. In summary, a steel square is an essential tool in any woodworking shop. Its ability to provide precise measurements, check for squareness, and assist in layout and marking tasks is invaluable to woodworkers of all expertise levels.
- Q: Can a steel square be used for checking the alignment of a belt grinder table?
- Checking the alignment of a belt grinder table can be done using a steel square. A steel square is a versatile tool commonly used in woodworking and metalworking to ensure precise angles and alignments. When verifying the alignment of a belt grinder table, one can place the steel square against the table and confirm if it is perfectly perpendicular to the belt's direction. By aligning the square with the table's edge and observing if the corner of the square touches the entire length of the table, it is possible to determine if the table is accurately aligned. This technique guarantees efficient operation and accurate outcomes for the belt grinder.
- Q: What are some common uses of a steel square in blacksmithing?
- In blacksmithing, a steel square, also called a layout square or framing square, is a highly adaptable tool. It serves multiple purposes in this craft: 1. Assurance of right angles: The primary function of a steel square is to guarantee the perfect squareness of corners and angles. It is frequently employed to assess the squareness of workpieces, including forging projects and structural components. This guarantees accuracy and precision in the final product. 2. Design and marking: Blacksmiths regularly employ a steel square to mark and create patterns on their workpieces. The square's straight edges and right angles aid in producing consistent and symmetrical shapes. It can be used to draw parallel lines, perpendicular lines, or measure and mark specific lengths. 3. Centering and alignment: Correct alignment and centering of workpieces are crucial in blacksmithing. A steel square facilitates this process by providing a reference point. It ensures that a piece is centered on an anvil or other tools, resulting in a balanced and evenly distributed force during forging. 4. Flatness testing: A steel square is an exceptional tool for examining the flatness of a surface. By placing the square's edge against a workpiece, a blacksmith can identify any gaps or irregularities. This is particularly useful in ensuring the flatness and uniform shape of forging projects, especially when working on blades, tools, or other items that demand precise flatness. 5. Tool and equipment setup: Blacksmiths frequently rely on a steel square to align and set up their tools and equipment. It aids in positioning various components, such as anvils, hammers, tongs, or vices, at right angles to one another. This guarantees stability and consistency throughout the blacksmithing process. All in all, a steel square is an indispensable tool for blacksmiths. Its capacity to measure, mark, align, and ensure right angles makes it a versatile and essential tool in various stages of the blacksmithing process.
- Q: Can a steel square be used for checking the squareness of a picture frame corner?
- No, a steel square is not suitable for checking the squareness of a picture frame corner as it is primarily used for carpentry and construction purposes. A framing square or a specialized picture framing square would be more appropriate for this task.
- Q: Can a steel square be used for checking the squareness of a jigsaw blade?
- No, a steel square cannot be used for checking the squareness of a jigsaw blade. A jigsaw blade needs to be checked for squareness using specialized tools such as a square or a squareness gauge designed specifically for jigsaw blades.
- Q: Can a steel square be used for checking the flatness of a wall corner?
- No, a steel square cannot be used for checking the flatness of a wall corner. A steel square is primarily used for marking and measuring right angles in woodworking and carpentry. It is not designed to determine the flatness or levelness of a surface. To check the flatness of a wall corner, a level or a straightedge would be more appropriate tools. A level will indicate whether the wall corner is straight and plumb, while a straightedge can be used to check for any gaps or irregularities in the surface.
Send your message to us
Steel Bar of Square Shape for Deformed Steel Bar Fabrication
- Ref Price:
-
- Loading Port:
- Tianjin
- Payment Terms:
- TT or LC
- Min Order Qty:
- 25 m.t.
- Supply Capability:
- 10000 m.t./month
OKorder Service Pledge
OKorder Financial Service
Similar products

Hot products


Hot Searches
Related keywords

