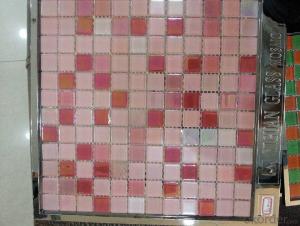
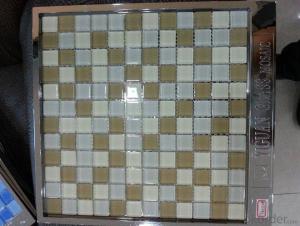
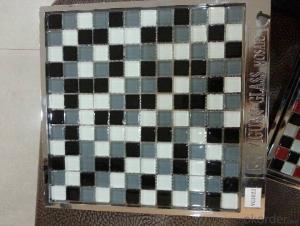
Glass Mosaic MSC-564 2015 Hot Sale Design
- Loading Port:
- China main port
- Payment Terms:
- TT OR LC
- Min Order Qty:
- 1 m²
- Supply Capability:
- 20000 m²/month
OKorder Service Pledge
OKorder Financial Service
You Might Also Like
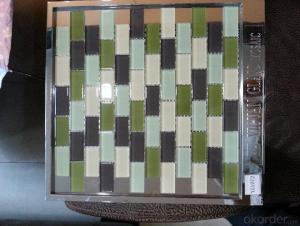
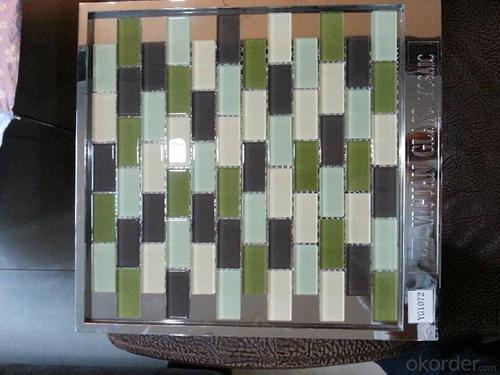
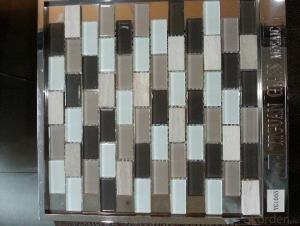
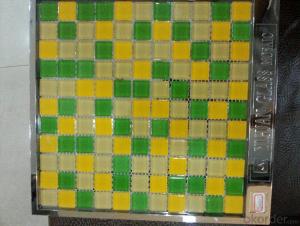
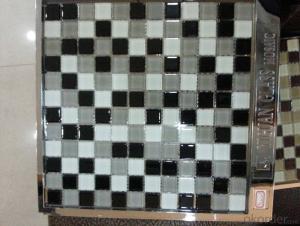
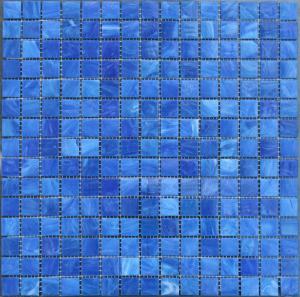
Our glass stick mosaic tile is the most popular kitchen backsplash decoration material
among customers. In the shape of long and short thin sticks arranged in staggered
rows, this kitchen glass mosaic tile is suitable for decorating the whole wall. Besides, it can also be cut into border
tiles as customer requires and the mosaic borders will go well with the wall tiles.
Item Name: | glass stick mosaic
|
Item No.: | MSC-564 |
Series: | Vicia cracca |
Material: | glass |
Chip Size: | multi size |
Sheet Size: | 298x268mm |
Thickness: | 8 mm |
Joints: | 2 mm |
Packaging: | 11 sheets / box |
Coverage: | 1 sqm. (10.76 sq.ft.) / box |
N. Weight | 16.5 kg/ box |
G. Weight: | 17 kg / box |
- Q: We have not picked out the tile yet, is one type better or worse/easier or harder to install?
- It depends on the size of the bathroom and the size of tile you are installing. Generally speaking installing tile is realativly easy, the hardest part will be cutting the tile without cracking it. As far as the tools there are not many needed what you will need to do is measure the area you will be doing, and visit your local hardware store where they can help you figure the amount of tile and other items needed to complete the job, most hardware stores will have brochures to help you complete the project.
- Q: I am installing 13x13 porcelain tile on a wall. Should I leave a 1/4‘‘ gap for grout or can I butt them up tight for a smaller grout line?
- Tile with no gap will not accept grout. A gap less than 1/8 will accept on non-sanded grout. Most large tiles are set with a 1/4 gap or a bit more. That will accept sanded grout. It's very difficult to get butted tile perfectly straight on a wall so it will look good afterward. If that wall is in a wet location, you definitely need grout.
- Q: We had redid our cupboards a couple years ago and still have to properly cover the hole that was left for the vent on the previous vent system. It looks like they used staples of some type but the way it is just needing 1 and a half (or less) tiles it‘s awkward.
- Most ceiling tiles have a tounge groove so each tile fits into another. When you are piecing in tiles it's impossible to get the tounges in the grooves without breaking them. I would suggest, cutting off the tounges with a razor knife and install with Liquid nails or some other construction adhesive. To keep the tiles in place while the glue is drying, cut a 2X4 long enough and put it under the tile while the glue sets up. You might want to put a towell between the tile and the 2X4 to keep from damaging the tile. For the 1/2 tile, score the backside of a tile with a razor knife then break it in half.
- Q: What is the difference between good and bad tiles
- At present, there are many varieties of tiles on the market, there are more than a dozen categories, such as seepage through the whole body brick, glass turn, anti-skid tiles and the like, usually can be divided into the following. Glazed tiles: tiles on the surface of the brick. This brick is divided into two categories: one is made of clay, because of high water absorption and must burn glaze, so it should be called "tile", the strength of this brick is low, and now rarely used ; The other is fired with porcelain clay, in order to pursue the decorative effect also burned glaze, this tile structure is dense, high strength, low water absorption, strong stain resistance, the price is slightly higher than the ceramic firing tiles. Porcelain clay fired glazed tiles, is currently widely used in home decoration, 80% of the buyers are using this tile as a ground decoration materials. The trick of resolving these two bricks is simple: the clay is fired behind the clay, the clay is fired behind the brick. In the ceramic tiles made of clay, the Spanish production of wall tiles because of its unique decorative effect, is currently very popular in Beijing, but the price of this brick is higher, generally used in high-end home decoration. Quintana Brick: This is a glazed porcelain tile that has good skid resistance and abrasion resistance. Generally what we call "slippery tiles", most of the whole body bricks. Because this brick price is moderate, so by the consumer favorite. Which "seepage through the whole body brick," the beautiful pattern, it is put it down. Polished tiles: the whole body after the polished polished polished tiles, the hardness of this brick is very high, so very wearable.
- Q: Our house has Asbestos floor tiles throughout. (I had them tested, and they definitely contain asbestos.)The dilemma: Currently these tiles are covered with carpet. The carpet is old and ugly and needs to be replaced. We want to replace it with Laminate flooring.I‘m worried about pulling up the carpet tacks at the edges.Is there a safe way to do that?Also, is it safe to put Laminate flooring over asbestos tiles?
- This probably isn't going to be cheap but you MUST get the asbestos out of the house asap. The only legal way is to employ a specialist firm to come in and remove it for you as they will have all the right equipment to remove it safely. They will also be licensed to take it away and dispose of it correctly. It's not just a matter of taking it to the local waste disposal site. If they're a reasonable company they may even take your old carpets away for you aswell because if they've been laid directly on top of the tiles there'll definitely be traces of asbestos in the carpets.
- Q: Am I able to Lay down Ceramic/Porcelain Tiles directly on top of vinyl tiles. If So are there special material that I need to use.Even though the floor is in the basement, it seems that the vinyl is laid over wood, rather than concerete.Thanks for your answer.
- Yes it is possible if your vinyl is in good condition with no loose areas. This method is generally not recommended though. You should remove your vinyl and use and good embossing floor leveler before preceding with installation as normal. You can give it try over the vinyl but I believe you will be happier in the long run with a job you know was done right.
- Q: I am installing 4x4 ceramic tiles on a shower wall. I have been using a 1/4 x 1/4 sq. notch trowel, but am having trouble with the tiles staying put...should I use a 3/16 x 5/32 v-notch trowel instead?
- it will state clearly on the mastic/mortar package. but normally 1/4 X 1/4, complete coverage and press firmaly. When you put the tile in place, put as close as posible to the desired location and only move slightly to align the tile, press firmly and hold for few seconds and release. if it does no stay, something is wrong, beyond your question.
- Q: Laying 225 Sq ft of 18x18 tile on flat slab. Using Ultraflex II thinset (white) w/ 1/16 spacers. Cannot find a 3/4 trowel to apply just to floor...can I use 1/2 sq notch trowel if I apply to floor and back of tile as well when I set them???
- luke has you covered, I'd lay one let it set up I have had natural stone change color after being put in a bed of thin-set
- Q: I am about to renewing my kitche.I plan to install tile.Well I have no tile cutter but I do have a simple, regular cutt off electrical tools and a diamond blade.Should this be enough for it?
- A okorder /
- Q: Including the ground and the wall, need to pay attention to what aspects of the problem? Decoration has no experience, hope to say the details, thank you
- On the stickers of the brick vertical and horizontal lines are straight, wrong paste the wrong degree of brick to be consistent; flatness is better, brick angle can not have high and low gap, can not have empty paste; cement mortar shall not overflow the length of 1 / Brick angle and edge line shall not leave stains, imprints, scars; reserved water and electricity mouth to the edge of the neat, fixed water pipe interface protruding brick surface height reasonable; residual corner more than reasonable.
Send your message to us
Glass Mosaic MSC-564 2015 Hot Sale Design
- Loading Port:
- China main port
- Payment Terms:
- TT OR LC
- Min Order Qty:
- 1 m²
- Supply Capability:
- 20000 m²/month
OKorder Service Pledge
OKorder Financial Service
Similar products
Hot products
Hot Searches
Related keywords
