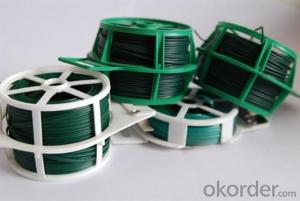


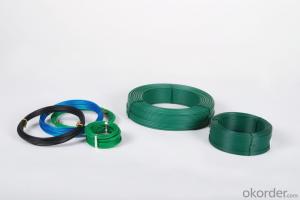
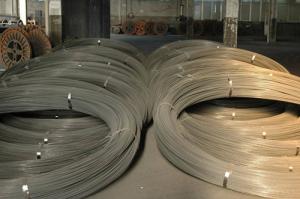
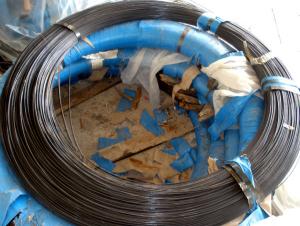
BINDING AND CRAFT WIRE
- Ref Price:
-

- Loading Port:
- Tianjin
- Payment Terms:
- TT OR LC
- Min Order Qty:
- -
- Supply Capability:
- -
OKorder Service Pledge
Quality Product, Order Online Tracking, Timely Delivery
OKorder Financial Service
Credit Rating, Credit Services, Credit Purchasing
You Might Also Like

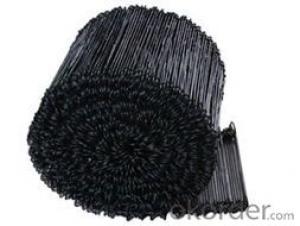

BINDING AND CRAFT WIRE
1、 APPLICATION:
Binding and ornaments in garden
2、 SIZE:
0.30mm—6.00mm.
3、 PACKING:
0.01kg/piece to 10kg/piece and other special packing request.
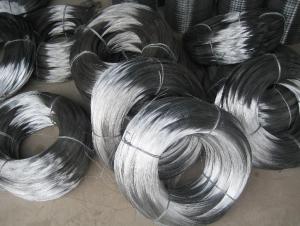
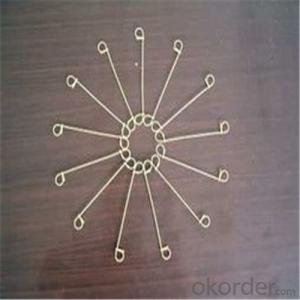
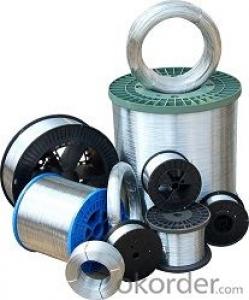
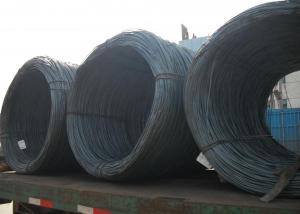
1、 STANDARD:
JIS/KS/ASTM/BS/GB
2、 Application: mesh(gabion mesh)binding and ornaments in garden
3、 size:0.50-6.0mm
4、TENSILE STRENGTH RANGE:
Tensile strength: 300-400N/mm2、400-500N/mm2、500-600N/mm2 600-700N/mm2、900-1100N/mm2
Tensile strength: 300-400N/mm2、400-500N/mm2、500-600N/mm2 600-700N/mm2、900-1100N/mm2
and other special tensile request.
5、PACKING
Packing:5kg/piece to 800kg/piece and other special packing request.
- Q: I just removed a Australian light switch that I've never seen before that controlled a bathroom ceiling fan and the bathroom light. (both buttons on a single panel switch)I have a black wire coming from the switch box that has 2 other black wires splitting out from the connection point, one of each going to the fan and the light. And a single black wire going to the ceiling fan and a red wire to the light.I'm just putting in your everyday off/on switch one for each the fan and the light. any help? what are the positive and negative wires?
- Here in the USA we use Black and Red for power (positive) , a white wire for a neutral and green (or bare copper) for ground. I am guessing that the red and black are the independent power wires and the other black wires are the main power. the use of a multimeter should be used to verify which is which. Since your putting in a single switch (which is a interrupter) where you have one black splitting to two, remove the 2 wires and make it a single wire and attach to the line side of the switch. Then connect the red and black wire for light and fan with a 3rd wire (tail piece) and attach the tail wire to the load side of the switch., Remember to test your power source first. If in doubt, hire a electrician. No one wants a fire!!!! Better to be safe then sorry.
- Q: I have a proj in tle class about solid wire joints and splices and i cant find a picture of 18 of the splices / joints we did at school we needed to like insulate the wires and twist em with each other help!
- Electrical Splices And Joints Pictures
- Q: Hi,I'm trying to connect a Panasonic CQ RDP200-LEN car radio. Normally,there is red and yellow wire for ignition and constant,and a black wire for ground. However,this unit has 2 yellow wires,2 black wires and a red. Where do these wires go? thanks
- I know waht you talking about for the wiring. my dual deck was the same way as far as the average wiring you were talking about..... that does sound weird. the other wires might just be for xtra hook ups that u dnt have. however dont take my word for that! what i would do is looking up the wiring diagram for the exact model that you have, look at the manual that came with it if there was one, or call a number for the wiring on the deck if there is one.
- Q: how to connect the wiring from car stereo to amplifier
- The consistent potential twine is nearly a small direct line from the battery, as in it is many times warm, yet once you have been placing it to the useful of the upload-ons it could have in basic terms been becoming a circuit. it is to no longer say which you probably did no longer short out the wiring some incorrect way and that i'm unsure what the twine grew to become into which you genuinely touched with the consistent, yet it is many times run from the useful part as a relentless, till you have a grounded useful electric equipment on your motor vehicle. you does not in an '89 Escort till you probably did that your self. Wiring could be with any luck fused, even regardless of the indisputable fact that i do no longer understand how some distance back the fusing may well be, no count number if or no longer this is each and every of the previously to the fuse field or a separate fuse closer to the wiring.
- Q: i have a 2002 pontiac sunfire where is my ground wire located? what does it look like?
- There is ground wire that connects the battery's negatime post to the frame of the car and that is it. If you are looking for a ground wire to connect something to eg. an amp, just connect the ground from the electronic device to the frame of your car via a bolt that goes in to your cars chassis/frame.
- Q: What type of wire do i need to install a normal inside wall outlet? Do i have to use solid copper wire?
- If the circuit breaker feeding the receptacle is 15 amps, you must use a #14 minimum size. if it is a 20 amp breaker, you must use a #12 minimum. You can use either solid or twisted. TexMav
- Q: can anyone please tell me what does hook-up wire mean and how does it differ from other kinds of wires such as light duty and heavy duty?Also,which one should I use for breadboards?
- Hookup wire is a term usually reserved for wire sizes smaller than 16 AWG, usually single strand conductor. It is generally used in applications where current-carrying capacity is not of prime importance. Breadboarding is one of these applications, but usually uses 22AWG or smaller wire.
- Q: okay my apt building was built in 1975 I am changing my light fixture new from home depot and the ground wire, the black and white wire are basic on the new fixture. I am looking in the case box in my ceiling all I see is a black wire attached to red, and a yellow wire attached to a white wire which then attaches to another two white wires (then gos go's up behind the casing) I am not sure which is the ground here. There is a copper looking wire that is thick, thick it just isnt as malleable as the new ground wire that is on my new light fixture. It seems very difficult to maneuver.. Could this be my ground from the ceiling. It was attached to the mount of the old fixture my a screw.
- All wiring is different but the basics remain the same. Before attempting anything please turn off the power. If I have the good picture in my head, there are extension wires added to the black and white this would be done if the wire run though the wall was too short and needed a little extra to get wired properly to a fixture. If I look at the bad picture in my head you have a jump cable attached which is running to a second outlet or light fixture. If the extra wires go back into the ceiling leading somewhere else then it is probably running to a different fixture and this isn't the best way to run electrical. It could potentially overload your circuit. If it has been working for 40 years without a problem you are probably ok, so long as the fixture you're adding is within the same category as the fixture you're removing. The thick copper wire will be your ground wire and should be attached to the box, and to the outlet itself with screws. Good luck with that fixture.
- Q: I have a wire coming from the car battery positive terminal. It is 12v DC. I want to split this wire to two other wires. I cannot connect another wire to the positive terminal. Will splitting this wire cause the voltage to drop to 6v each wire? or will they pull a constant 12v each?
- Each okorder /
- Q: need color of sig wire on maf and witch wire is sig on 02 sensore
- Yes we do need car description.O2 sensors black wires are normally for the heating element.It should be one of the white wires.The wire will read 0.2 volts with a cold engine and fluctuate between 0.1-0.9 volts at normal operating temp,so look for the wire which has these voltage reading.The maf signal wire will have less than 5 volts on it.Generally it will show 0.60-0.80 volts at idle and increase to between 1.50-2.20 volts at a 2500-3500 rpm level.Be aware that a maf sensors heated wire can become dirty causing it to read and function incorrectly,so it may just need to be cleaned rather than bein replaced
Send your message to us
BINDING AND CRAFT WIRE
- Ref Price:
-
- Loading Port:
- Tianjin
- Payment Terms:
- TT OR LC
- Min Order Qty:
- -
- Supply Capability:
- -
OKorder Service Pledge
Quality Product, Order Online Tracking, Timely Delivery
OKorder Financial Service
Credit Rating, Credit Services, Credit Purchasing
Similar products


Hot products

Hot Searches
Related keywords

