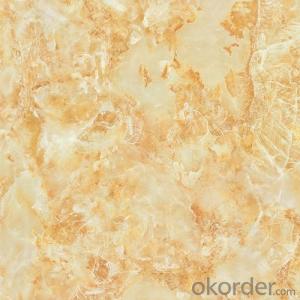
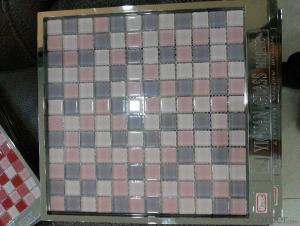
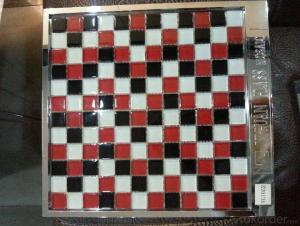
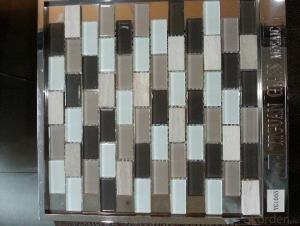
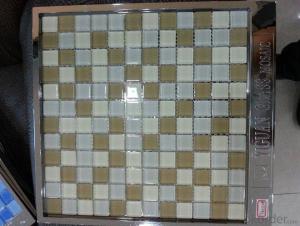
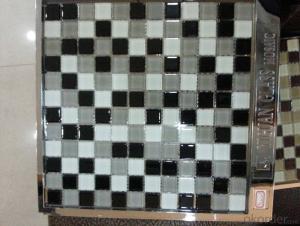
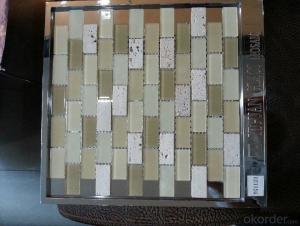
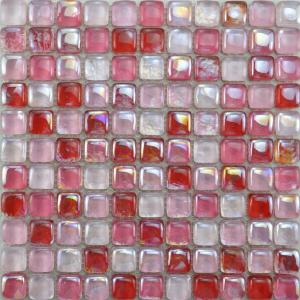
Glass Mosaic MSC-569 2015 Hot Sale Design
- Loading Port:
- China main port
- Payment Terms:
- TT OR LC
- Min Order Qty:
- 1 m²
- Supply Capability:
- 20000 m²/month
OKorder Service Pledge
OKorder Financial Service
You Might Also Like
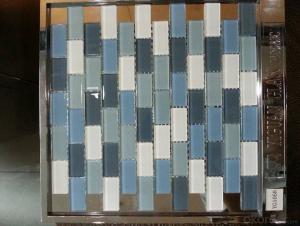
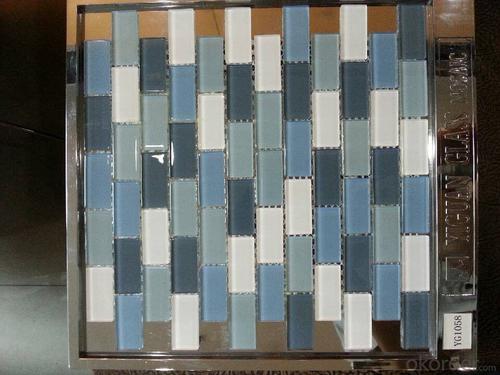
Our glass stick mosaic tile is the most popular kitchen backsplash decoration material
among customers. In the shape of long and short thin sticks arranged in staggered
rows, this kitchen glass mosaic tile is suitable for decorating the whole wall. Besides, it can also be cut into border
tiles as customer requires and the mosaic borders will go well with the wall tiles.
Item Name: | glass stick mosaic
|
Item No.: | MSC-569 |
Series: | Vicia cracca |
Material: | glass |
Chip Size: | multi size |
Sheet Size: | 298x268mm |
Thickness: | 8 mm |
Joints: | 2 mm |
Packaging: | 11 sheets / box |
Coverage: | 1 sqm. (10.76 sq.ft.) / box |
N. Weight | 16.5 kg/ box |
G. Weight: | 17 kg / box |
- Q: I want to put vinyl tiles on my pre-existing ceramic tiles but in some areas there is no ceramic tiles and I need something to fill in the gap to make my floors even when I put on the vinyl tile. What should I use? Then when my floors are even how do i put my tiles?
- well you dont put anything over ceramic tile you rip it up after that then will talk
- Q: My new home has a kitchen with glazed ceramic tiles covering most of the walls.The colour is basically honey brown, but there‘s a hideous purple border (in the same tile size shape) running horizontally vertically all over the place - I‘d say that 20% of the tiles are this colour.I want to reduce all the tiles to one (new) colour.Two guys (both pros) have this to say:GUY 1: Cheapest solution (and least noisy/disruptive) is to use a ‘glass enamel paint‘ over the tiles. I went online and found several manufacturers of this stuff.GUY 2: Scoffed at this and said there was no other way than retiling the whole kitchen.Guy 1 is adamant that it can be done, and the job will last if enough care is taken in preparing the surface.Is he right?Has anyone tried this ‘re-enamelling‘ technique, and were the results OK?Thanks!
- Guy 3 Says: Break out the offensive tiles and replace them with ones more appealing. Re-grout. You can do this yourself. 1. remove grout from tiles that must go 2. carefully break offending evil tiles with hammer and chisel. 3. clean substrate 4. Place new friendly tiles of same dimensions in space using organic mastic as a binder. 5. Re-grout with non-sanded grout. You really need to know a little more than this, but it is really not that hard, and very rewarding.
- Q: I have a large number of tiles on the walls of the laboratory nowadays, and the whole piece of fall, years ago is normal, do not know how the matter, please answer expert!
- There are two possibilities: One, paving time and space drums, two, paving no seam or stay too small, hot up caused by cold
- Q: HiIs there an adhesive that can be used to spot repair Vinylfloor tiles 18x18 on a basment floor?
- I definitely think that it is. A basement does not have to be as decked out as the rest of the house although it can be. There are really nice vinyls now a days that you can choose from so take your time and research well before you purchase. You will be glad that you didn't spend an arm and a leg and still got something nice. Hope this helps and God Bless!
- Q: Does the tiles have radiation?
- The tile surface has a glazed surface. With a certain degree of radiation. Tiles appear on the market are generally very small radiation. Radiation is big for some marble and artificial stone
- Q: How do you tile anyway? thank you
- I have to have the same thing done. No, I would not put the new over the old! Actually, I know that it is expensive, but it would be best to hire someone that knows what they are doing, do it for you. Worth the money in the long run.
- Q: how do i do the measuring and lay out on a 10 foot by 6 foot floor when laying the tiles diagonally?
- A 10x6 room requires 60 square feet of tile to cover the floor. On a normal square to the walls pattern, I would order 10% more tile to cover waste. On a diagonal pattern, you will have more waste. I would order 15% to 20% more tile to cover waste. To set up to lay the tile, I start by picking the most obvious sight line in the room - maybe from the next room through the door and chalk a line perpendicular to the far wall along that sight line and parallel to the side wall. Then you chalk a line 45 degrees wall to wall through the center point of the center of the first line. This is your 45 degree pattern. Chalking a line wall to wall 90 degrees from the second chalk line through that same center point gives you your grid pattern to set your tile from. Ignore the first line - that was for reference only - line two and three are the lines you set your tile from. Set out tile dry with spacers to see if you like the effect. I will sometimes set out all of the whole tile possible in the room and walk around to see if it looks good. If it doesn't look right or you end up with too small pieces along the edges or in the doorways, you can move your initial start point and rechalk your lines.
- Q: My husband and I just purchased a condo. We want to retile the bathroom in a more modern looking tile or maybe a marble or some kind of fancy tile. We are going to do it ourselves. Where can we find good prices on the tile?
- Lowes has great looking tile but is a bit pricier than Home Depot.
- Q: and didn‘t seal the floor or grout. Now they are dirty, how can I clean them so they look new, then seal it? I have grout sealer, do I need to seal the tiles also, they look to be sort of porous?
- I work for a manufacturer of tile and stone setting materials. Try this, before renting the steam cleaner: wash it down with SoftScrub and a stiff brush. 90% of the time, this will bring your grout and tile back to original color. Sealing the tile: ignore previous answers. Yes, you want to seal your tile, also. Even porcelain tile, whose porosity is less than 1/2 of 1%, needs sealing. All tile wicks moisture... best to keep it on the surface. Plus, sealing the entire surface is a whole lot easier than masking your grout joints... and will provide a uniform look.
- Q: I laid some ceramic tile about 6 years ago in a family room. There are some tile that sound hallow, Like they did not set in the adhesive securely. Nothing else is wrong with the tile, but it does sound hallow when you walk on it. I laid the tile on a concrete slab. How would you go about fixing this? I thought of drilling a small hole in the center of the tile and spraying some liquid insulation (that you put around windows) and grouting the hole closed with some grout the same color as the tile.
- By coincidence I had the same situation once. No...! You don't want to do it that way. First the tiles can crack, it's not going to seal and the hole is going to be ugly. The only pain full solution here and it's not very easy is to cut the grout with a thin masonry bit and a drill moving along while you cut'em and very carefull so you don't crack the tiles and lift every loosen tile. Clean the old grout from every tile after removed and then clean the old cement from the floor with a spatula very smooth and then with a sanding grinder and a masonry disk out doors. Now you must use fresh tile cement to re install the tiles again. Good luck...!
Send your message to us
Glass Mosaic MSC-569 2015 Hot Sale Design
- Loading Port:
- China main port
- Payment Terms:
- TT OR LC
- Min Order Qty:
- 1 m²
- Supply Capability:
- 20000 m²/month
OKorder Service Pledge
OKorder Financial Service
Similar products
Hot products
Hot Searches
Related keywords
