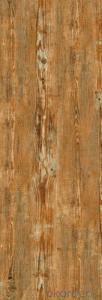


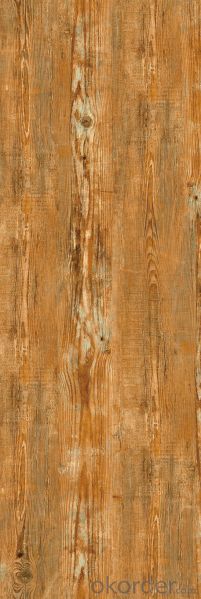
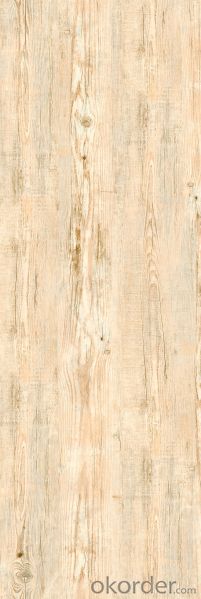
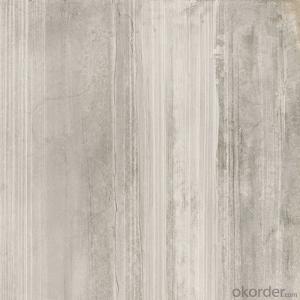
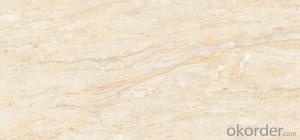
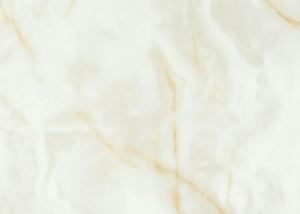
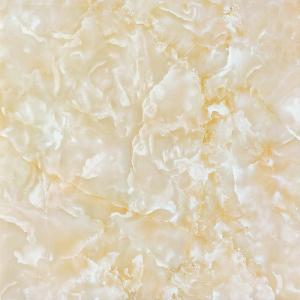
Glazed Porcelain Tile Wood Floor Series WF6015
- Ref Price:
-

- Loading Port:
- Qingdao
- Payment Terms:
- TT OR LC
- Min Order Qty:
- 1267.2
- Supply Capability:
- 100000 m²/month
OKorder Service Pledge
OKorder Financial Service
You Might Also Like


Product Brief Introduction
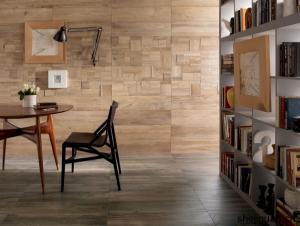
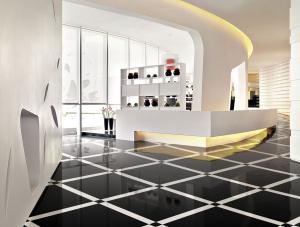
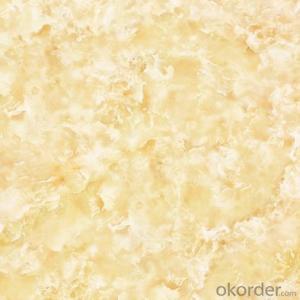
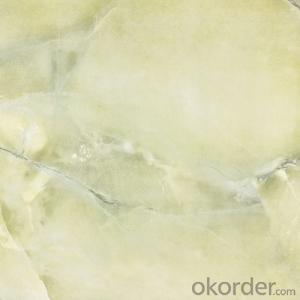
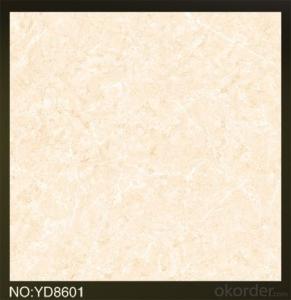
Glazed Porcelain Tile Wood Floor Series WF6015 is one of the most popular series of Glazed Porcelain Tile, which is one most popular serie of Glazed Porcelain Tile in the present market. Just like other series, it could be used for interior floor for apartment, villa, super market as well as other public areas. This kind of tile has structure on the surface.
Product Features
Glazed Porcelain Tile
Only Grade AAA available
Strict control on color shade, deformation, anti-pollution as well as packing
Competitive price
Standard export packing: Pater Carton+ Wooden Pallet
Fast delivery
OEM service could be offered
Product Specification
Tile Type: Glazed Porcelain Tile
Quality standard: GB/T4100-2006, ISO13006, ISO9001
Water Absorption Rate: 1-3%
Breaking Strength: 》 1800 N
Rupture Modulus: 》40 MPa
Length and Width Tolerance: ±0.1%
Surface Smoothness: ±0.15%
Edge Straightness: ±0.15%
Wearing Strength: 《1600 mm3
Packing Information (For 27.5 Tons heavy 20’Fcl)
For 600x600mm, 4pcs/Ctn, 40 Ctns/Pallet, 960 Ctns/20’Fcl, 1382.4m2/20’Fcl
Production Line & Package


FAQ
1. For Glazed Porcelain Tile, is the 30*60 available?
—— Yes, 30*60 is available. Due to the basic size is 60*60, we need to cut 60*60 tile into 30*60. 6 pcs are packed into one carton. We also have different sizes for the wood floor series.
2. What is the MOQ for this tile?
—— Normally the MOQ is 1382.4 m2 for one 20’ container. To support our clients, we could go with 3 models to fill one container at most.
3. How it will be installed? Is it rectified?
—— Normally they are rectified and also easy installation.
- Q: are tiles or reptile carpet better for a bearded dragon tank? i was also wondering where can i buy tiles specifically for reptile tanks?
- For the best answers, search on this site https://shorturl.im/awFCO I prefer tiles. While the carpet may look nice and is not ingestible, the fabric can snag on claws and teeth. It is absorbent too, so even picking poop up right away will leave the bacteria behind inside the carpet - there is no wiping down, you have to wash the whole thing. As well as being much easier to clean, tiles also hold and spread heat better :)
- Q: i would like to paint over the old yellow tile on our bathroom walls, and of course in the shower. is that possible, and how can i do that?
- no,use a scraper and remove it,replace with corian
- Q: Hi, I was wondering what type of tile is easier to lay down on a bathroom floor, large, single tiles or small tiles that are connected together by mesh. I have never done anything like this before, so any suggestions would be helpful. Thanks!
- You did not say how big the bathroom was and that is important in deciding what size tile to use... You said layng ceramic tile... you did not say if it was ON the floor or ON the wall behind the vanity top and that makes a difference. I would love to answer as I have just completed another job in my bathroom this week ... but I just do not have enough information from you
- Q: im making this really cool projecr for my moms birthdayy and i need a few tiles. plain tiles. where can i get them individually and cheap? ‘ how much will it cost? (per tile)
- Most tiles are sold by the square foot,(s/f). But most places like Home Depot and Lowes will sell the small tiles , like the 4 inch tile per piece. I ve seen them as low as 8 cents a pc for basic white and cream ( bone colored) . Matte and high gloss both. Any questions you can e mail me through my avatar. GL
- Q: We have ceramic tile on the wall in the bathroom with a few tiles of color. Hate to change whole bathroom.
- With no offense to you or others who answer, the answer truly is NO, not to any satisfactory level! After installing thousands of sq. ft. of tile, and applying thousands of gallons of paint, AND UNDERSTANDING the properties of fired, glazed tile, I share this. It's essentially GLASS. Without much detail regarding color I'm going to assume you're talking about individual tiles interspersed among a base color tile. Also without knowing the substrate, there is an option. If you can match the base color tiles, and live with them, you can use a diagonal grinder to remove the surrounding grout, around the offensive color tiles, chip them out carefully, and after cleaning the substrate, install new. Certainly that can be applied to NOT matching tile pieces as well. Allow the mastik proper drying time, re-grout, and hopefully be OK with it. If that seems too easy, or difficult, you should consider other PATTERN options, since it's possible you'll damage base color tiles, OR, again, see if that base color is still available. For that you may have to go to a manufacturer, which may be difficult since many are in Europe and/or Mexico. Steven Wolf
- Q: I keep hearing that tile showers are a real chore to keep clean. I bought some tile sealer, and grout sealer. Will this help out significantly? How often should I reapply? Any other tips I should know about while it‘s still a virgin shower before it‘s too late?
- I can say I sealed my grout with a aerosol spray grout and it worked great. Make sure you do it twice.
- Q: I have a 15x15 tile that is on the floor in front of a gas fireplace (never been used) that has a hairline crack in it. The tile is one of 4 on the floor and matches 8 others that ring the face of the gas fireplace, the bathrooms and the kitchen. I cannot find the same tile to replace it. There is no elevation difference across the crack.Is there a method to fill the hairline crack so it doesn‘t stand out like a sore thumb?
- If you must fix the crack, go to a stone fabrication company, they have a product called akimi that can be colored to match the tile and will harden when mixed with a hardner. The only problem is that tile does not crack unless the tile is not bonded or the substrate moves, so your one tile may be the first of many to crack. Take a broom handle and tap the tile, the cracked one might have a hollow sound, if it does, it is not bonded well to the floor. tap the others to see if you have other problems.
- Q: I‘m looking to re-tile my kitchen... I would like to get good quality tile, at a good price. Can I trust tile purchased at any particular large hardware chain, or should I seek out a specialty flooring store? Or does it even matter that much - is tile just tile?
- I'm not sure how you judge a good tile from the start but I do know that you need to get a good quality tile contractor for doing the installation. It's no use getting a good quality beautiful tile if it's put up and the installation looks horrible.
- Q: I want to know if it‘s necessary to use any special underlayment, or any additional steps required to successfully lay ceramic tile over a wood plank floor. Thanks!
- Yes you can, if in good condition. If you have hardwood over planks, then it won't move anymore than having cement board over planks will. 1.5 inches of wood in excellent condition doesn't have enough bounce to bother tile. Cement board is overkill in most jobs. And not that great of one in the first place. On the flip side, If it is not an overkill, then it probably isn't enough. Any tile that goes over the seams of the cement board, is at high risk for cracking. Tile in the center of cement board is very safe. Mine you if the joists aren't strong enough, it won't matter what the sub floor is or how many layers of cement board you have, you can't do tile. If the floor moves a 1/16th of an inch when 300 pounds is set in one spot, then you have to reinforce or replace the joists, nothing else will fix it. This is how most plank floors fail. Old floors often are built with 2x6 lumber spanning 10 feet. And then there is the new technology: Tile membranes. Cement board harden the floor so it doesn't move. Tile membranes create a floating layer for the tile to sit on. As long as the floor doesn't move more than an 1/8 at the extreme, the tile won't crack on top of a tile membrane. Tile membranes cost about 1.00 to 1.80 US dollars a square foot. The basic membrane is 1/8 of an inch thick. Due to price most tile installers have rarely or never used it, so be prepared to see skeptics. common membrane brands: Schluter?-DITRA is the favorite of TV shows like Holmes on Homes and is sold at home depot among other places. Homelux is sold at Menards
- Q: A roof tile falls off the roof of a house. An observer inside the house notices that the tile took 0.2 s to pass a 1.6 m window of the house. If the tile feel from rest, how far above the top of the window did it fall from? Give your answer in meters, recall that this is height above the window and has a positive sign, do not enter units.
- Average velocity of tile in falling past window = 1.6/0.2 = 8m/s This is the instantaneous velocity of the tile half way down the window in time. This means that the tile had a velocity of 8m/s 0.1 sec after it reached the top of the window. How long does it take a falling body to attain velocity of 8m/s, v = u +at 8 = 0 + 9.8t t= 8/9.8 t = 0.816sec 0.816 - 0.1 = 0.716 seconds Therefore it reached the top of the window in 0.716 seconds. How far must the tile fall to attain a velocity of 0.716 sec? s = ut + ?*a*t? s = 0 + ?*9.8*0.716? s = 2.5m The tile fell from height 2.5m above the top of the window.
Send your message to us
Glazed Porcelain Tile Wood Floor Series WF6015
- Ref Price:
-
- Loading Port:
- Qingdao
- Payment Terms:
- TT OR LC
- Min Order Qty:
- 1267.2
- Supply Capability:
- 100000 m²/month
OKorder Service Pledge
OKorder Financial Service
Similar products

Hot products
Hot Searches

