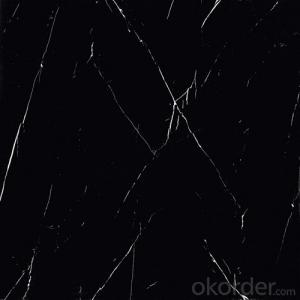


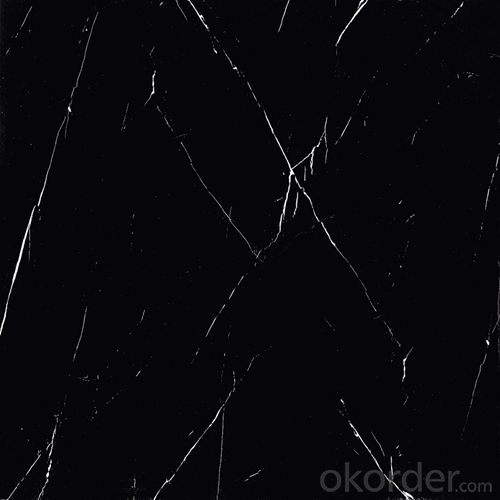


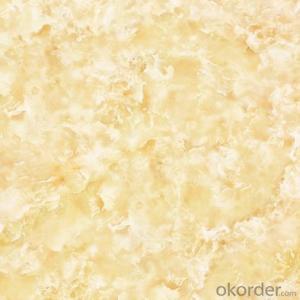
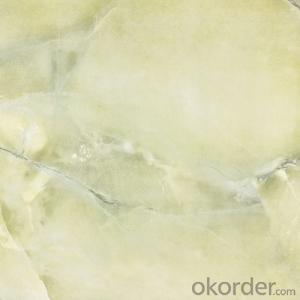
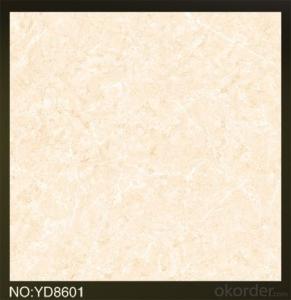
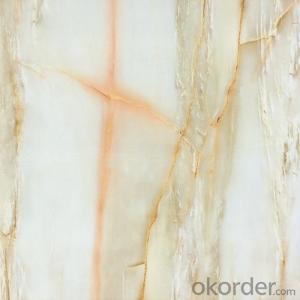
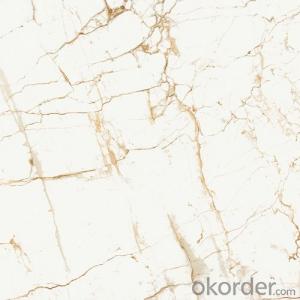
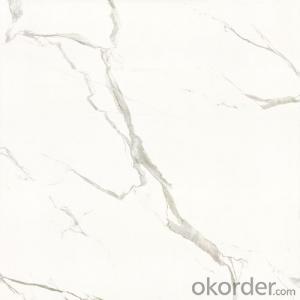
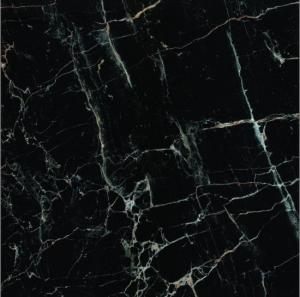
Full Polished Glazed Porcelain Tile 600 XD6C231
- Ref Price:
-

- Loading Port:
- Guangzhou
- Payment Terms:
- TT OR LC
- Min Order Qty:
- 1152 m²
- Supply Capability:
- 100000 m²/month
OKorder Service Pledge
OKorder Financial Service
You Might Also Like


Basic Information:
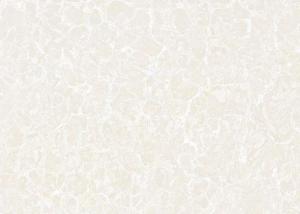
Tile Type | Full Polished Glazed Porcelain Tile |
Certificate | ISO13006, ISO9001 |
Finish | Nano Finish |
Size | 600x600mm |
Water Absorption Rate | Below 0.5% |
Packing | Carton + Wooden Pallets |
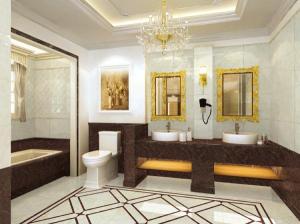
Usage | Floor and wall |
Other Choices | many designs, size, colors |
Delivery Time | 15~20 days after 30% deposit received |
Features:
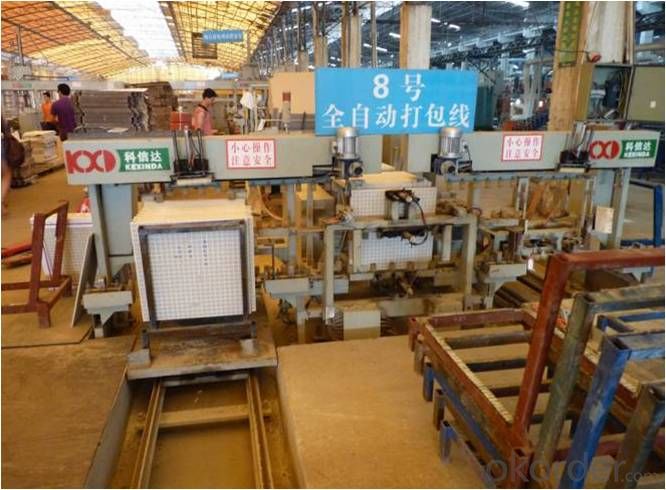
l Available in many designs, specifications and assorted color, unique designs and exclusive quality
l Used for indoor & outdoor wall and floor decorations, as well as Stair Case Product;
l Easy to install, anti-dust, washable, acid-proof, alkali-proof, durable
l Material: glazed porcelain
l Customized sizes available according to clients’ requirements
l The full polished glazed porcelain tile is widely used for interior house flooring, hotel lobby flooring, shopping mall as well as other public sites.
l Vivid stone texture and vein bring our decoration the natural stone beauty with much lower cost, easier quality control and easier decoration proceeding.
l Advanced glazing technology to make sure the tile surface beauty vivid and clean, via ink-jetting or silk printing.
l We could go with OEM model, making 2nd production based on client’s requirement;
l We could offer flexible service on shipment and better support on payment term;
l Our quality guarantee is based on the strict production procedure, quality controlling on the shade, straightness as well as white degree.
- Q: What is the best tiles?
- Champion, Dongpeng Tiles, Nobel Tiles, Mona Lisa Tiles, Marco Polo Tiles and other top ten brands Not the best, only the most appropriate, different parts of the selection, the characteristics of different tiles, there is no need to be the best, neither economic nor nicely suitable for paving parts
- Q: my husband put in tile in the motel i work at and it is ceramic tile and some of the rooms are popping up up can you tell me why? by the way could it be the climate i live in florida!
- Could be the humidity. What did he use to stick them down? Did he use a mastic that comes already mixed in a tub? If so, there will probably always be problems in a humid or wet areas. Thinset is best for tile.
- Q: We had redid our cupboards a couple years ago and still have to properly cover the hole that was left for the vent on the previous vent system. It looks like they used staples of some type but the way it is just needing 1 and a half (or less) tiles it‘s awkward.
- Most ceiling tiles have a tounge groove so each tile fits into another. When you are piecing in tiles it's impossible to get the tounges in the grooves without breaking them. I would suggest, cutting off the tounges with a razor knife and install with Liquid nails or some other construction adhesive. To keep the tiles in place while the glue is drying, cut a 2X4 long enough and put it under the tile while the glue sets up. You might want to put a towell between the tile and the 2X4 to keep from damaging the tile. For the 1/2 tile, score the backside of a tile with a razor knife then break it in half.
- Q: Balcony tile on the ground, do not know when a piece was made a small pit, but the brick has been posted for 3 months, is a cement paste, and now want to change that a brick, the location is in the middle of the ground, I ask any idea? anxious
- The original tile broken and then the bottom of the cement chisel and then covered with cement paste with the color of the floor tile
- Q: I want to lay ceramic tile in the entry way of my townhome. It‘s about 80 sq ft. The house originally came with a generic white vinyl flooring that I swear is officially a part of the concrete slab it lays on. Because it is so firmly attached (no bubbles, no visible defects of any kind) would it be possible to lay the ceramic tiles over the vinyl? I honestly think it‘s going to take more time to rip up that flooring (and the glue that keeps it down) than it will laying the tile. Thoughts? Thanks!
- you really should pull the vinyl up, even if it's a hassle, because it could buckle in the future and affect your tile work. Go to your home store and see if they have a solvent that will loosen the adhesive holding the vinyl down, then scrape it all up. Hopefully it will be concrete underneath and not another layer of vinyl (happened to us in a kitchen once). Clean it really well, then do your tiling. Be sure to use the correct adhesives and grouts. There is also a sealer you can use that will insure the grout never stains, something *she* will appreciate when she never has to get on the floor with a toothbrush to clean out the muck between the tiles. :) Good luck and happy holidays!
- Q: What is good for tiles?
- Now the market is full of a lot of ceramic tile brand, a national well-known brands, there are some small brands for the local market, of course, in the conditions and budget allowed to recommend or choose some well-known brands, so the quality of the product more To ensure that at the same time after-sales service and construction guidance and so will be more sound, the following can give you some of the market on the front of the brand sales De Gao, Leibang Si, Xi card, porcelain Lai paste, the proposal is for reference only, specific Or you need to decide.
- Q: how can i tile over linolium flooring without pulling it up?
- By tiling over it without pulling it up... :) Really. You either tile over cement or whatever is already there. It's commonly done, it's just not the 'clean' or thorough way of doing things. It's best if the floor is completely flat without the ridges that linoleum usually has, to prevent cracks. Just clean the floor well, leave no debris, and you should be alright.
- Q: I am in the process of installing a slate floor in my mudroom. The durock has been laid, and the tiles cut and sealed, and I‘m ready to start using the medium set to secure the tiles in place, but as I‘ve never laid slate (or any tile) before, I have some questions. 1. The tiles are in place now how I want them, do I have to take up the tiles row by row before I start mortaring them in place, or can I do 1 or 2 tiles at a time?2. I laid the tiles out starting from the center and working outwards. When I lay the tiles in place do I again start at the center, or do I start from the edges, or doesn‘t it matter?3. What is the best way to prevent lippage? As this is slate there is a good amount of variation. Do I just back butter each tile so that it is as high as the highest tile in the room? How do I manage to do that properly?
- Others might disagree, but here's what I suggest: 1. I take up at least a few rows of tile at a time, carefully stacking them in order. 2. Layout should always be done using a center line. There are options for the installation: - If you carefully snap or draw lines for each row on the Durorock and do not use spacers you can start wherever you want, for example against a far wall so that you don't work your way into a corner. - If you only use a center line and rely upon spacers, then you need to start at the center. Tiles tend to drift from each other slightly when you install using spacers, so if you start in the center and work in both directions the net drift toward the edge will be half as much as it would if you work from one edge all the way to the other. - I always draw lines for each row when I do a diagonal installation. I install the longest row first and the work away from it toward the opposite corners. 3. Once I mix a batch of thinset, I don't want to fuss much with tile thickness. So before I even lay the slate tiles out on the floor I sort them from thickest to thinnest. Individual tiles often vary in thickness from one corner to the other; others might have consistent thickness but be dished (not flat). These tiles are candidates to be cut for edge pieces, or they might not be worth using at all. Anyway, I layout the tiles from thickest on one side of the room to thinnest on the other and only need to butter a thin corner of that occasional irregular tile that is pretty enough to be worth the hassle. 4. See my answer to 2.
- Q: Hi, I`m planning a bathroom remodel soon, and I want to use the same floor tiles as before - they are beautiful! But I just can`t find them anywhere (we bought this house recently and the previous owner did the remodel, and we can`t get hold of him any more). If anyone recognizes them, I`d be really grateful if you could point me in the direction of where to find them. Thank you SO much!Further info: the tiles are a fraction under 4 square and are a kind of gray-based quartz or granite (not sure of the difference, sorry!) with flecks of aquamarine and blue that give it an overall pale blue hue. They sit between plain white tiles with the corners shaped to accept the smaller blue squares.I`ve looked in Lowes, Home Depot, Amazon and online but so far no luck :( !
- You will have to contact a company and request a catalog of their tiles that they manufacture. After a run of tiles are made the next run will not be the exact same to match. It's very possible that no manufacturing tile company is still making the tile. With the wear and glaze that the tile has it would be impossible to get a match. I suggest that you shop for tiles that will enhance and blend with what you have and you may even use hard wood and tile aquamarine color that will pull the color hue from your present tile. The hardwood and tiles are beautiful. Hope this helps. Interior Decorator. Jo Ann
- Q: A rectangular area can be completely tiled with 200 square tiles. If the side length of each tile was increased by 1 cm, it would take only 128 tiles to tile the area. Find the side length of each tile.
- here goes... Conceptually, if you knew the area of the rectangle was, say 5000cm squared, and you knew that the length of the tile was, say 5cm, then you would know that the number of tiles necessary would be (5000cm sqrd)/5^2 = 5000/25 = 200 tiles. Using this conceptual knowledge, we can set up equations to answer this question. Let A represent the area of the rectangle to be tiled (this is a constant in this question, we just need to give it a label here) Let x represent the length of the original square tile. We know from the question the following: A / (x^2) = 200 tiles rearrange for A = 200(x^2) This is Equation 1. The question says that if the length increases by 1cm (i.e. x+1) then only 128 tiles are needed, so A / [(x+1)^2] = 128 tiles rearrange for A = 128(x+1)^2 This is Equation 2. Substitute Equation 1 into Equation 2 and solve for x! So the first step is: 200(x^2) = 128(x+1)^2 ---> divide both sides by 8 25(x^2) = 16(x+1)^2 You might be tempted at this point to expand and collect like terms, but you'd end up with an equation with which it appears difficult to solve for x. Here however, you should notice that all parts of this equation are very easily square rooted...so, square root both sides to simplify and solve for x: sqrt [25(x^2)]= sqrt[16(x+1)^2] 5x = 4(x+1) 5x = 4x + 4 x = 4 Therefore the side length of each tile is 4 cm. Of course, you can check your answer by plugging it into any of the equations above, and making sure that the left side of the equation acutally does equal the right side!
Send your message to us
Full Polished Glazed Porcelain Tile 600 XD6C231
- Ref Price:
-
- Loading Port:
- Guangzhou
- Payment Terms:
- TT OR LC
- Min Order Qty:
- 1152 m²
- Supply Capability:
- 100000 m²/month
OKorder Service Pledge
OKorder Financial Service
Similar products


Hot products


Hot Searches

