

Street Light Controller 24V - Wind Solar Hybrid with 2 Solar Charge Controllers
- Ref Price:
-

- Loading Port:
- Shanghai
- Payment Terms:
- TT or LC
- Min Order Qty:
- 1 unit
- Supply Capability:
- 8000 unit/month
OKorder Service Pledge
OKorder Financial Service
You Might Also Like
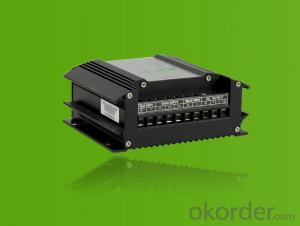
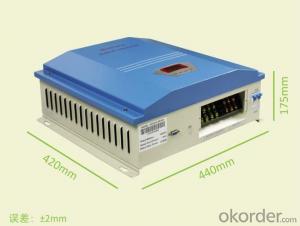
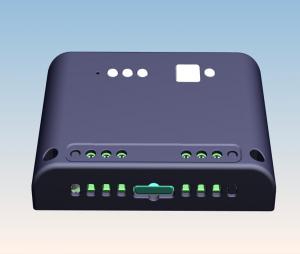
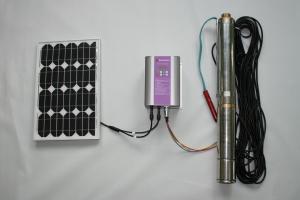
I. PRODUCT INTRODUCTION
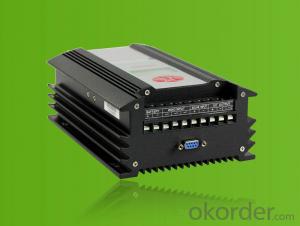
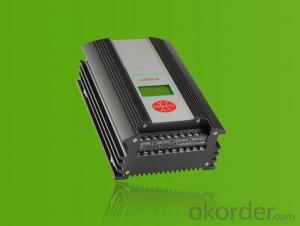
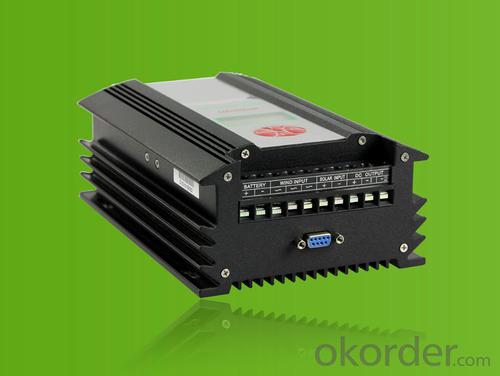
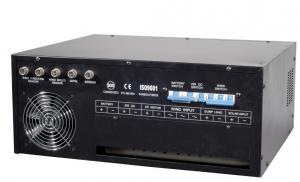
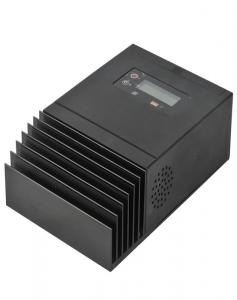
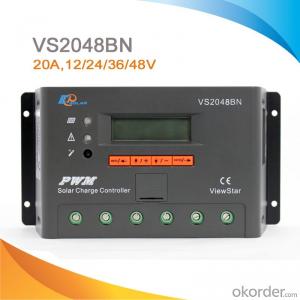
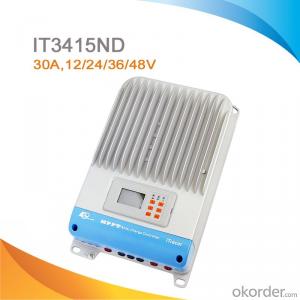
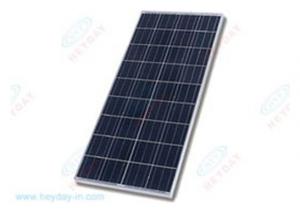
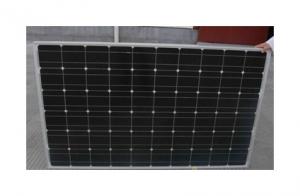
The wind/solar hybrid controller is specially designed for high-end small-scale wind/solar hybrid system and especially suitable for wind/solar hybrid street light system and wind/solar hybrid monitoring system.The controller can control wind turbine and solar panel at the same time and transform the wind and solar energy into electricity for DC load use, with excess energy stored into batteries. Varieties of appearance and function design, which is flexible to meet the requirements of different customers.
II. PERFORMANCE FEATURES
² Superior military-grade components to ensure the product stability.
² Superior military-grade components to ensure the product stability.
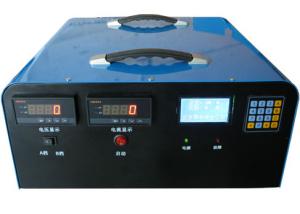
² Check and set all operation parameters as requirement from LCD display.
² Voltage limiting and current limiting charge mode ensures battery in the best charging status.
² Two DC Load output, light control, time control, constant output, and multiple output control mode selections.
² PWM stepless dumpload mode, which release the excess power into dump load, making the battery charging in best status.
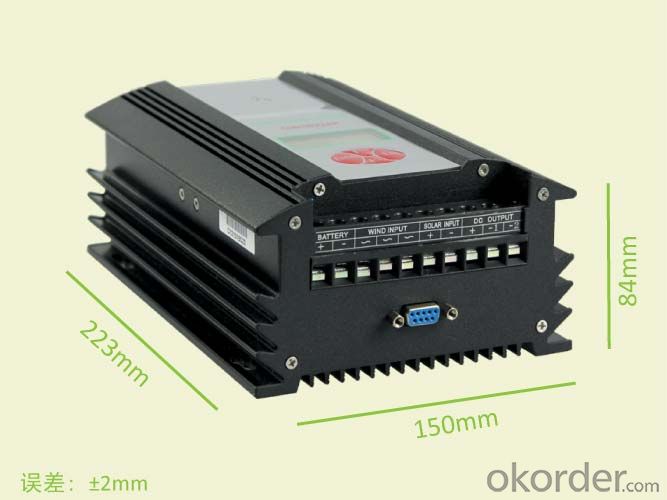
² Design of high quality aluminum alloy appearance, with small size and good cooling effect.
III. APPLICATION AREAS
² Stand alone wind/solar hybrid power station.
² Stand alone domestic household wind/solar hybrid power system.
² Mobile Communication base stations, expressway and other non-residential regions.
² Coastal islands, remote mountainous, border posts for regions shortage of or without electricity.
² Government demonstration projects, landscape lighting project, street light project etc.
IV. 24V TECHNICAL PARAMETERS
Product Model | WWS03-24-L01D | WWS04-24-L01D | WWS06-24-L01D |
Rated battery voltage | 24V | 24V | 24V |
Rated wind turbine input power | 300W | 400W | 600W |
Maximum wind turbine input power | 450W | 600W | 900W |
Rated solar input power | 300W | 300W | 300W |
Dumpload Start Voltage | 27V | 27V | 27V |
Charge Shutoff Voltage | 29V | 29V | 29V |
Wind Turbine Brake Current | 15A | 20A | 30A |
Battery Under Voltage Shutoff | 21.6V | ||
Battery Under Voltage Recovery | 24V | ||
Input Over Voltage Shutoff | 32V | ||
Light Control On Voltage | 2V | ||
Light Control Off Voltage | 3V | ||
Rated Output Current of Load 1 and Load 2 | 10A | ||
Load 1 Output Control Mode | Light Control On and Light Control Off | ||
Load 2 Output Control Mode | Light Control On and Time Control 5 Hours Off | ||
Dumpload Control Mode | PWM | ||
Display Mode | LCD | ||
Protection Level | IP53(Indoor) | ||
Quiescent Current | ≤20mA | ||
Display Content | Battery Voltage, Wind Turbine Voltage, PV Voltage, Wind Turbine Current, PV Current, Wind Turbine Power, PV Power, Over Voltage, Under Voltage, Over Load, Short Circuit, Night etc status | ||
Protection Functions | Solar reverse charge protection , Solar reverse connection protection, Battery over charge protection, Battery over discharge protection, Battery reverse connection protection, Over load protection, Short circuit protection, Lightning protection Wind turbine current limiting, Wind turbine automatic brake and manual brake. | ||
Ambient Temperature | -20~+55℃ | ||
Ambient Humidity | 0~93%, without condensing | ||
Working Altitude | ≤4000m | ||
Wind Turbine Start Charge Voltage | 4V | ||
Input Admittance Value | 10/30 | ||
Dimension (L x W x H) | 223×152×82mm | ||
Net Weight | 2.8kg | ||
- Q: How do I ensure proper grounding for a solar controller?
- To ensure proper grounding for a solar controller, you should follow these steps: 1. Locate a suitable grounding point: Find a metallic structure, such as a grounded metal rod or a metal pipe, preferably close to the solar controller installation site. 2. Clear the grounding area: Remove any dirt, paint, or rust from the chosen grounding point to ensure a good electrical connection. 3. Connect the ground wire: Use a copper conductor or a grounding cable to connect the grounding point to the ground terminal on the solar controller. Make sure the connection is tight and secure. 4. Avoid sharp bends: Ensure the ground wire is not bent sharply, as this can impede the flow of electrical current. Instead, maintain gentle curves or use grounding clamps to navigate around obstacles. 5. Protect the ground wire: Safeguard the ground wire from physical damage or exposure to moisture by using conduit or other suitable protective measures. 6. Test the grounding: After installation, use a multimeter to verify that the ground wire is properly connected and has low resistance to earth. This will ensure that the solar controller is effectively grounded. By following these steps, you can ensure proper grounding for your solar controller, which helps protect against electrical surges and improves system safety and performance.
- Q: Can a solar controller be used with different types of solar panels (monocrystalline, polycrystalline, thin-film)?
- Yes, a solar controller can be used with different types of solar panels including monocrystalline, polycrystalline, and thin-film. The solar controller's main function is to regulate the charging process of the battery by monitoring the voltage and current from the solar panels. It is designed to work with various types of solar panels, making it compatible with different technologies and ensuring efficient charging regardless of the panel type.
- Q: Are there any safety precautions I should take when using a solar controller?
- Yes, there are a few safety precautions to take when using a solar controller. 1. Familiarize yourself with the product's user manual and instructions before installation or operation. This will help you understand the specific safety guidelines provided by the manufacturer. 2. Ensure that the solar controller is properly installed and connected according to the instructions provided. This includes the correct wiring and grounding procedures. 3. Avoid contact with any live electrical components while installing, operating, or maintaining the solar controller. Always turn off the power source and wear appropriate protective gear, such as insulated gloves, when necessary. 4. Regularly inspect the solar controller for any signs of damage, wear, or loose connections. If any issues are detected, promptly disconnect the power source and consult a professional for repairs or replacements. 5. Do not expose the solar controller to extreme temperatures, moisture, or direct sunlight, as it can affect its performance and durability. Install it in a well-ventilated and protected area, if possible. 6. In case of any abnormal behavior, such as unusual noises, smoke, or sparks, immediately disconnect the power source and contact a qualified technician for assistance. Remember, while solar controllers are generally safe to use, it is essential to prioritize safety precautions to minimize potential risks and ensure the optimal performance of your system.
- Q: Can a solar controller be used with a solar-powered entertainment venue?
- Yes, a solar controller can be used with a solar-powered entertainment venue. A solar controller regulates the flow of electricity from the solar panels to the venue's electrical system, ensuring optimal charging and preventing overcharging or damage to the batteries. It helps monitor and manage the power generated by the solar panels, allowing for efficient and reliable operation of the entertainment venue.
- Q: How do I protect a solar controller from overheating?
- There are several precautions you can take to safeguard your solar controller from overheating: 1. Optimal installation: It is crucial to mount the solar controller in a well-ventilated area, away from direct sunlight and other heat sources. This will prevent excessive heat buildup. 2. Proper sizing: Ensure that the solar controller is appropriately sized for your solar panel system. Undersized controllers may struggle to handle the load, leading to overheating. Consult the manufacturer's specifications or seek professional advice to ensure compatibility. 3. Monitor ambient temperature: Regularly check the surrounding temperature near the solar controller. If it exceeds the recommended operating range, consider relocating the controller to a cooler area or enhancing ventilation. 4. Utilize heat sinks: If the solar controller is placed in a confined or enclosed space, consider using heat sinks or devices that dissipate heat. These will absorb and disperse excess heat, preventing damage to the controller. 5. Install thermal sensors: Advanced solar controllers often come equipped with built-in thermal sensors that can detect excessive heat and automatically shut down or reduce the load on the controller. If your controller lacks this feature, consider installing external thermal sensors to monitor and trigger protective measures. 6. Ensure proper wiring: Faulty or loose wiring can increase resistance and cause the solar controller to overheat. Regularly inspect the wiring connections to ensure they are secure, tight, and properly insulated. Address any signs of damage or overheating promptly. 7. Regular maintenance: Periodically clean and inspect the solar controller for debris, dust, or dirt accumulation, as these can hinder proper heat dissipation. Gently clean the controller using a soft brush or compressed air. By following these steps, you can safeguard your solar controller from overheating, ensuring optimal performance and longevity.
- Q: What is the cost of a solar controller?
- The cost of a solar controller can vary depending on several factors such as brand, capacity, features, and quality. On average, a basic solar controller can range from $20 to $50, while more advanced models with additional functionalities can cost anywhere from $50 to $200 or more.
- Q: Choose a solar controller which need to have a few conditions
- According to your specific application environment, first determine whether to select the charge controller or charge and discharge controller. Two applications of input and output power level, the input power is mainly solar panels, and the controller is basically in accordance with the current to count. For example, 12V system 120 wrench that should be selected at least rated 10A controller. While the actual system current 7A or so is the other security margin.
- Q: Can a solar controller be used with a solar-powered electric gate opener?
- Yes, a solar controller can be used with a solar-powered electric gate opener. The solar controller is responsible for regulating the voltage and current from the solar panels, ensuring that the gate opener receives the correct amount of power.
- Q: Can a solar controller be used with solar panels of different forms?
- Yes, a solar controller can be used with solar panels of different forms. A solar controller is designed to regulate the charging process of a solar panel system and protect the batteries from overcharging or overdischarging. It is compatible with various types of solar panels including monocrystalline, polycrystalline, and thin-film panels. The controller's main function is to match the voltage and current output of the solar panels with the requirements of the batteries. Therefore, as long as the solar panels are within the voltage and current range supported by the solar controller, they can be used together regardless of their form or type.
- Q: Solar controller can not charge what is the reason the electric power will be less than the inverter with no fixed freezer! Solar energy simply did not charge into the electricity
- Overdischarge protection Termination voltage: This is better understood. Battery discharge can not be lower than this value, which is the provisions of the national standard. Although the battery manufacturers have their own protection parameters (standard or line standard), but ultimately to close to the national standard. It should be noted that, for safety reasons, the general 12V battery over the protection point voltage plus 0.3v as a temperature compensation or control circuit zero drift correction, so 12V battery over discharge protection voltage is: 11.10v, then 24V system over discharge protection point voltage is 22.20V. At present, many manufacturers of charge and discharge controller are used 22.2v (24v system) standard.
Send your message to us
Street Light Controller 24V - Wind Solar Hybrid with 2 Solar Charge Controllers
- Ref Price:
-
- Loading Port:
- Shanghai
- Payment Terms:
- TT or LC
- Min Order Qty:
- 1 unit
- Supply Capability:
- 8000 unit/month
OKorder Service Pledge
OKorder Financial Service
Similar products

Hot products
Hot Searches
Related keywords

