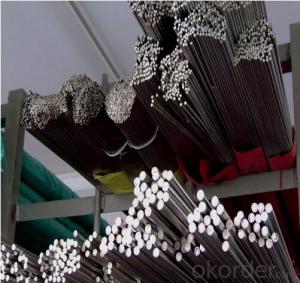
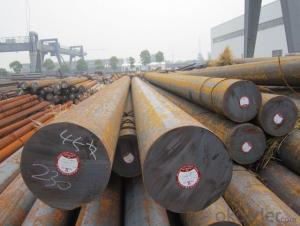
Stainless Steel Square Bar
Stainless Steel Square Bar Related Searches
H S Code For Stainless Steel Surface Grinding Wheels For Hardened Steel Hole Saw For Stainless Steel Step Bit For Stainless Steel Transformers For Lights In Ceiling Led Lamps For Ceiling Stainless Steel Box With Lid Stainless Steel Bucket With Lid Ceiling Plate For Hanging Light Decorative Lights For CeilingHot Searches
Steel Mesh Panels For Sale Type Of Inverter For Solar Price Of Shipping Containers For Sale Types Of Inverter For Solar Aluminum Bar Stock For Sale Bags Of Cement For Sale Types Of Temporary Side Panels For Cement Deck Cost Of Awnings For Decks Type Of Scaffolding With Pdf Price Of Scrap Stainless Steel Price Of Stainless Steel Scrap Price Of Stainless Steel Galvanized Steel Scrap Price Type Of Stainless Steel Types Of Stainless Steel Grades Types Of Stainless Steel Aluminum Corp Of China Stock Types Of Scaffolding In Construction Pdf Stainless Steel Factory Stainless Steel TypeStainless Steel Square Bar Supplier & Manufacturer from China
Okorder.com is a professional Stainless Steel Square Bar supplier & manufacturer, offers integrated one-stop services including real-time quoting and online cargo tracking. We are funded by CNBM Group, a Fortune 500 enterprise and the largest Stainless Steel Square Bar firm in China.Hot Products
FAQ
- Certainly! A steel square is capable of serving as a tool for marking angles. Known by a few names such as framing square or carpenter's square, this versatile tool proves useful in various carpentry and trade tasks. Its main function revolves around measuring and marking right angles, but it is also capable of marking angles that are not 90 degrees. By utilizing the diverse markings and measurements present on the square, one can accurately mark angles on a piece of work. Moreover, the square's steel construction guarantees durability and stability, establishing it as a trustworthy tool for marking angles.
- Using a steel square is not suitable for verifying the squareness of a miter saw blade. Although a steel square is effective for measuring and assessing right angles, it lacks the specific design to accurately determine the squareness of a miter saw blade. Miter saws possess their own mechanisms and adjustments to guarantee the blade's perfect perpendicularity to the table. To verify the squareness of a miter saw blade, it is advisable to utilize a specialized tool known as a squareness gauge or a designated square explicitly created for miter saws. These tools are intended to deliver precise measurements and angle checks, guaranteeing precise and square cuts.
- To create a 45-degree angle using a steel square, place the square on a flat surface and align one edge of the square with the desired starting point of the angle. Then, rotate the square until the 45-degree mark on the angle scale aligns with the edge of the square. Use a pencil or a marking tool to trace along the other edge of the square to create the 45-degree angle.
- Some common measurements that can be taken with a steel square in electrical work include: 1. Right angles: A steel square is often used to ensure that corners or junction boxes are square and properly aligned. This is crucial for accurate installation and alignment of electrical fixtures. 2. Angles: Steel squares can also be used to measure and mark angles, especially when cutting conduit or pipes. This helps ensure that bends and joints are accurately made, resulting in a proper fit. 3. Parallel lines: The straight edges of a steel square can be used to draw parallel lines, which is useful for marking and aligning electrical components such as switches, outlets, or circuit breakers. 4. Centering: Steel squares can assist in finding the center of a surface or object, which is helpful when installing light fixtures, ceiling fans, or other electrical devices that need to be centered. 5. Layout and marking: Steel squares are often used for marking lines, notches, or holes on electrical panels or enclosures. This helps electricians accurately place and install various components. Overall, a steel square is a versatile tool in electrical work, providing accurate measurements and ensuring proper alignment and installation of electrical components.
- Checking the levelness of a wall stud cannot be done with a steel square. The steel square, or framing square, is mainly used for measuring and marking angles in carpentry and woodworking. It consists of a long arm and a shorter square arm at a 90-degree angle. To accurately check the levelness of a wall stud, the appropriate tool to use is a level. A level is a rectangular device with a straight edge and a bubble vial filled with liquid. When the bubble is centered between the lines in the vial, it indicates that the surface is level. Using a steel square for this purpose would yield inaccurate results. It is best to utilize a level, as it is specifically designed for this task and provides more precise measurements.
- To achieve a line parallel to a board edge at a specific distance, you can follow these instructions: 1. Determine the desired distance for the parallel line. For instance, if you want the line to be 2 inches away from the board edge, take note of this measurement. 2. Align one side of the steel square parallel to the board edge, ensuring that it is flush against the board without any tilting or skewing. 3. Once the square is properly aligned, use a pencil or marking tool to make a reference point on the board along the square's edge. 4. Proceed to move the steel square along the board edge while maintaining the parallel alignment. Be consistent in keeping the same distance between the square's edge and the reference mark you made earlier. For example, if the desired distance is 2 inches, always ensure the square's edge is 2 inches away from the reference mark. 5. While moving the steel square, continue marking reference points at regular intervals. These points will serve as a guide for drawing a straight line later on. 6. Once you have marked enough reference points along the board edge, connect them using your pencil or marking tool to create a straight line. This line will remain parallel to the board edge with the specified distance maintained throughout its length. By utilizing a steel square and following these steps, you can accurately mark a line parallel to a board edge at a specific distance. This technique is commonly employed in woodworking, carpentry, and related trades to ensure precise measurements and markings.
- To use a steel square to find the square footage of a pool, you would need to follow a few steps. First, ensure that the steel square is clean and free from any dirt or debris. This will provide accurate measurements. Next, measure the length and width of the pool using the steel square. Place one side of the square against the edge of the pool and extend it until it reaches the opposite side. Take note of the measurement on the steel square. Repeat the process for the width of the pool, placing the steel square against one side and extending it until it reaches the other side. Again, take note of the measurement on the steel square. Once you have both the length and width measurements, multiply them together to find the square footage of the pool. For example, if the length is 20 feet and the width is 10 feet, you would multiply 20 by 10 to get a total of 200 square feet. Keep in mind that this method assumes the pool is a simple rectangular shape. If the pool has irregular or curved edges, this method may not provide an accurate measurement of the square footage. In such cases, it is advisable to consult a professional or use alternative methods, such as using a measuring tape or laser distance meter, to obtain precise measurements.
